How To Setup Operators
This topic discusses setting up your Operators to access and use Collect!. This requires that you
have access rights to the various menus and forms in Collect!.
 Examine settings for different Operators by using the Record Navigation keys [<<] BACK and
[>>] FORWARD from the Operator form. As you scroll through the records, you can examine the
settings for each Operator.
Examine settings for different Operators by using the Record Navigation keys [<<] BACK and
[>>] FORWARD from the Operator form. As you scroll through the records, you can examine the
settings for each Operator.
Please press F1 for an explanation of the fields in the Operator form.
Operator ID Guidelines
Each Operator must be set up with a UNIQUE ID.
Each Operator must also have a Password. It is advised to make the Password unique for each Operator,
although it is permissible to give the same Password to multiple users.
The password is used to sign on, but the ID is used to set every parameter that relates to the operator.
For your convenience, Collect!'s Demonstration database contains a predefined set of Operator IDs and
Passwords.
For Example:
- OWN for owner
- SYS for system administrator
- MGR for office manager
- SC for senior collector
For each of the IDs, the Password is the default password same as the ID. For example, for ID OWN the
Password is own, and for ID SYS the Password is sys.
 WARNING: For security reasons, we recommend changing the default password, especially for ID 99.
- Use up to 7 characters for the Operator ID.
- Make sure each of your Operators has his/her own UNIQUE ID. (Passwords can be shared.)
- Use a different means of identifying your Distribution Teams, such as, ST1, ST2, ST3.
Distribution Team IDs are not Signon IDs, but are used to classify Distribution Team
information where it is needed.
Using 1JC, 2JC, 3JC is acceptable, but we advise assigning distinct, different IDs, derived
perhaps from the user's name. For example, JM for John Miller, SD for Sally Douglas, and JMC
for Jayne McCaul.
 You cannot use "System" or "Admin" for your ID. These are reserved words.

Password
You must first commit the Operator to the database by clicking OK before you can set a password.
Once the record is committed, you can go back in and use the CHANGE PASSWORD button to set the
password.
Using The Operator ID
When your Operators have been set up, you can use the Operator ID in many places in Collect! to
customize routines and direct them to a particular Operator's attention. This pertains to the WIP
( Work In Progress) To Do List, assigning accounts, building Distribution Teams, running
Contact Plans, assigning commission rates, and other procedures.
Personal Information
Fill in the personal information fields as needed. If the Operator has an Email address, put that
in the Email field and Email can be sent to the Operator.
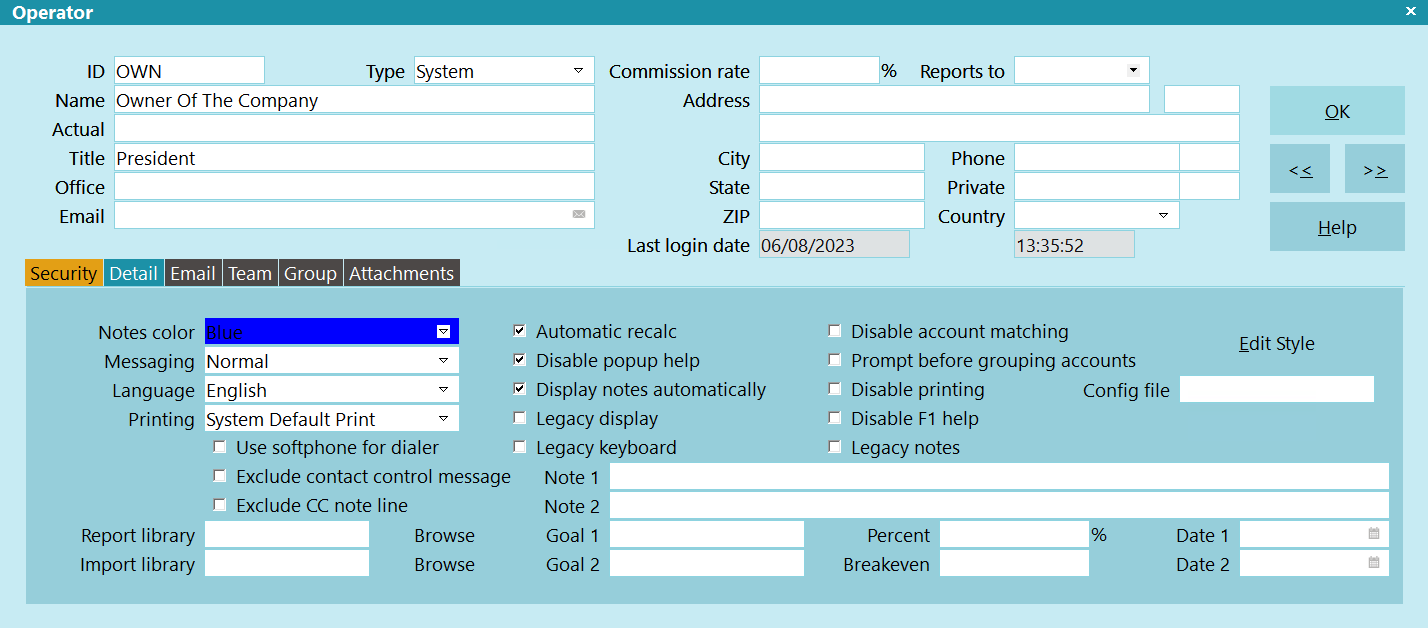
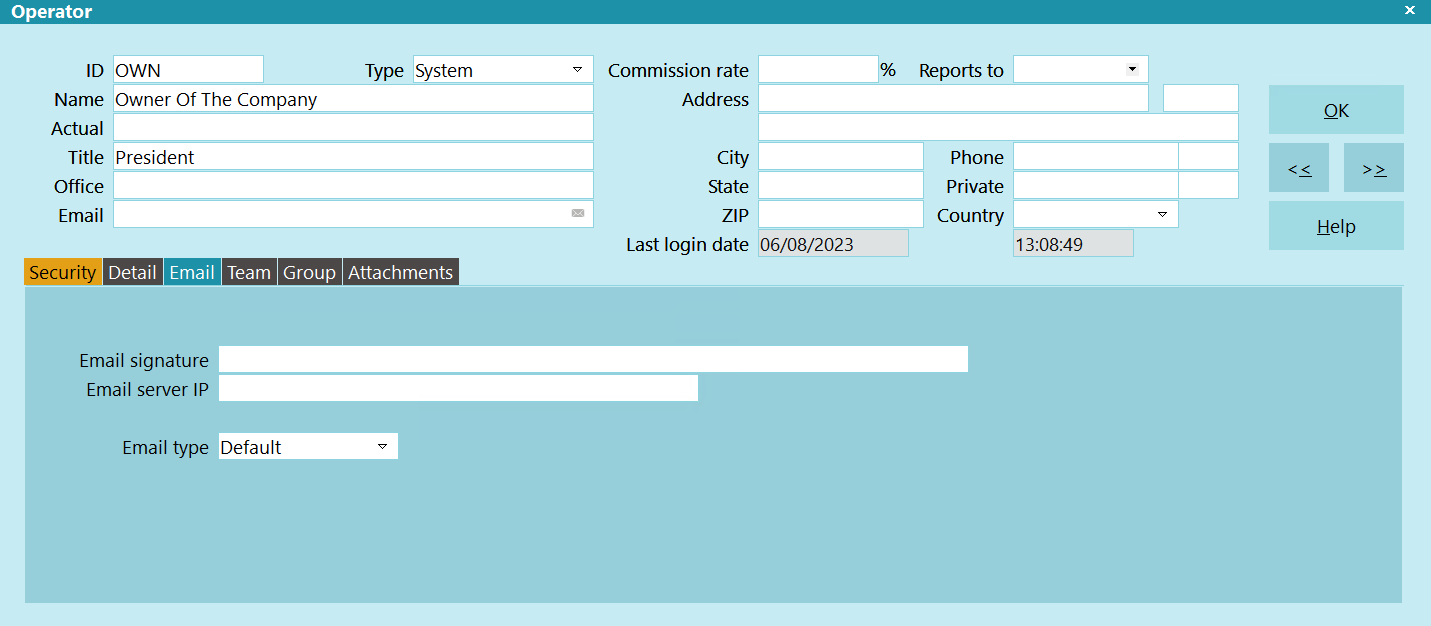
Operator Form
Click Here to View this Form.
Click Here to Close this Form.
The Operator form contains all the settings for an individual
Collect! user. These settings control many aspects of the
particular operator's access to Collect!
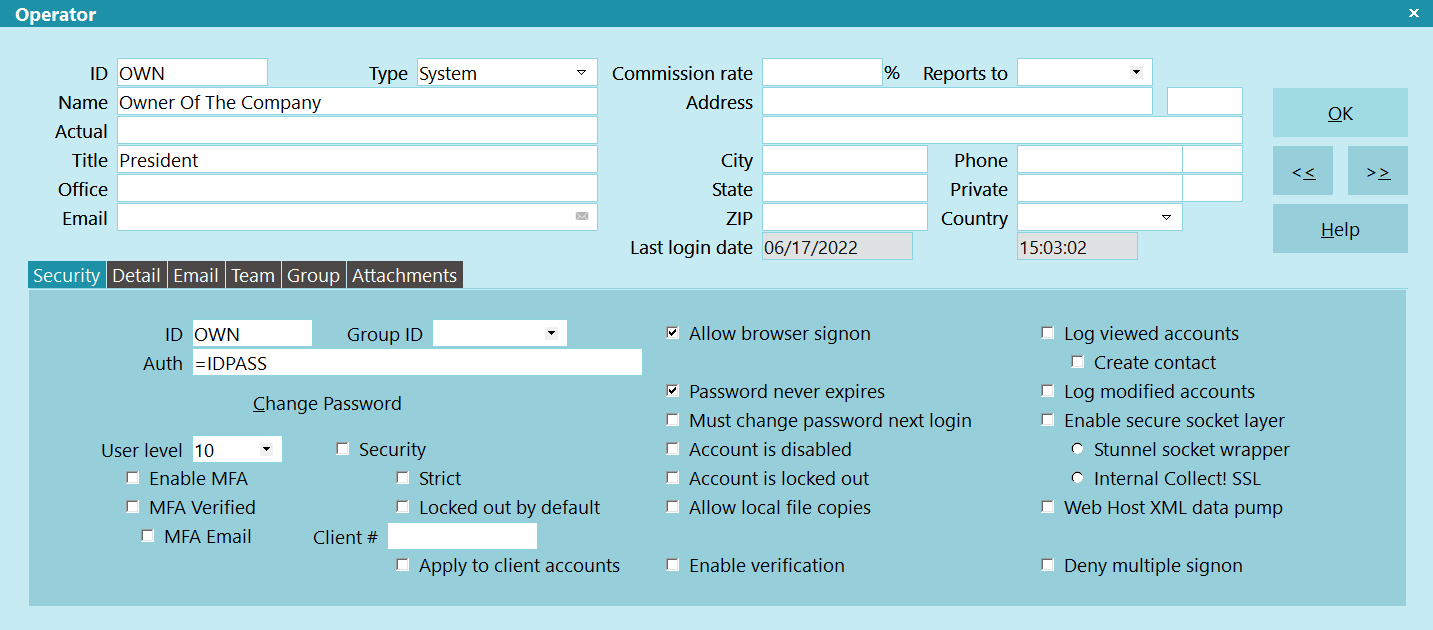
Operator
When the operator signs in, a different form or menu may
be displayed. The operator Commission Rate and Sales Team
settings may be set in the Operator form. Other settings
control the messages displayed to the operator and the
printing defaults that apply. You can set whether or not
accounts are recalculated automatically when changes are
made to the accounts. Logging operator account activity can
also be switched ON. Password and account security,
and permission to access the Web Host are also set
in the Operator form.
ID
This is the short identification code assigned to the
Operator or Sales Team. This ID is used to set every
parameter in Collect! that relates to the operator. The
ID that you choose for each Operator must be UNIQUE.
If you are using Sales Team functions then you should
assign distinct ID codes to Distribution Teams. It is suggested
that you use codes that clearly designate Sales Team
IDs as different from your individual Operator IDs.
You cannot use "System" or "Admin" for
your ID. These are reserved words.
Type
The selection in this field controls which form the operator
will see upon starting Collect!. Certain types have special
functions that start up automatically. The Type pick list
options are listed below.
System
An operator with this setting will see the Main Menu
as soon as they sign into Collect!. This is useful for
managers and any other user who performs multiple
functions in Collect!.
Collector
An operator with this setting will see the Work In Progress
form as soon as they sign into Collect!. This is useful for
collectors to be ready to work their accounts as soon as
they sign on.
Dialer Operator
An operator with this setting sees the Predictive Dialer
waiting for a call as soon as they sign into Collect!.
When a call connects, the Debtor form is displayed for
the Debtor being contacted.
Client
An operator with this setting will see the Client form as
soon as they sign into Collect!. A Client operator only
has access to their own accounts.
When you select this field, you will notice that the Title
field is now displaying "Client #." You must enter a valid
Client Number for this operator. It should be the Client
Number for the accounts you want this operator to see.
If you leave the Client # blank, Collect! will not allow the
Client operator to sign into Collect!.
This is tied into a hierarchical client
ownership system. If the Client # you enter
owns other clients, they will also be visible to
this particular operator through the Browse
Debtors and Find By menus. All other
accounts will not be visible.
Web Host
An operator with this setting automatically starts Collect! in
Web Host mode. This setting enables several functions that
depend on additional settings in the Operator Security and
Operator Detail form.
Additional settings may be set for sending XML data to
Collect!, for enabling SSL, and for naming ports to use
for HTTP and HTTPS (secure mode).
Scheduler
An operator with this setting automatically starts Collect!
in Scheduler mode. This setting displays the Scheduler as
soon as the operator signs in, allowing you to set tasks
to be performed automatically, such as database snapshot,
import routine, recalculate totals, print letters/report
and Reconcile ACH and Credit Card History, etc.
Distribution
This is formerly Sales Team. The description was update
to reflect its purpose in Account Toss, but the functionality
related to the field is the same.
When you select this setting, fields will appear on
the Operator form displaying a list of Sales Team
members and settings.
Sales Team definitions let you distribute commissions
among groups of people. For example, a Collector may
get 10%, a Salesman 5% and the Sales Manager 2% of
any commission collected from an account.
Sales team ID should be entered in the Debtor's
Sales field.
Pool Desk
The is a display option for tracking pool desks. There is no
system functionality linked to this type.
Name
This is the name or alias of the Operator. This is
printed on many letter/report templates. If this is a
Sales Team, you can enter a description here.
Actual
This is another name you can use. You can put
your Operator's actual name here for your internal
information. This field is not normally printed
on letters.
Title
This gives the title of the Operator, such as
Account Manager. This is printed on letters.
This field is ignored for Sales Team definitions.
When the Initial Form is set to CLIENT, this
field changes to "Client #."
Client #
This specifies the Client Number of this Client Operator.
Only accounts belonging to this Client Number may be
viewed by this Operator.
You MUST put a value in this field for this to work right.
If you leave this blank, Collect! will not allow the Client
operator to sign into Collect!.
This field replaces the 'Title' field when the Type is
set to CLIENT.
The Client # is tied into a hierarchical client
ownership system. If the Client # you enter
here owns other clients, they will also be
visible to this particular operator through
Browse Find By functions. All other accounts
will not be visible.
The Client # in the Operator Security section
is ignored when the Operator type is CLIENT.
Office
If your agency has multiple offices, this field can
be used to indicate which office the operator is
working from.
Email
Enter an Email address here for this Operator.
Click on the Email field icon to the right of this
field to open the Email message window.
You can send an Email to the Operator. The
address is entered automatically. Press Send
to deliver the Email. Collect! uses your system
Email program. After the Email is sent, the
window closes. Refer to Send Mail for details
about the use of Email in Collect!. Select the
Email tab to fill in details for the operator's
email setup.
Commission Rate
This is the Commission Rate assigned to the
Operator. Transaction commissions are multiplied
by this percentage to determine the Operator's
commission in the Operator Analysis report.
For Sales Team definitions, this field is calculated
as the sum of all member commission rates. The
commission should never exceed 100%,
since 100% represents the commission paid by
the client to the agency.
Reports To
This field will open an Operator list to allow
you to specify a manager for this operator.
There is no functionality link to this field.
It is for reporting purposes only.
Address
This is the Street Address of the operator.
Street Number
This is the Street Number of the operator.
Address 1
This is an optional second Address line for
the operator.
City
This is the City of residence for the operator.
State
This is the State Name or Code for the operator.
ZIP
This is the Zip or Postal Code for the operator.
Phone
This is the phone number of the Operator.
This is printed on letters. This field is ignored
for Sales Team definitions.
Phone Extension
This is an optional Extension for the number
indicated in the Phone field.
Private
This is another phone number you can use.
Private Phone Ext
This is an optional Extension for the number
indicated in the Private Phone field.
Country
This is the Country of residence for the operator.
Last Login Date
When an Operator logs in, it will store the date
in this field.
Last Login Time
When an Operator logs in, it will store the time
in this field.
OK
Select this button to save any changes you
have made and return you to the previous form.
<<
Select this button to navigate to the
previous operator in the Operator list.
>>
Select this button to navigate to the
next operator in the Operator list.
Help
Select this button for help on the Operator
form and links to related topics.
Delete
This button is visible only on the list of all
Operators. Select this to delete the highlighted
item from the database.
Edit
This button is visible only on the list of all
Operators. Select this to open and modify the
highlighted item.
New
This button is visible only on the list of all
Operators. Select this to open a new blank
Operator form.
Cancel
This button is visible only on the list of all
Operators. Select this to close the list of
Operators without saving any changes you may
have made. You will be returned to the previous
screen.
Security
The Operator Security section controls access levels
and other security settings pertaining to this operator.
Logging account activity can also be switched ON.
These settings are explained in the Help topic
Operator Security.
Detail
The Operator Detail section enables you to select
many additional personal operator level settings.
These are explained in the Help topic
Operator Detail.
Operator Email
This section sets Email parameters for the
operator. The settings are explained in the
Help topic Operator Email.
Team
The Operator Team section sets details when
the Operator Type is SALES TEAM. These settings
are described in the Help topic Operator Team.
This tab is accessible only when you
have selected 'Sales Team' in the
Operator 'Type' field.
Group
The Operator Group section enables you to set up
a customized list of Operator IDs for this operator.
You can use this list to limit the Operators this
Operator sees when they view the list of all Operators.
This is a very useful security feature when loading
contacts for operators in your WIP List.
This tab is NOT accessible if you have
selected 'Sales Team' in the Operator 'Type'
field. Select any other type of operator to
access the Group area.
Please refer to Help topic, Operator Group, for
more information.
Attachments
Select this tab to display all the Operator Attachments
link to this Operator.
Type
There are various types of user that can be chosen. Each of these results in a different series of
events when the Operator signs into Collect!.
SYSTEM takes the user to the Main Menu upon signing on.
COLLECTOR takes the user directly to the WIP list when signing on. Other settings can be chosen in
the WIP Options to affect how the Operator works the WIP list.
DIAL OPERATOR begins to dial contacts for this Operator as soon as they sign in, provided Auto Dialer
is installed and set up.
CLIENT takes the user directly to a Client record that is specified in the Operator form field
labeled Client #. This field appears when you select Client for the Operator Type.
If the Client does not exist, the user is not admitted to Collect! no matter what User Level you
select. The Client Type Operator can only see accounts belonging to the Client # you select.
The Browse Find By functionality for Client Operators is tied to a hierarchical client
ownership system that also allows you to use the "Owned by Client" in the Client form.
Clients who own other clients will be able to see all records in their hierarchical tree,
but no others.
WEB HOST opens Collect! in Web Host mode when this Operator signs on. Additional settings may be
chosen in the Operator Detail and Operator Security sections.
SCHEDULER opens Collect! in Scheduler mode when this Operator signs on. This setting displays the
Scheduler as soon as the operator signs in, allowing you to set tasks to be performed automatically,
such as database snapshot, import routine, recalculate totals, and print report. Please refer to
Help topic, Scheduler, for details.
DISTRIBUTION is not used to sign on an Operator. The ID is used to calculate commissions shown on
the Debtor form. It is not a valid Signon ID. When you select Sales Team, other fields become visible
on the Operator form where you can set up the team members.
The Sales Team Operator Type can be used for account access security. Please refer to Help
topic, How to Restrict Access to Accounts for details.
Distribution Operator
Click Here to View this Form.
Click Here to Close this Form.
The Operator Team section of the Operator form
sets details when the Operator Type is SALES TEAM.
These settings are described below.
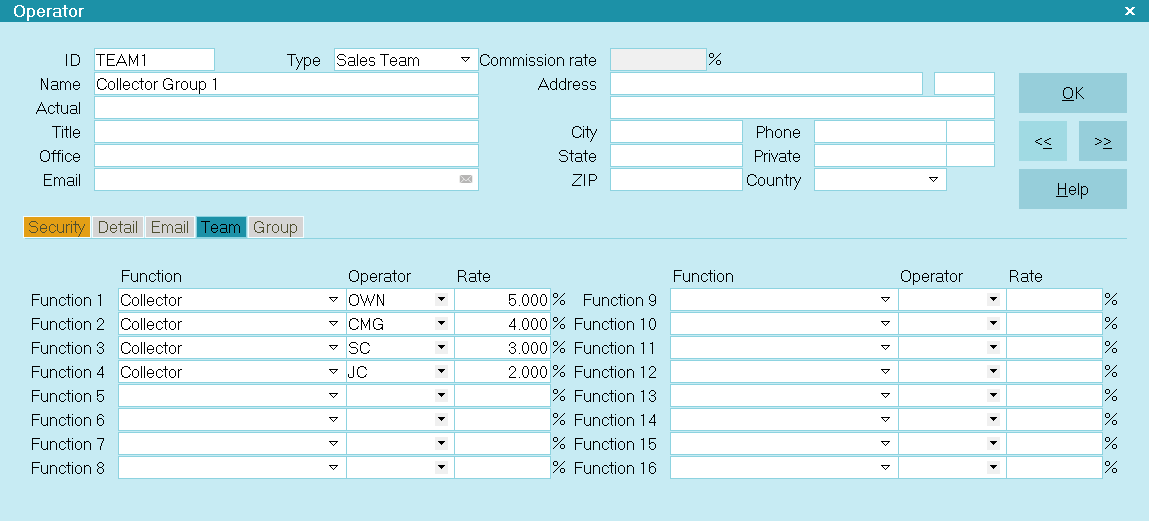
Operator Team
Function
This is the function of the Operator assigned the
following commission. Functions given are Collector,
Sales, Legal and a number of others. For each
function you can assign an Operator at a
specific commission rate. You can have multiple
Operators responsible for one function, just as
you can have one Operator assigned to multiple
functions.
Function 1
You can have up to sixteen members in a team.
Teams can also consist of only one member.
Each team member performs a function at a
specific commission rate.
Operator
This is the ID of the Operator assigned the specific
function. The Operator's commission will be
incremented by the Transaction Commission
Amount times the Member Commission Rate.
Press F2 to choose from your list of operators.
Only Operators with the ACCOUNT IS DISABLED switch
OFF will appear in these lists.
Member 1
You can have up to sixteen members in a team.
Teams can also consist of only one member.
Each team member performs a function at a
specific commission rate.
Rate
Values in this column are commission rates assigned
to each specific function. This is the commission
rate of the team member. Transaction commissions are
multiplied by this percentage to determine the
Operator's commission in the Operator Analysis report.
The total of all member commission rates is calculated
and automatically entered into the Team Commission
field. The total should never exceed 100%.
Commission 1
You can have up to sixteen members in a team.
Teams can also consist of only one member.
Each team member performs a function at a
specific commission rate.
Account Access Security
When using the account access security system in
Collect!, you can set up a series of teams and then use the
Sales IDs to control access to your accounts. Teams can be
nested within other teams as needed.
Please refer to How to Restrict Access to Accounts for details.
Create an Operator form for each of your Operators, assigning each of them a unique ID. Then you can
create a Sales Team form with its own Sales Team ID and add the Operators to the team.
Before a Sales Team is constructed, each Operator must have their own Operator form filled
out with a unique ID.
Distribution Teams provide a convenient way to keep track of commissions owed to a group of your
operators. A Sales Team has its own ID. We recommend that you use a code such as ST1, ST2, or TM1,
TM2, to designate a Sales Team. You should try to make the ID distinctly different from your
individual Operator IDs so that you can clearly identify Distribution Teams.
When the Sales Team choice is selected, fields appear on the Operator form to hold Sales Team
information. Operators are listed in the Sales Team fields by their unique individual ID. This can
be chosen from a drop-down box.
Enter the Sales Team ID in the Debtor's form. Any commissions will be calculated and divided up among
the Sales Team members using the commission percentages recorded in the Sales Team information on the
Operator form.
Distribution Teams also provide a way to group Operator IDs for account security purposes. This can
be used with Account Access Control to restrict access to accounts based on Team ID or nested Teams.
Before a Sales Team is constructed, each Operator must have their own Operator form filled
out with a unique ID.
Operator Security
Click Here to View this Form.
Click Here to Close this Form.
The Operator Security section of the Operator form controls
access levels and other security settings pertaining to this
operator.
Operator Security tab
Several of these settings may be used to easily
and effectively restrict access to your accounts using
methods described in Help topic,
How to Restrict Access to Accounts.
These and other available settings are explained below.
ID
This is the short identification code assigned to the
Operator or Sales Team. This ID is used to set every
parameter in Collect! that relates to the operator. The
ID that you choose for each Operator must be UNIQUE.
If you are using Sales Team functions then you should
assign distinct ID codes to Distribution Teams. It is suggested
that you use codes that clearly designate Sales Team
IDs as different from your individual Operator IDs.
You cannot use "System" or "Admin" for
your ID. These are reserved words.
Group ID
This is a user-defined field where you can select an ID
from the Operator pick list. This enables you to group
Operators for your own purposes. This is a loosely
organized group with no automatic functionality. You can
use it to track performance, calculate commissions or
set other options. To use this field in a report, you can
use WHERE (@os.gi = {myID}) to find all members of
the group. Please refer to Help topic, Operator Group
for details about creating a more formal group of operators
with added functionality.
Auth
Collect! allows you to associate your Windows account with
your Collect! account. When you sign in for the first time,
with a valid password, you will receive a prompt asking if
you want to Automatically sign in with Windows Authentication.
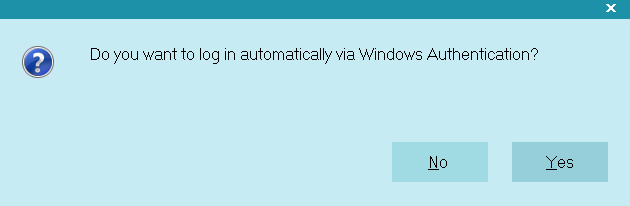
Sign on with Windows Authentication
If you select YES, your Window ID will be written to this
field. When you sign into any computer on your network
and open Collect!, it will automatically sign you in.
If you select NO, the value '=IDPASS' is written to this
field. Each time you sign into Collect!, you will be prompted
to enter an ID and password.
If you have an operator who needs access to multiple
operator accounts in Collect! such as an IT person or
someone who works in multiple departments, you can
put the Windows ID in the AUTH field of multiple
operators. When that Windows user signs in, they
will be given a list of operator IDs to select from.
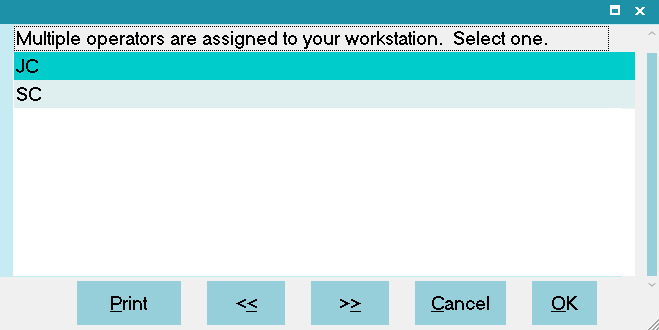
Sign on with Windows Authentication for Multiple Operators
Password
This is the password used when the Operator signs on to
the system. Passwords can be the same among a group
of users. This field is ignored for Sales Team definitions.
The Password may be up to 21 characters and/or numbers.
Passwords are case-sensitive.
When creating a new operator, you will need to click OK
to commit the operator to the database first, then go
back in to set the password.
Click the CHANGE PASSWORD button to either set or change
an operator's password.
You cannot use a password of ******** ( 8 asterisks).
If an error occurs when you create a Password, you
will be sent back to the Change Password form to correct the
error. You can still leave the Operator without correcting
the error by pressing ESC on your keyboard.
User Level
This is the level of the User. This can range from a Junior
Collector with very limited access rights, to a System
Manager who has complete control over Collect! Press
F2 when you are in this field, or select the down arrow
next to the field. Either way, the list of User levels is
displayed for you to make a choice. You can create
your own User levels with their own set of rights. This field
is ignored for Sales Team definitions.
It is recommended that you use the predefined
User Levels provided by Collect! and modify
them if needed. You should have a good idea
of the rights of each Level before you assign
a Level to your Operators.
You should only use User Level 99 for
administrative purposes. Assigning a User
Level 99 may result in losing functionality
that relies on Collect!'s access rights
system.
The value in this field may be used in contact
plans to trigger events based on the Debtor
Operator's User Level.
Enable MFA
When this switch is ON, MFA will be enabled for the Operator
and the user will be expected to type in an MFA code after
signing in with the normal user name and password.
MFA Verified
This switch is turned on the first time they sign in with a
valid MFA code. If the switch is turned off a new secret will
be generated when they sign in and they will be presented
with a new bitmap to scan. If the switch is on, their existing
secret will be used to verify the MFA code they enter.
MFA Email
If this switch is on, an email will be sent to the Operator
with their one-time password. This requires a valid email on
the Operator record and is meant as an alternative to the QR Code.
This requires Collect! to be setup for email and the Operator
record to have a valid email address. Please see the Help
topic How To Setup Sending Email In Collect! for more information.
Security
When this switch is ON, Collect! will allow this operator
to access accounts which you have restricted, either
through the Debtor Detail form or through the other
security settings available in Operator Security. You
can customize this further using the 'Strict' switch below
this check box.
Please see How to Restrict Access to Accounts for
instructions on using this feature.
The security options also work for client operators
like sales people. When enabled, you can restrict
access to clients to operators by filling in the
Client Operator, Assign Accounts to Operator, or
Assign Sales to Operator fields. If you have Sales
Teams, you can specify a team on the Client Operator
field.
You cannot switch OFF 'Security' if you have
switched ON 'Strict' as 'Strict' can only be
applied to accounts when 'Security' is
switched ON. If you want to switch
OFF 'Security', remove the check mark
from 'Strict' and then you can remove the
check mark from 'Security'.
Strict
This switch controls whether or not restricted accounts
appear to the operator. When this switch is ON, this
operator cannot see any accounts which they do not
have access to. The accounts are completely invisible
to the operator, even when browsing or printing a report.
When this is switched OFF, this operator will be allowed
limited, read-only access to these restricted accounts.
When you switch ON 'Strict', the 'Security'
check box above it will be marked
automatically as 'Strict' can only be applied
to accounts when 'Security' is switched ON.
Please see How to Restrict Access to Accounts for
instructions on using this feature.
Locked Out By Default
When you have 'Security' switched ON, you can switch
this ON to lock out this operator from all accounts in
your database. This is a comprehensive way to apply
account access control without having to set each
account.
Only accounts that have this Operator ID in the
Debtor Operator or Sales field will be able
visible to the operator. If you want to grant
access to other individual accounts to this
operator, put the operator's ID in the
Debtor Detail Clerk or Access field or put in
a Team ID that this operator belongs to.
This setting can be further enhanced with the use of
the 'Strict' setting. Please see How to Restrict Access to Accounts
for instructions on using this feature.
This setting is ignored if the Operator Type is CLIENT.
Client #
Use this field to restrict this Operator to only view accounts
for this particular Client. Only the accounts for this Client #
will be accessible to the Operator.
This is tied into a hierarchical client ownership
system. If the Client # you enter here owns
other clients, they will also be visible to this
particular operator through the Browse Debtors
and Find By menus. All other accounts will not
be visible.
This setting is ignored if the Operator Type is CLIENT. In
that case, you MUST enter the Client # in the field beneath
the field labeled 'Actual' in the top part of the Operator form.
Apply To Client Accounts
Switch ON this setting if you want to enable this Operator to
view Client accounts while restricting access to only the
Client # you have set, or any Clients owned by the Client #
you have set.
This is useful for your Sales Operators. It enables
them to view and edit the Client accounts you
want them to see. When you combine this with
Client Hierarchy, you can set up a very nice
working environment while ensuring proper
restrictions.
You can also setup operator teams for security. For example,
if you have an account that should be accessible by a team
instead of just a single operator, you can assign the
operator to a team and assign the debtor to the team instead
of the operator. Alternatively, you can put the team ID on
the debtor's Access field located on the Debtor Detail form.
Please refer to the Help topic How to Setup a Security Team
for more information.
Enable Verification
Switch this ON to prompt operators to confirm important
information before they exit a form. This is a very useful
feature for confirming data or simply to make sure the
operator has important information that you need.
There are a few steps necessary to set up this
procedure. Please refer to Help topic,
How to Prompt To Verify Field On Exiting A Form
for details. This will explain how to proceed with
verification on the field of your choice.
Allow Browser Signon
Switch this ON to allow this operator to access
Collect! over the Internet using Collect!'s Web Host.
This switch works with the
Web Data Entry feature. It has
no effect on the use of Collect!
in ordinary network setups.
Please refer to Web Host for more information.
Password Never Expires
If you set a number of days globally in the 'Renew
password every' field in the Password Settings
form (accessible through the System menu, Rights
option, at the top of Collect!) then operators will be
prompted to renew their passwords. Switch
ON 'Password never expires' with a check mark to
avoid the system prompting the user to renew the
password.
Must Change Password Next Logon
Switch this ON with a check mark to force the user
to change their password the next time they sign
into Collect!.
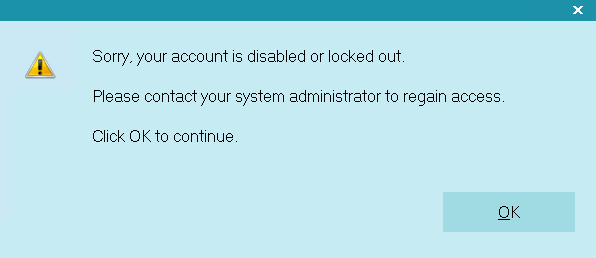
Account Is Disabled
When you switch this ON with a check mark, the
operator will not be allowed to sign into Collect!
A message will be displayed informing the operator
of this with a suggestion to contact the system
administrator.
Account Is Locked Out
You can enable this switch with a check mark
to lock a user out of your system. They will not be
able to sign in at all. To re-enable the account so
that the user can sign in, clear the check mark
from this field.
If you set a number of tries in the 'Lock out after'
field in the Password Settings form, this will
set a limit to the number of signon attempts
Collect! will allow a user. When a user has
entered too many incorrect passwords, this switch
will become enabled and they will not be able to
sign in at all. To re-enable the account so that the
user may sign in, clear the check mark from
this field.
Show Passwords
Switch this ON to unhide Operator Passwords. The
effect is immediate. Once you have switched ON
Show Passwords, you can navigate through the list
of Operators and all the Passwords will be visible.
The "Show passwords" switch is visible only if you
are signed in at User Level 99. It works only for
User Level 99, for security reasons. No other level
can unhide or view Operator Passwords.
Allow Local File Copies
Switch this ON to automatically store printed files locally.
Operators with the switch ON will be able to print documents
to a local My Collect! Documents folder inside the My
Documents folder of the currently logged on Windows user.
You are making local copies of files on operators'
machines. Debtor or client data may be stored in
these documents. If you are a high security
company and cannot store data off the server,
don't use this switch.
Because the files are local, this preserves your single
socket connection to the server. Operators with this
switch ON will be able to print documents even through
the Client executable.
This switch has no effect on HTML files, because these
files may have external dependencies.
Log Viewed Accounts
Switch this ON to log account activity to the Application Log.
Every account that this operator views will be written to the
log with a date/time stamp.
Collect! considers as "Viewed" opening the Debtor form and
any part. Creating or modifying Contacts and Attachments
are recorded as "Viewed" as well.
Please refer to Help topic, Collect! Log Viewer for more
information about the Application Log.
Create Contact
This box works in conjunction with Log Viewed Accounts above.
Switch this ON to create a Review contact on the Debtor that
the account was viewed. In addition to the date and time the
account was opened, it will also store the Elapsed Time
that the Operator was on the account. The Contact Type will
be "Operator Viewed."
Log Modified Accounts
Switch this ON to log account activity to the Application Log.
Every account that this operator modifies will be written to
the log with a date/time stamp.
Collect! considers as "modified" any change to the actual
Debtor form, the creation or modification of Notes, Cosigners,
Transactions, Debtor Detail and the Misc tab. Also, any
changes to the Credit Report Details tab.
Creating or modifying Contacts and Attachments
from the Debtor are not considered as modifying
the Debtor. However, this logged as "Viewed"
because the Debtor form is open.
Please refer to Help topic, Collect! Log Viewer for more
information about the Application Log.
Enable Secure Socket Layer
Switch this on to enable SSL automatically when a
Web Host operator logs into Collect!. This setting
is used with the following two settings to determine
how the SSL will be used.
Stunnel Socket Wrapper
When this setting is chosen, Collect! automatically starts
the Web Host with the /W1s argument. This must be used
with a third party SSL utility.
Internal Collect! SSL
When this setting is chosen, Collect! automatically starts
the Web Host with the /W1ss argument. This uses the
internal SSL functionality of Collect!. No external utilities
are needed. Collect! will use Port 443 for HTTPS by
default, or you can set a different port using the /y argument.
Web Host XML Data Pump
This setting allows a user to pipe data directly into
Collect! using XML. The Operator Type must be
Web Host to use this feature. Collect! automatically
starts Web Host with the /W3 argument. Use with
Trusted Hosts to add a layer of security. Please
refer to Help topic, Web Host XML Data Pump for
more information.
Deny Multiple Signon
Switch this ON with a check mark to restrict this
Operator to signing into only one instance of Collect!
at any given time.
When this switch is ON and the Operator attempts to
sign on more than once, this will generate an error
message. The event will be written to the Application Log
and Collect! will shut down.
This evaluation takes place during the
opening of a database when Collect!
retrieves the Operator record.
In the Operator Security tab:
Enable Verification
This feature gives you the ability to force verification of field data. Switch this ON when you want
the operator to confirm important information in a certain field before they can exit a form. This
is very useful for confirming data or simply to make sure the operator has important information
that you need. There are a few steps necessary to set up this procedure. Please see Help topic,
How to Prompt To Verify a Field On Exiting A Form for details.
There are many possibilities for using the Security section. User Level is the primary way to limit
or grant access to areas of your system. There are also several other settings that can be used to
control access to accounts in many different ways to suit your needs. Please refer to Help topic,
How to Restrict Access to Accounts, for details.
You should only use User Level 99 for administrative purposes. Assigning a User Level 99 may
result in losing functionality that relies on Collect!'s access rights system.
If you attempt to set an Operator's user level to 99, Collect! will display a cautionary message.
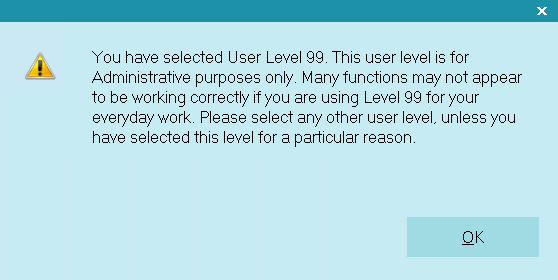
Setting User Level 99
Operators who sign into Collect! at user level 99 will see a similar message.
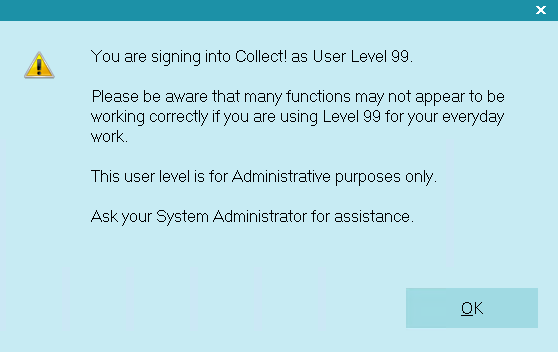
Signing on with User Level 99
The Operator 99 shipped with Collect! does not display this message. That is, Operator ID 99, User
Level 99.
You can change the Password for ID 99 and Collect! will not display the message, as long as
you are using ID 99 with User Level 99. Any other use of user level 99 displays the
cautionary message.
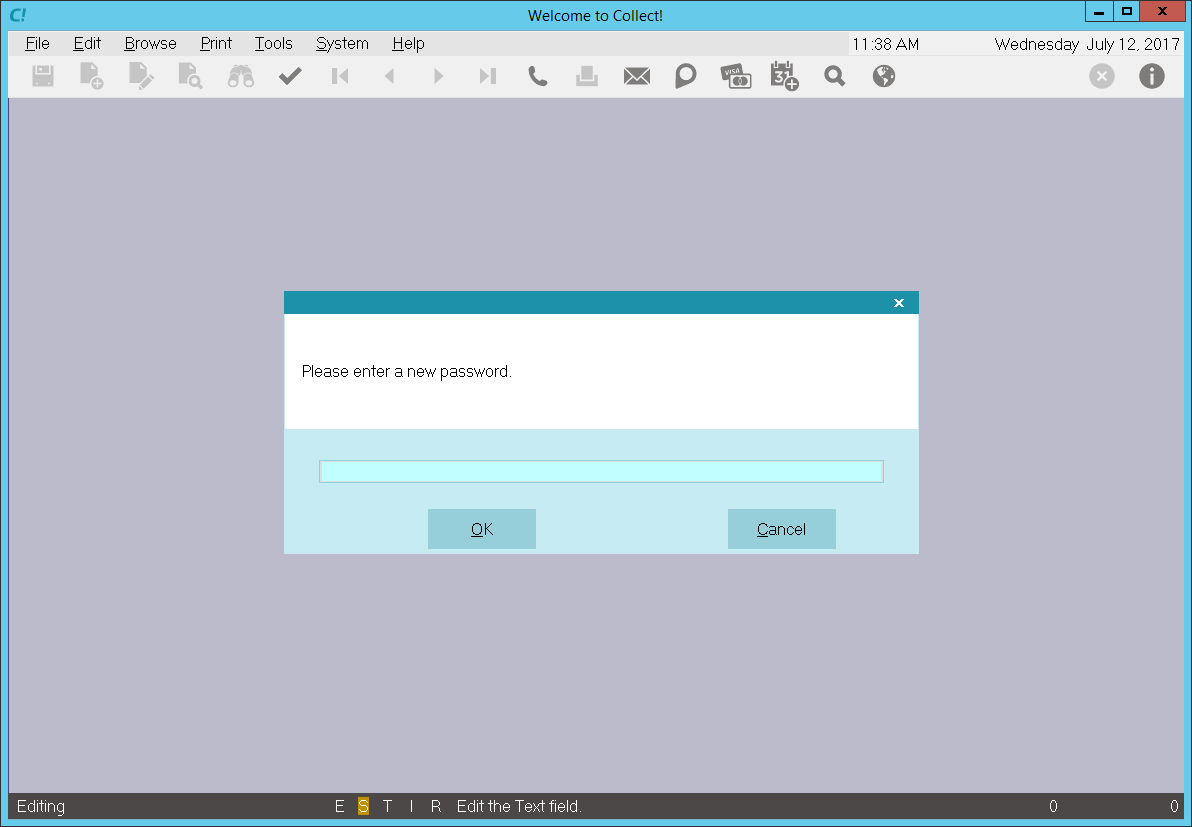
When creating a new operator, Collect! prompts about entering a password if you attempt to leave
the form without creating a password.
You cannot use the reserved ID "system" or "admin". Also, you cannot use a password of
******** ( 8 asterisks).
If an error occurs when you create a Password, you will be sent back to the Operator form to correct
the error. You can still leave the Operator without correcting the error by pressing ESC on your
keyboard.
Adjusting User Rights
When you set up each operator, it is best to choose a User Level that most closely fits the access
rights you want this operator to have. However, you may discover that they cannot access certain
areas that they need or maybe they can view forms they need not see, or they can change data in
fields you want left alone. You can fine tune the user's permissions to suit your needs.
Every Operator must have a User Level assigned.
Please refer to How To Use Access Rights for guidelines on customizing user rights.
Planning User Levels
Setup of Operators uses the Collect! feature User Levels. By means of these levels, your users can
be monitored to access only the areas of Collect! they need to, to change only the information that
they must, to view only the data and forms that pertain to their work. You can guide users to the
areas that they should address, displaying records tailored to their work load.
Users that need to access more of your system's forms and data can easily be set up to do so.
It is recommended that you plan before assigning User Levels. What tasks do your different
workers do? What do you want them to be able to do in Collect!? Do you have a good idea of
the Access Rights each User Level allows?
It is recommended that you try out the User Levels that are supplied before you create your own.
Please refer to the User Level Samples in the DEMODB for more details.
You must sign out of Collect! completely, returning to the Desktop, whenever you change to
a different User Level, or some of the rights from the previous level that you were signed
in as may still be in effect.
Allow Browser Signon
This switch is used to activate the Operator's access to Collect! over the Internet using Web Host.
When the Operator attempts to connect to Collect! to enter new information or view existing accounts,
Collect! verifies that this switch is ON for the Operator before allowing them to access the database.
Please refer to Help topic, How to use Web Host for more information.
Operator Details
Click Here to View this Form.
Click Here to Close this Form.
The Operator Detail section of the Operator form enables you
to select many additional personal operator level settings.
These are explained below.
Operator Detail
Notes Color
This setting determines how notes are displayed
on the Debtor form. You may select a color from
the pick list provided, or add your own colors to the
pick list.
You may use different colors for different operators.
These colors show up when you are viewing the
Debtor form, but they are not displayed when you
are editing the notes.
These are RGB values, as in standard HTML color
usage, and are in hexadecimal form.
Examples:
White #FFFFFF
Blue #FF0000
Red #0000FF
Green #008800
Amber #0099FF
Purple #FF00FF
Please refer to an online Color Chart for a quick reference
to additional colors that you may use and to
Using Color In Collect! for color topics.
Messaging
These settings determine how Collect! handles messages
intended for the user. NORMAL sees the most messages.
This is very useful to prevent user error! EXPERT sees
very few messages, so it must be used with caution or
you may end up performing actions by mistake without
realizing it, like deleting records!
The Messaging pick list choices are explained below.
NORMAL
Select this to display all error messages and prompts
to the user. This field is ignored for Sales Team definitions.
This setting alerts the user before
records are deleted. It will then
provide a second prompt requiring
the user to type in the word DELETE.
It is case sensitive. It is useful
to leave it enabled even if you do not
consider the user to be a "novice."
ADVANCED
Select this if you consider this user to be experienced.
Most prompts and messages are displayed. This field is
ignored for Sales Team definitions.
This setting alerts the user before
records are deleted. It may be useful
to leave it enabled for your more
experienced users as well.
EXPERT
Select this mode to inhibits messages and prompts.
No prompts are displayed when deleting debtors.
Be careful assigning this capability to anyone since
they can quickly delete many records! This field is
ignored for Sales Team definitions.
WARNING: This setting does not alert the
user before records are deleted!!!
Use with caution.
*** Even an experienced group like the Comtech
Support team uses the NORMAL level setting! ***
Language
Select a Language to use a custom language file so this
Operator has a different translated version of Collect!.
Please refer to the Help Topic How To Customize An Operator's Language
for more information.
Printing
These settings determine the default printing mode for
the operator. This can be changed when a report is
being printed. However, it is useful to set here when you
are pretty sure of the mode the operator will be using for
most letters and reports.
The Printing pick list choices are explained below.
SYSTEM DEFAULT PRINT
This setting uses the default system-wide print option
as set in the Report and Printer Setup form.
To access the Report and Printer Setup
form, select System from the top menu
bar and then select Preferences from the
list of choices that appears.
The System Setup menu will be displayed.
Select Reports and Printing from this menu.
PRINT DIRECT TO PRINTER
This setting overrides the system-wide default print
setting and applies to the currently displayed
Operator ID. Printing occurs directly to the printer.
This setting is for backward compatibility with earlier
versions of Collect!.
PRINT VIA DEVICE CONTEXT
This setting overrides the system-wide default print
setting for the currently displayed Operator ID and
uses Windows features. It is fast and works very
well with most printers. Use this setting to print
documents with images and graphics.
Older Dot Matrix printers may require that you
choose Print Direct To Printer instead.
PRINT VIA BROWSER
This setting overrides the system-wide default print
setting and applies to the currently displayed
Operator ID. It sends printing through your browser in
HTML format.
This setting must be selected when you
want to use a Style Sheet for this Operator.
Exclude Contact Control Message
Switch this ON to disable all messages related to
Contact Controls for this Operator. This will also
disable the associated note lines that are written
indicated that the operator had been notified.
Selecting this options disables the prompt
and the note lines.
Exclude CC Note Line
Switch this ON to disable the note lines that are
written after a user is prompted regarding a
Contact Control.
Selecting this option only disables the note
lines, not the Operator prompt.
Use Softphone For Dialer
Switch this ON if you want Collect! to use softphone
for all this Operator's auto dialed calls. You must
put the softphone protocol prefix in the "Note 2"
field.
Your O/S must be configured already to
handle the softphone communication
protocol you specify.
Please refer to Help topic, How to Setup the Auto Dialer
for additional information.
Automatic Recalc
Switch this ON to force Collect! to fully recalculate
the debtor when you open a debtor account. This
will ensure that, when you are viewing the account
form, all dollar amounts are current and up to date.
Perhaps this operator does not need to see updated
financial information or perhaps your use of Collect!
does not require recalculation whenever you view an
account. In this case, you may choose to leave this
switched OFF. If you have many, many operators,
leaving this switch OFF will optimize your network
performance.
Please refer to How To Setup Operators for more
details.
Disable Popup Help
To stop help from popping up automatically put
a check mark in this field.
Re-enable popup help at anytime by pulling down
the Help menu and choosing Enable popup help.
Display Notes Automatically
Switch this ON if you want the Notes tab to
always be selected when moving onto a Debtor form.
When this switch is OFF, the last highlighted
tab is displayed when moving to another debtor.
Disable Account Matching
Switch this ON to disable account matching
for this particular operator. This will
override the global account matching settings.
This lets you use account matching on your system,
yet allows certain operators to be able
to navigate debtors without the system
performing the account matching functions.
Typically, system administrators and junior
collectors would have this switch turned ON,
while data entry operators would have this
switch turned OFF. Turning this switch ON
disables account matching only for the
designated operator.
Prompt Before Grouping Accounts
Switch this ON if you want the system to
prompt before grouping accounts. When entering
or modifying fields on the Debtor form, this
prompt lets the user choose between grouping
or not grouping the account to other matching
accounts that Collect! finds in your system.
Disable Printing
Switch this ON with a check mark to stop an operator
from printing in Collect!. This will stop an Operator from
printing in the following ways.
- Right click and "Print"
- The "Print" icon on the toolbar
- Print menu, Quick Print
- Print menu, Reports and Letters
- The PRINT buttons on records such as the Debtor
Whenever the Operator attempts to print in these ways,
they will not be allowed to continue to Print Report. A
message will inform them that their printing has been
disabled. This is also written to the Application Log.
This switch can be used with Access Rights if
you want to enable this operator to perform
some printing functions while eliminating the
freedom to print whatever they want. For
instance, you can grant access to items in
the Print menu and the operator will be able
to perform them. Also, you can include Letter
events in contact plans that the operator is
entitled to run.
This is very useful to restrict access to printing functions in
Collect! while not hampering the operator from performing
their normal functions that require printing.
Disable F1 Help
Switch this ON to prevent this operator from
accessing Collect!'s HTML help via the Internet
browser. Local popup help is still available for
fields and menu items.
Legacy Notes
Switch this ON to use background highlighting in the notes.
The color for the highlighting is based on the option set
in the 'Notes Color' field on the Operator Detail tab for
each operator.
If this is not switched on, Collect! will use the value
set on the Screens and Messages form.
Goal 1
User-defined field.
In the Operator Analysis Report, this field may be
use to track the goal of Agency Commission an
Operator must reach before qualifying for the
second commission rate stored in the Percent field.
Goal 2
User-defined field.
In the Operator Analysis Report, this field may be
use to track the cap that an Operator can have on
the Operator Commission amount to pay out.
Percent
User-defined field.
In the Operator Analysis Report, this field may be
use to track the second commission rate an Operator
can have after qualifying for the goal stored in
the Goal 1 field.
Breakeven
User-defined field.
In the Operator Analysis Report, this field may be
use to track the minimum amount of Agency Commission an
Operator must reach before qualifying for the
first commission rate stored in the Commission rate
field. With this filled in, the calculations would
be based on the Agency Commission amount above this
value. For example, if the Breakeven was $5,000 and
the Operator brought in $20,000 of Agency Commission,
the commission calculation would be based on $15,000.
Date 1
User-defined field.
Date 2
User-defined field.
Report Library
This field displays an alternate report library for this operator.
When the operator signs in, this report library will load
automatically. Select the BROWSE button to view the
available registered devices that you may select. The current
database and Web Host report libraries show up in this list
by default. Any additional report libraries created with the
New Report Library function will also be displayed.
Import Library
This option enables you to load an alternate import library
for this operator. When the operator signs in, this import
library will load automatically. Select the BROWSE button
to view the available registered devices that you may select.
The current database and Web Host import libraries show
up in this list by default. Any additional import libraries
created with the New Import Library function will also
be displayed.
Browse
Select the BROWSE button to view a list of registered
devices that you may select. The current database and
Web Host libraries show up in this list by default. Any
additional libraries created with the "new library" functions
will also be displayed.
Select BROWSE next to "Report library" to
select an alternate report library to load for
this operator.
Select BROWSE next to "Import library" to
select an alternate import library to load for
this operator.
Note 1
User-defined field.
When the Operator Type is Web Host, this field contains
the port Web Host listens on for HTTP requests, e.g. 80.
Not filling this in defaults to port 80 for the /S Web Host
argument.
Note 2
User-defined field.
When the Operator Type is Web Host, this field contains
the port Web Host uses for SSL (HTTPS requests), e.g. 443.
Leaving this blank causes Collect! to default to port 443
for the /y Web Host argument.
When you have switched ON "Use softphone for dialer,"
Collect! will look in this field for the protocol prefix for
the softphone you want to use. For example, "sip:" All
this Operator's auto dialed calls will use this softphone.
When you are using UDP protocol for your dialing
system, the UDP redirect string is entered into this
field. Please refer to Help topic, How to Setup the Auto Dialer
for more information.
If using softphone, your O/S must be
configured already to handle the softphone
protocol you specify.
Edit Style
Select this button to edit the personal Style Sheet for
the currently displayed Operator ID. To use Style Sheets,
select "Print via Browser" from the pick list attached
to the field labeled "Printing." Please refer to
How To Edit Style Sheets for Browser Reports for more
information.
Config File
By default, when Collect! opens, it uses the collectcfg.ini file or,
if it exists, the collectcfg_{database name}.ini file to load the
configuration.
If you want to specify a configuration file, you can put the filename
in this field.
The file must be in the Collect\config folder.
WARNING: Any changes to system settings will only affect the configuration
file that the Operator has loaded. Typically, this is expected, but
if you need to change your SQL Login on the Database Preferences
form, you will need to manually copy and paste the encoded values
from the collectcfg.ini to any other configuration files that are
in use.
Group Work In Progress
As an alternative or amendment to the above, users like
managers or team leaders can sign in and load a work in progress
that merges all the contacts from the group into a single To Do List.
Here is an example of an operator setup to see the WIP for 2 other users:
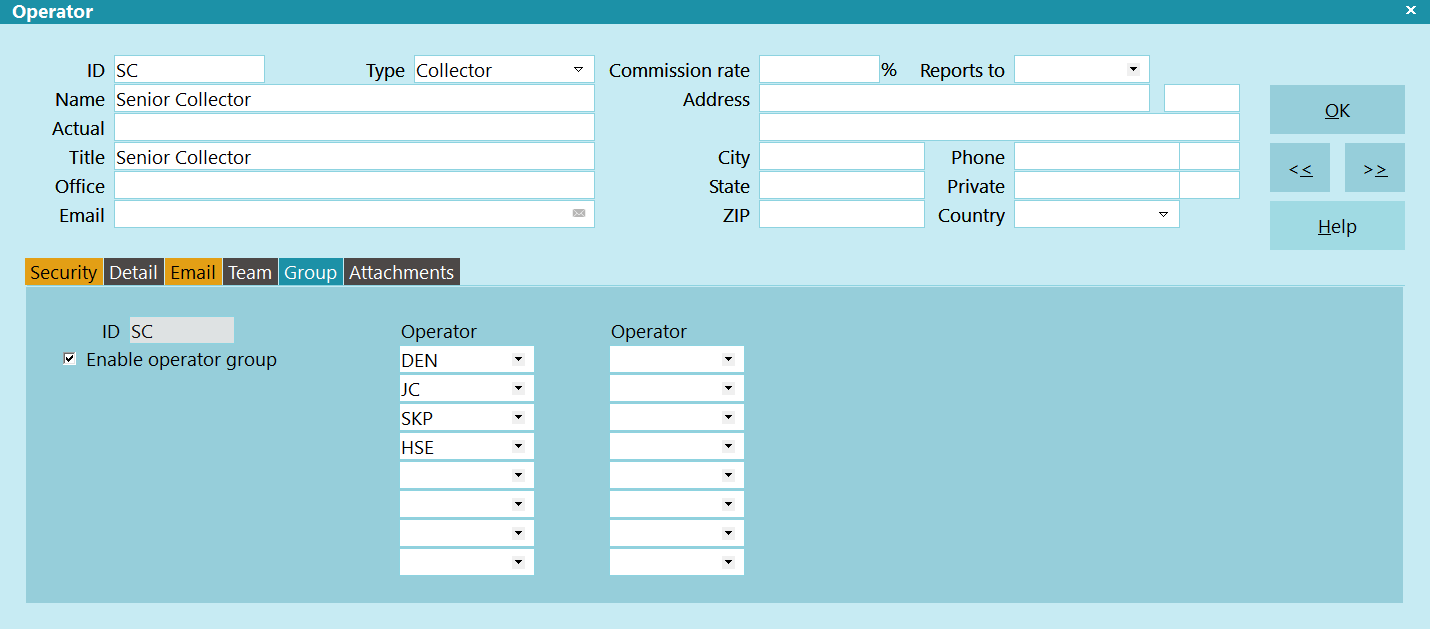
Operator Group
On the WIP Options form, you can then select LOAD CONTACTS FOR GROUP and click OK.
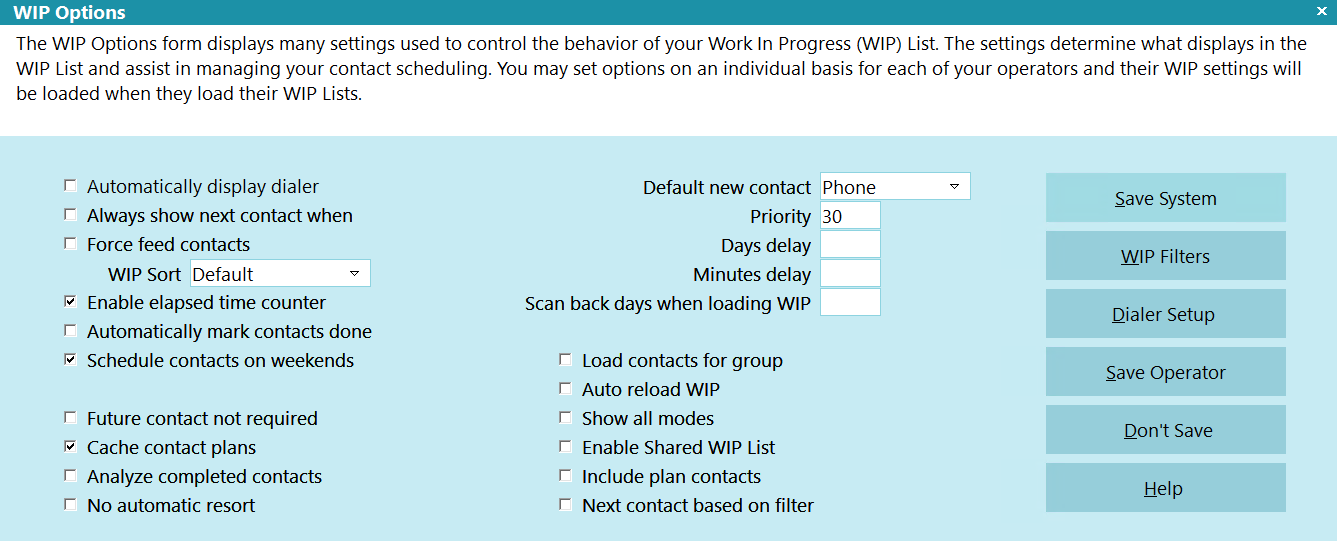
WIP Options
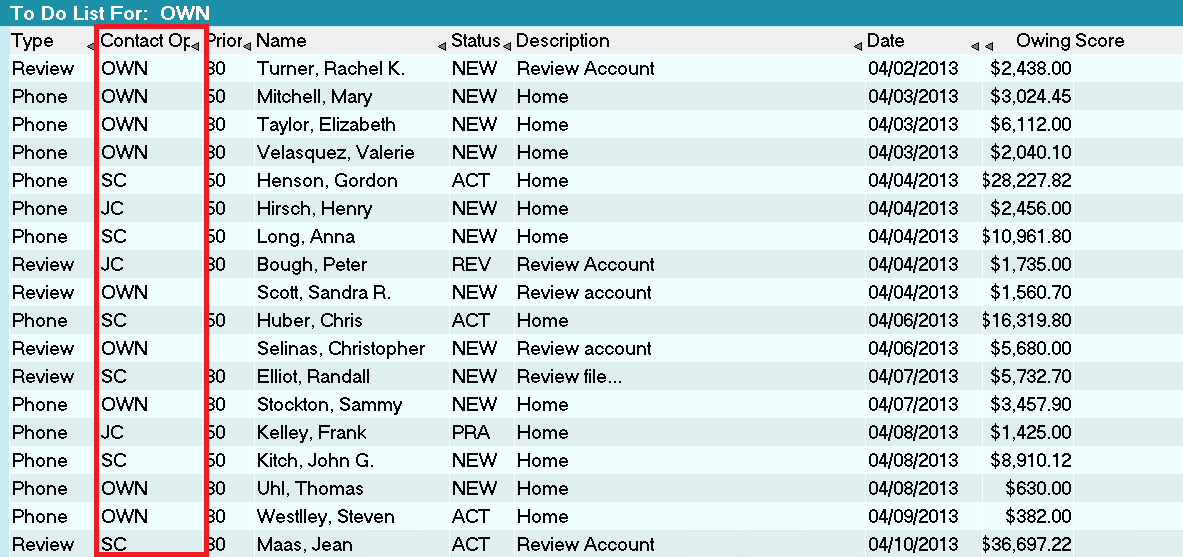
To Do List Displaying All Contacts for Operator Group
In the Operator Detail tab:
Messaging
Although you may have users that are very experienced, it is advised to choose NORMAL level, at least
at first, to give more prompts and messages for error checking.
After your users have experience, you can elect to use Advanced. It will not require users to type
in the word DELETE to confirm the deletion.
It is not recommended to use Expert. Records will be deleted without any prompts.
Use Softphone for Dialer
You can use a softphone for your Collect! auto dialed calls. Switch ON "Use softphone for dialer"
and put the softphone protocol prefix in the Note 2 field. Collect! will use this softphone for all
the Operator's auto dialed calls.
This requires that your operating system is set up to handle the softphone protocol of your choice.
Please refer to Help topic, How to Setup the Auto Dialer for more information.
Disable Popup Help
You can disable popup help at the Operator level. It can still be enabled if needed by pulling down
the Help menu and choosing Enable popup help.
Automatic Recalc
Switch this ON for any operator. This will force Collect! to recalculate an account whenever the
operator opens a Debtor form. This will ensure that, when you are viewing the account form, all
dollar amounts are current and up to date.
Perhaps an operator does not need to see updated financial information when viewing an account. Then
you may choose to leave this switched OFF. If you have many users, you may prefer to switch it OFF
to optimize your network resources for increased performance.
If you do not use Automatic Recalc, there are several other options for recalculating dollar amounts
to bring account balances up to date.
You may use the Tools menu, Recalculate option at any time to bring all account balances up to date.
You may use the RECALC button on the Debtor form to recalculate the dollar amounts for the account
you are viewing.
Printing
Various printing options are available, as explained in F1 help. The settings here override the
global switches set in the Report and Printer Setup. This is useful, for instance, if you want to
assign certain reports or certain types of printing to one Operator's queue and not affect the
general printer setup.
Operator Email
Click Here to View this Form.
Click Here to Close this Form.
This section of the Operator form sets Email parameters
for the operator. The settings are explained below.
Operator Email
Email Signature
Collect! will add the contents of the file displayed in this
field to your outgoing emails. You can simply type in the
name of a file to use.
This field only applies to the ad-hoc emails sent via the
Email icon in the email field that opens the Send Mail form.
When populated with a file with a TXT extension, the text
file is loaded into the Email Body. You can then update the
email body with your own text and send the email.
When populated with a file with an HTML extension (not HTM),
the email body remains blank. You can put in your email text,
then send the email. When the email is sent, the HTML file
is wrapped around the text that you just typed in. The body
is inside a <pre> tag, so by default, the text is
plain text. You can use CSS inside the HTML file to format
the PRE tag with any formatting that you want.
Collect! looks in the Collect\config\email folder by default.
You can create different signature files for
different operators. If you have a disclaimer,
caveat or any text message of several
paragraphs that you would like to always
include in each email, you can simply
create a signature file in Notepad and save
it as a TXT file in Collect\config\email.
Email Server IP
Enter the IP address of your Email Server, if not specified on
the Database Preferences form. This field is an override and
typically left blank.
Email Type
Select an option for sending emails. The options are:
- Default: This option will use the Email Type configured
on the Report and Printer Setup form. If the
system is also set as Default, then MAPI will
be used.
- SMTP: Select this option if you are routing your emails
through an email server. This option is used if you
have an email server that either doesn't require
user authentication or all users use the same
email account.
- SQL: Select this option if you have enabled emailing in
Microsoft SQL Server. When selected, the Operator
can navigate to the Reload Work in Progress List
form and click the Configure Email button to
enter their email settings.
- MAPI: Select this option to send emails via your local
email client that is set as the default in Windows.
Microsoft has been moving to deprecate MAPI, so
this option may not be available in your operating
system.
In the Operator Email tab:
Enable SMTP
Select this to switch ON Simple Mail Transfer Protocol, a standard mail transfer protocol that
Collect! can use with the Email feature. This setting is switched ON when sending emails directly
to a mail server. Please refer to How To Send Email as HTML for details.
WIP Settings
Operator level settings can be saved as a configuration (CFG) file when you are setting up your
operators. You can also set the configuration for all operators of the same User Level once you have
saved the CFG file for one of the operators of that user level. Please see Help topic
Copy Operator Configuration for details.
| 
Was this page helpful? Do you have any comments on this document? Can we make it better? If so how may we improve this page.
Please click this link to send us your comments: helpinfo@collect.org