How To Use Pick Lists
This document discusses how to modify or create a pick list. Pick lists show predefined choices for
any field. This speeds up data entry and minimizes errors. Virtually any field in the system can
have a pick list attached to it.
To View The Pick List File For A Field
You must have access rights to form and field properties. These rights depend on your user level.
 User level 99 does not display pick lists when you open forms, except for internal pick lists
created by Collect!. Please sign in as a user level other than 99 to see how pick lists will
be displayed to the end user.
User level 99 does not display pick lists when you open forms, except for internal pick lists
created by Collect!. Please sign in as a user level other than 99 to see how pick lists will
be displayed to the end user.
 WARNING: Do not modify System pick lists. System pick lists are identified by having an underscore in
front of the name and no .pck extension. These lists will automatically regenerate during
the upgrade process.
WARNING: Do not modify System pick lists. System pick lists are identified by having an underscore in
front of the name and no .pck extension. These lists will automatically regenerate during
the upgrade process.
- Tab into the field or click in it with your mouse.
- Press Alt+F1, or Right click the field, and choose Properties from the popup menu. Or, select
System from the top menu bar and then select Field Properties from the drop-down choices.
Either way, the Access Rights form will open.
- To make sure you have accessed the right field, look in the Name field of the Access Rights
form. It must contain the name of the field whose pick list you are about to modify.
- Look in the Pick List File field. You will see the name of the pick list file that is attached
to this field. (For example, 7.pck or field1) All legacy
pick lists in Collect! have the *.pck extension as they used to be stored as files. As pick
lists are stored in the database, the name can be any value as long as there is a corresponding
record that in the Pick Lists list. If there is no pick list on the field, Collect! will
automatically generate a unique name and create the Pick List record.
- Tab into the Pick List field and press F2 to view the contents of the pick list file, or select
the small folder icon to the right of the field. The pick list Editor will open with information
about the data type of the field and a list of choices formatted in a special way. When you
add to this list, or modify an entry, please be sure to enter the same type of data in the
same format. See details below under "Entering Choices In Your Pick List."

Pick List Form
Click Here to View this Form.
Click Here to Close this Form.
The Pick List form allows you to create custom drop down lists that
can be attached to fields. The same pick list can be attached to
multiple fields, allowing for consistency.
Pick List Form
Please refer to the Help topic How To Use Pick Lists for more information.
Name
This is the name for the record. In prior versions of Collect!, it was
the file name (EX: 1.pck). The name does not require an extension, but
it does need to be unique. The value placed here will also be the same
value that you place on the Access Rights or Form Rights forms.
There are 4 naming conventions for this field: 1) Traditional
(EX: 1.pck) that uses the file name from the legacy pick lists;
2) UUID (EX: 2ED17D42.pck) that is automatically generated by the
system; 3) System (EX: _2ED17D42) which is the same as UUID, but
is prefixed with an underscore and does not have an extension; and
4) User-Defined (country.pck or country) which can be any text
as long as it's unique.
Description
This is a descriptions for the pick list, so you know what its purpose
is. It can be any text.
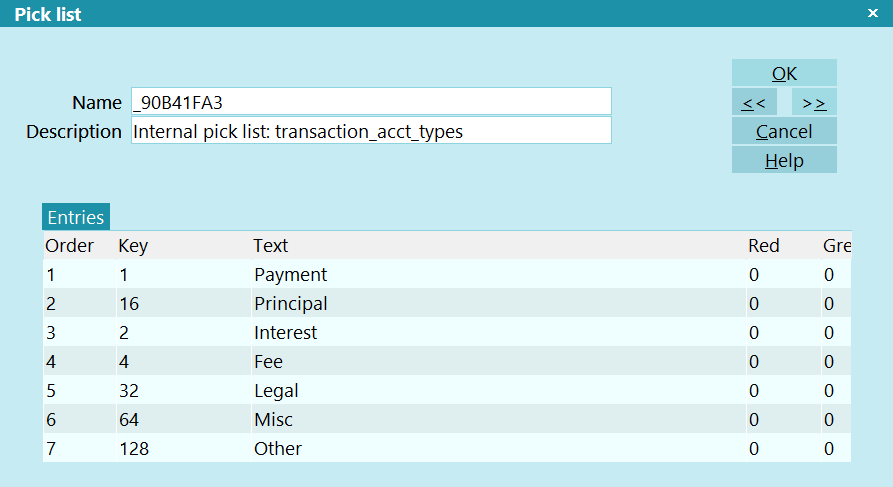
Entries
The entries is a sub-list that links to the Pick List Entry record.
WARNING: Do not modify System pick lists. These lists will automatically
regenerate during the upgrade process.
Pick List Entry Form
Click Here to View this Form.
Click Here to Close this Form.
The Pick List Entry form allows you to create or edit custom drop down lists
that values that are associated to pick lists, which can be attached to fields.
The same pick list can be attached to multiple fields, allowing for consistency.

Pick List Entry Form
Please refer to the Help topic How To Use Pick Lists for more information.
Pick List
This is the Pick List records that this entry pertains to.
Order
This is the position in the list that this entry will appear in. For example,
a value of 1 will appear first in the list.
When you create a new entry, it will automatically assign the next highest
value in this field.
Key
This is the value that will be stored in the database. For Example, if the key value
is RET and this pick list is associated with the Debtor Type field, then in the database
for the debtor record, the text RET will be stored in the de_type field.
Text
This is the text value to display on the screen when this item is selected on the field.
For example, if the Text is Retail and this pick list is associated with the Debtor Type
field, then the text Retail will display in the field for the end user when they open
a Debtor, instead of the KEY defined above.
Color
Instead of a color field where you can put in a hex value, this record has the Red Green Blue
(RGB) values separated out.
When populated, the color will display in the field and in the pick list when you are selecting
a new value. Using color helps to make specific value stand out.
Red
A number from 1 to 255 representing the Red portion of a color.
Green
A number from 1 to 255 representing the Green portion of a color.
Blue
A number from 1 to 255 representing the Blue portion of a color.
To Create A New Pick List On A Field
- Follow Steps 1 through 3 above to open the Access Rights form and ensure that you are on the
right field.
- Select the small folder icon to the right of the Pick List File field to open the pick list
Editor. You will see information about the data type of the field and a few sample entries
showing you how to format your entries for pick list choices. Please be sure to enter the
same type of data in the same format. See details below under "Entering Choices In Your
Pick List."
To Remove A Pick List From A Field
- Follow the steps above to open the Access Rights form for the field.
- Click into the Pick List File field and use the Backspace key to delete the *.pck filename.
This removes the pick list from the field, but it does not delete it. You would do this if
you wanted to disassociate a pick list with a field, but keep it in the database for other
fields.
- Press OK to exit the form.
To Delete A Pick List File
WARNING: BE CAREFUL as this actually deletes the pick list from the Collect! database. It will
be gone.
- Follow the steps above to open the Access Rights form for the field.
- Select the "X" icon next to the pick list field.
- Select the OK button when the prompt displays if you are sure that you want to DELETE the
file.
- Press OK to close the Access Rights form.
 If you are not sure about actually deleting the file, you can simply remove it from the field
by backspacing as described above. This leaves the file in the pick list folder but removes
it from the field.
If you are not sure about actually deleting the file, you can simply remove it from the field
by backspacing as described above. This leaves the file in the pick list folder but removes
it from the field.
For information about using the shortcut buttons next to the Pick List File field, please see
below under "Buttons On The Pick List Field."
Import A Pick List
If you obtain a pick list from another system, database, or from the Member Center, these quick steps
will assist you with importing it into Collect!.
- Navigate to the Collect\database\picklist folder. If a picklist folder does not exist, create
one.
- Place the file in the picklist folder. Note the name of the file (EX: state.pck).
- Sign into Collect! and navigate to System -> Rights -> Pick Lists
- Check the list for an existing pick list with the same name from step 2. If so, rename the
file in picklist folder with to be unique.
- Navigate to the form and field that you want to put the pick list on. Please refer to the
TO VIEW THE PICK LIST FILE FOR A FIELD section above on how to get to the Access Rights for
a field.
- In the Pick List File field, type in the name of the file from step 2. Do NOT use any of the
buttons to the right of the field to select the list.
- After the file name is in the field, click the Open File icon. It's the first icon on the right
side of the Pick List File field.
- You will get a prompt that states that the pick list was not found, but a legacy version was
found. Click Yes to import the file.
Entering Choices In Your Pick List
- Use any method above to navigate to a Pick List record.
- Click in to the Entries list and either create a new entry or select an existing one.
- The Order field will pre-fill for new entries. Edit it, if required.
When creating a new pick list, you can create an entry with a blank Key and Text. This will
allow users to type in their own text instead of the pre-defined choices in the pick list.
WARNING: When using a blank entry, keep in mind that the value entered still needs to match the
data type for the field. Please see below for more information.
- Fill in the Key field. This is the value that will be stored in the database for this
field.
- Fill in the Text field. This is the text that will display to the end user on the screen when
this item is selected.
You can leave this field blank and Collect! will display the Key value to the end user. This
is useful, particularly in string fields where the value stored in the database will be the
value displayed to the end user (Example: Yes or No). As a note, using numbers in the database
is faster when doing SQL queries. Please see below on field data types for information on what
can be stored in a field.
- If desired, fill in the Red Green Blue (RGB) fields with the applicable RGB values of a
color.
- Click OK on the Pick List Entry form to save the entry and click OK on the Pick List form to
save the list.
WORDS OF CAUTION
* * *
Each field has limitations regarding the kind of information it holds. If you are unsure of the
fields data type, please refer to the Printable Field Help page. Find the field in the list and
look at the Record Type and Field Length columns.
Text, AN means that any alphanumeric value can be stored, up to the value in the Field Length
column.
Text, N means that only whole numbers can be stored in the field.
Currency means that a floating point number, up to 2 decimals can be stored.
Percent means that a floating point number, up to 3 decimals can be stored.
Date is a special case. You can place a pick list on a date field as long as the values in the Key
field are dates.
In reports, when you output a field (Example: @de.ty), Collect! will display the Text value of the
pick list. If you want to output the Key value, you can place it in a variable using the @PV command.
See the "Printing Pick Lists" section below.
When running SQL queries on fields with pick lists, the result you get back will always be the
database or KEY value. Your query, or post query process, will need a translation table to convert
the database value into the pick list value if you want it displayed in a report.
You can join the pick list table in SQL queries to return the text value of a field.
This is an advanced reporting topic.
When importing to a field with a pick list, ensure that the data you are loading will fit in the
field. Also, if you are using FILL VALUE, only fill the value that will be stored in the database.
For example, if you use fill value on the Mode field when importing new accounts, use a fill value
of A, not ACTIVE.
* * *
Examples
For large text fields:
Key:
"First Choice "
"Second Choice"
"Third Choice "
" "
In this example, the choices of First Choice, Second Choice and Third Choice would appear in the
drop-down list. The example also allows for users to enter their own choice. See the Words of Caution
above.
If First Choice were selected, then First Choice would appear in the field. Its value would be
entered in the database as well.
For small fields using an identifier:
| Key |
Text
|
| "01" |
First Choice |
| "02" |
Second Choice |
| "03" |
Third Choice |
In this example, the choices of "First Choice," "Second Choice," and "Third Choice" would appear in
the drop-down list. If First Choice were selected, then it would display in the field and 01 would
be placed into the database.
Also, in the second example, no other option could be entered because the empty entry is missing from
this example. This is an easy way to ensure that only valid entries are entered in any given field.
Buttons On The Pick List Field
In the Access Rights form, the pick list field has four shortcut buttons to the right of it. Use
these buttons to quickly do the following.
- Open the pick list record: If the Pick List field already contains the name
of a pick list, click this button to open the pick list Editor. Then you can modify the file
if needed. If the Pick List field is empty, selecting the Open button will open a new pick
list for you.
- Print a pick list record: To Print the displayed pick list select the Print
button.
- Delete a pick list record: To delete the pick list, select the button with
the stylized X on it. This prompts you to delete the record. CAUTION!! This actually deletes
the record from your Collect! database.
- Select a pick list record: To attach an existing pick list to the field, click
the Magnifying Glass button. Collect! will open a dialog displaying the list of pick lists in
the database. NOTE -- You should already know which list you want to select.
Setting User Level Pick Lists
The Form Rights Pick List field gives you the ability to assign a special pick list to a particular
user level. This is very useful for limiting the operator's choices. For instance, you can create
one pick list for your system level users and another for your collectors. An example would be the
Debtor Status field. Perhaps you want your collectors to be able to change the Status, but limit
them to a few choices. This is where you could benefit from setting the pick list in Form Rights
for the user level you have assigned to your collectors.
Printing Pick Lists
The @PV command enables you to populate a variable with the database value of a
pick list. This command is useful if you need the database value for an export or SQL query.
Use @PV to:
- Return the database or numeric value of a pick list to a variable.
Syntax: @varReturn* = @PV()
Examples
@varReturn* = @PV(@de.st)
Sample pick list on the state field:
"CA" California
"OR" Oregon
"WA" Washington
In normaly use, @de.st would return the readable text (California, Oregon, Washington).
@varReturn* = @PV(@de.st) will return the first column to the @varReturn variable (CA, OR, WA).
The @PT command enables you to populate a variable with the human readable text of
a pick list. This command is useful if you obtained the database value of a pick list from and SQL
query and need it converted back into the display text.
Syntax: @varReturn* = @PT({fieldname}, {value})
Example 1:
@varReturn* = @PT(@de.st, CA)
Sample pick list on the state field:
"CA" California
"OR" Oregon
"WA" Washington
In normal use, @de.st would return the readable text (California, Oregon, Washington), but when
retrieved via SQL directly, you will get the database value (CA, OR, WA).
@varReturn* = @PT(@de.st, CA) will return the second column to the @varReturn variable (California,
Oregon, Washington).
Example 2:
@varValue* = @varArray[1][1]
@varReturn* = @PT(@de.st, @varValue)
Example 3:
It is possible to put the field into a variable with the quotes.
@varField* = "@de.st"
@varReturn* = @PT(@varField, CA)
| 
Was this page helpful? Do you have any comments on this document? Can we make it better? If so how may we improve this page.
Please click this link to send us your comments: helpinfo@collect.org