Print Report
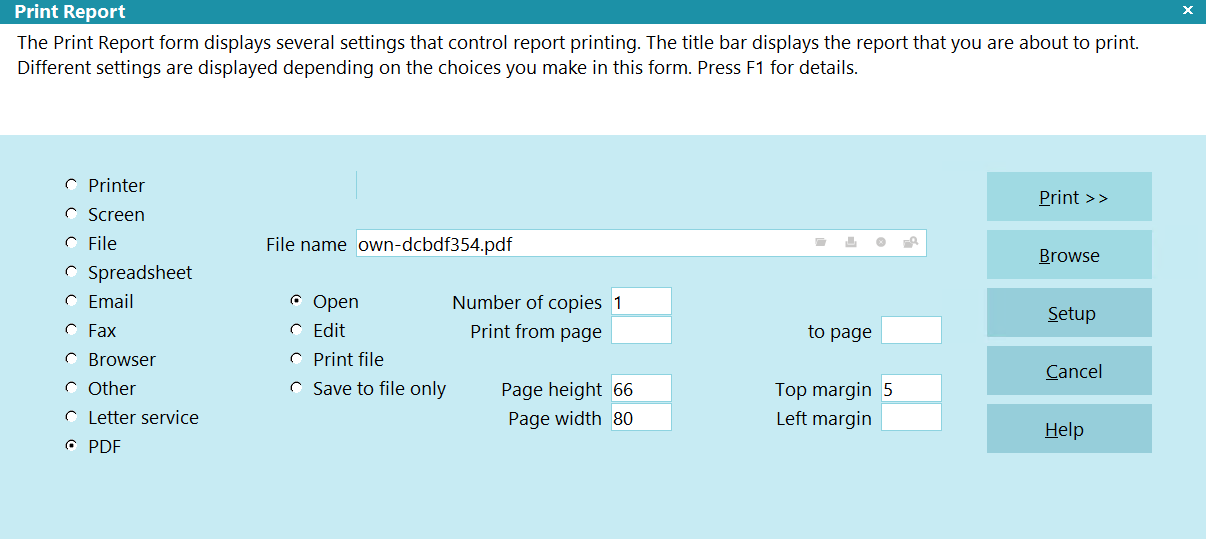
The Print Report form displays several settings that control
report printing. The title bar displays the report that you
are about to print. Different settings are displayed depending
on the choices you make in this form. Press F1 for details.
Print Report
You may choose the location you want to send the report to,
for instance to the screen or to a specific printer. Page height,
margins, number of copies and pages to print can also be set.
You may also send the report to Collect! Technical Services
by selecting Screen as your location and then putting a check
mark in the box labeled Technical support.
Please choose the location you want to send this report to:
To preview the report or send it to Collect! Technical Services,
select Screen.
To save it on disk, select File and enter the
name and location of the file to save.
To print to a printer, select Printer. You may
select a specific printer and preview the report before it is output.
Other options include Spreadsheet, Email, Fax, Browser,
Letter Service and Other.
Destination
What output device are you using for this report?
| Destination |
Description |
| Printer |
Send the report or letter directly to a printer. |
| Screen |
Preview and edit your report on the screen before printing. |
| File |
Send your report to a file which you can later edit, using a
word processor, or import into a spreadsheet or database.
Collect! will not analyze the contents and attempt to
format the output. The output is user-defined. |
| Spreadsheet |
Print quickly and easily to your spreadsheet program.
Collect! will attempt to analyze the report contents
and format the report for CSV. |
| Email |
Send the report automatically as an Email. |
| Fax |
Send the report automatically as a Fax. |
| Browser |
Print the report as HTML using stylesheets. |
| Other |
This setting is identical to File, except that it
offer the ability to redirect to an external
application or script. |
| Letter Service |
Letter Service settings for printing to service bureau. |
| PDF |
Outputs to PDF using wkhtmltopdf API. Report body must
be in HTML format for this option to work. |

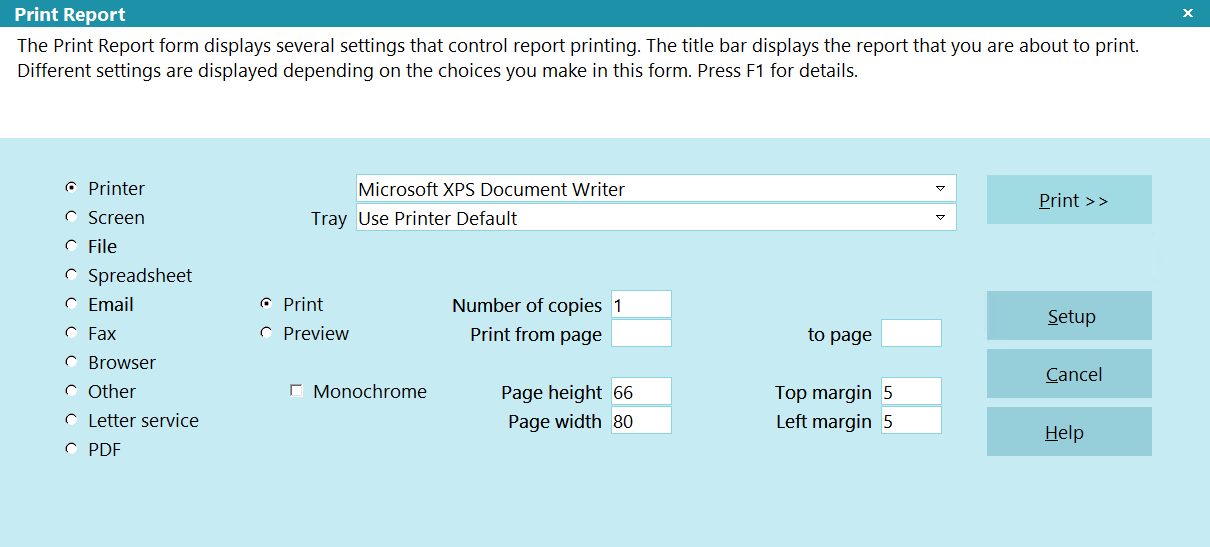
Printer
Select this option to print the report to paper. Select
the appropriate printer from the pick list.
Two fields are visible to refine your choice.
Choose Print to print to
your printer. Choose Preview
to view output in the Print Preview.
Printer Number
This field displays the printer to which Collect! will
print the report. You can either accept the default
printer, or pull down the list and choose any printer
correctly attached to your computer or network.
The pick list shows your installed printers.
Tray
This choice is visible only when Printer is selected as
the report output option. It requires that you are printing
via Device Context.
The choices in the pick list attached to this field
change depending on the capabilities of your printer.
Collect! checks your printer driver and builds a list
of the options available to you.
Select 'Use Printer Default' if you want Collect! to
function as it always has, using your default printer
setup to determine output.
 If you have multiple printers in your printer
list, the choices in the Tray pick list will
change depending on the printer you choose
from the pick list on field labeled Printer.
If you have multiple printers in your printer
list, the choices in the Tray pick list will
change depending on the printer you choose
from the pick list on field labeled Printer.
If you are not sure of the features your printer
supports, please refer to the printer manual or
ask your vendor for details.
Preview
This option is allows you to view your report in
Print Preview before sending it to the printer.
Monochrome
Switch this ON to print any color attributes in greyscale.
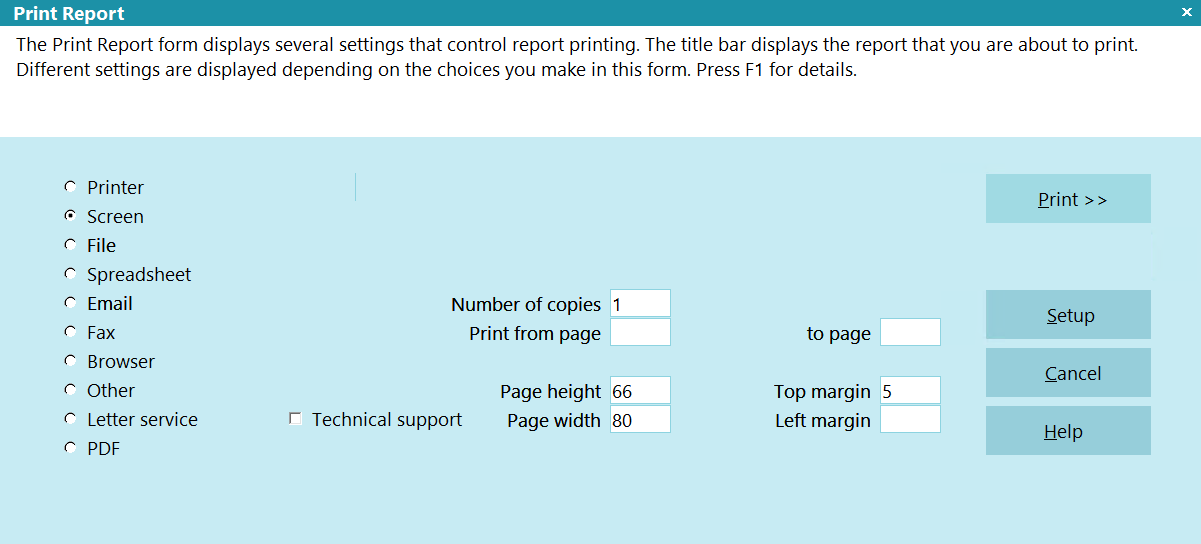
Screen
Choose this option to print your report to the screen. You can
edit the text of the report when it is displayed on the screen
and choose Print from the toolbar. The Print Report form is
displayed again and you can choose a new destination for
your edited report to be printed to, or even send it off as an
Email.
When you print to screen and edit or print a letter, Collect!
will create a Letter contact and mark it as 'Done.' Instead of
a metafile, the screen text will be saved in the contact blob.
Uncompleted Letter contacts created by printing a letter to
screen and saving after editing can be processed in your
Daily Batch Letters. When printing to email or printer with
meta files enabled, a standard meta file will be generated
and will replace the original text that was saved in the
contact blob.
When 'Screen' is selected, a check box
labeled 'Technical support' appears in the lower
right hand area of the Print Report form.
Print Report - Screen
Technical Support
This check box is displayed when you select 'Screen"
as your output option. This enables you to quickly
send your report output to Collect! Technical Services
for review.
 This is very useful for sending a Quick Print
when Technical Services asks to see
details.
This is very useful for sending a Quick Print
when Technical Services asks to see
details.
Switch this ON with a check mark to send the report
output to Collect! Technical Services. This will send
any information that would normally have been printed
to Screen. This is very useful for sending information
that formerly required faxing many supporting pages
for a technical issue.
Use this to send any information requested by
Collect! Technical Services, including Report Codes,
Access Rights settings, User information, Operator
settings, Transaction Type settings, or WIP Options,
for example.
Data is encrypted and transferred securely.
This check box is visible only when you select 'Screen'
as the output destination. It may not be visible if your
access rights do not permit you to use the function.
File
Choose this option to print the report to the file named
in the File Name field. By default, Collect! puts a file
name with an *.HTM extension in the File Name field .
You can change this as needed to output as *.CSV
or *.TXT, for instance. You can also change the path to
save to a folder of your choice.
When you choose this option, four additional
fields become visible. Choose one of these
to further refine your choice.

Print Report - File
Browse
Select the BROWSE button to navigate to a folder of
your choice for saving this report to FILE. Enter a name
for your report and a valid extension, such as CSV or TXT.
Collect! will display the path and when the report prints
it will be saved to the folder you selected.
By default, reports are saved to your letters folder
so you do not have to select a folder here. This
is just a convenience for users who need more
flexibility for storing report files.
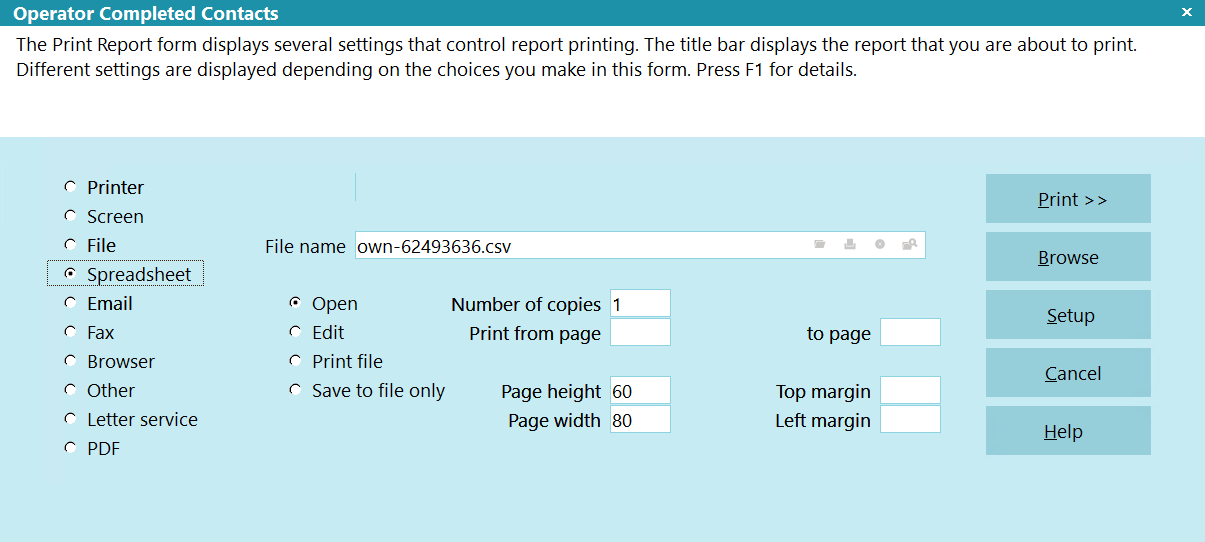
File Options
The options, Open, Edit, Print, and Save To File Only,
become visible when you choose File as your output
destination or Letter Service, if this is a letter batch for
the Letter Service Bureau.
Open
Choose this to open the file after it is created.
Whatever program you have associated to
Open .txt files will open and display the report.
Edit
Choose this option to open the file after it is created.
Whatever program you have associated to Edit .txt
files will open and display the report for editing. This
is useful for editing reports generated as HTML.
Print File
Select this option to save the report to file and also
print it to the selected printer.
Save To File Only
Choose this option to save the file after it is created.
File Name
This field displays the path and name of the file that will
be created when you print your report to FILE. By default,
Collect! puts a file name with an *.HTM extension in the
File Name field . You can change this as needed to output
as *.CSV or *.TXT, for instance. You can also change the
path to save to a folder of your choice. After the report has
been printed, you can locate this file by looking in the
specified folder.
You can set the File Name and Path when you
create your report. Use the Report Options
to tell Collect! to always print to file and enter
the name and path of the file to be printed.
If you enter simply the extension, *.csv
or *.rtf in the Report Options, when creating
your report, File Name field, Collect! will
create a file name for you automatically when
you print your report. Collect adds an operator,
date, time and increment stamp.
For example, "OWN-20080305-115656-1.csv."
 WARNING: With this option, Collect! does not alter the
formatting of the output. The output must be
defined in the report body. If you have a report
that is set to use this option, and you want
the output in CSV, then do NOT change it to
Spreadsheet as the report body is likely
already formatted for CSV.
WARNING: With this option, Collect! does not alter the
formatting of the output. The output must be
defined in the report body. If you have a report
that is set to use this option, and you want
the output in CSV, then do NOT change it to
Spreadsheet as the report body is likely
already formatted for CSV.
Spreadsheet
Choose this option to print the report to a spreadsheet
named in the File Name field. You can change this path
name. File names must follow the 8 and 3 naming
convention. That is, 8 character name and 3 character
extension. Use the default name assigned by Collect!
or type in your own.
The output file is a CSV file and can be viewed in whatever
program you have associated with your *.csv files.
Switch ON ' Multi Currency to omit currency
formatting. This will output only numbers and
the decimal point so that MS Excel may
do math on the numbers.
To set the 'Multi Currency' switch, select OPTIONS from
the top menu bar and a list of choices is displayed.
Select COMPANY DETAILS to open the Company Details
form and switch ON 'Multi Currency'. You may switch it
OFF again, if desired, after the report is printed.
Click here for information
on Open, Edit, Print file, and Save to file only
WARNING: With this option, Collect! alters the formatting
of the output by attempting to analyze the content
and convert it to CSV format.If you have a report
that is set to use FILE, and you want
the output in CSV, then do NOT change it to
Spreadsheet as the report body is likely
already formatted for CSV.
Print Report - Spreadsheet
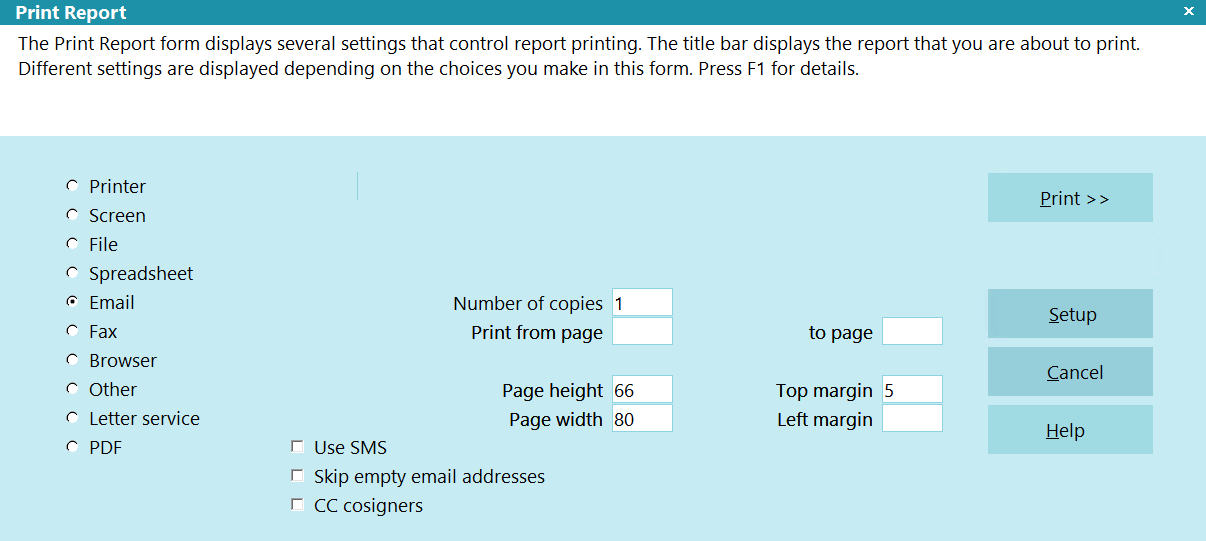
Email
Choose this option to print the report as an Email. The report
will automatically be sent through your Email program to the
address in the Debtor's Email field. If you are printing to a
Client, the address in the Client's Email field will be used.
When printing a Client letter batch to Email,
please ensure that you are printing letters
that 'Start On' "Client."
When you select this option, the 'Use SMS'
check box will be displayed. Switch it ON
to print SMS to the recipient's mobile phone.
Please refer to Help topic, SMS Email Setup for
details.
Print Report - Email
Restrict To Email Destination
This field is visible only when you have selected "Email"
as your output destination and you are in the Print Batch
Letters configuration. Switch this ON with a
check mark to restrict the email batch job to Report Definition
records that have a destination of Email on the Report Options
form.
Use SMS
This field is visible only when you have selected "Email"
as your output destination. Switch this ON with a
check mark to enable SMS Email. An additional field
appears where you can enter the domain name of your
SMS Gateway.
Email using SMS creates an email with a
TO field based on the phone number you
set up in the SMS Email Setup form.
The @domain is created from the entry you
put in the 'Domain' field.
Please refer to Help topic, SMS Email Setup for details.
Skip Empty Email Addresses
This field is visible only when you have selected "Email"
as your output destination. Switch this ON with a
check mark to skip records that don't have an email address.
Collect! will not display the "Please enter an email
address" prompt.
This option is useful if you are printing to a tagged
list and want to exclude records with no emails.
You can check this box and use the @EMAILTO function
to send any report to any email address.
CC Cosigners
This field is visible only when you have selected "Email"
as your output destination. Switch this ON with a
check mark to add cosigners to the CC section of an email
to a debtor.
Cosigners with no emails will be skipped. If the debtor
has no email, the whole email will be skipped.
If 'Restrict to cosigner only' is enabled on the
Report and Printer Setup form, Collect! will only email
cosigners with a Class of Cosigner.
For Clients, if this is enabled, the Client Associates
will also be CC's on emails.
Domain
This field is visible only when you have switched ON 'Use
SMS'. Enter the address of the SMS Gateway you are
using for emailing to SMS. Collect! will prepend the @
symbol automatically when it creates the address, using
your phone setup. If you set up a Default Domain Name,
this field will fill automatically.
Please refer to Help topic, SMS Email Setup for details.
Fax
Choose this option to print the report as a Fax.
The report will automatically be sent through
your Fax modem using the Fax Numbers you
have set up. Please refer to How to Fax for details.
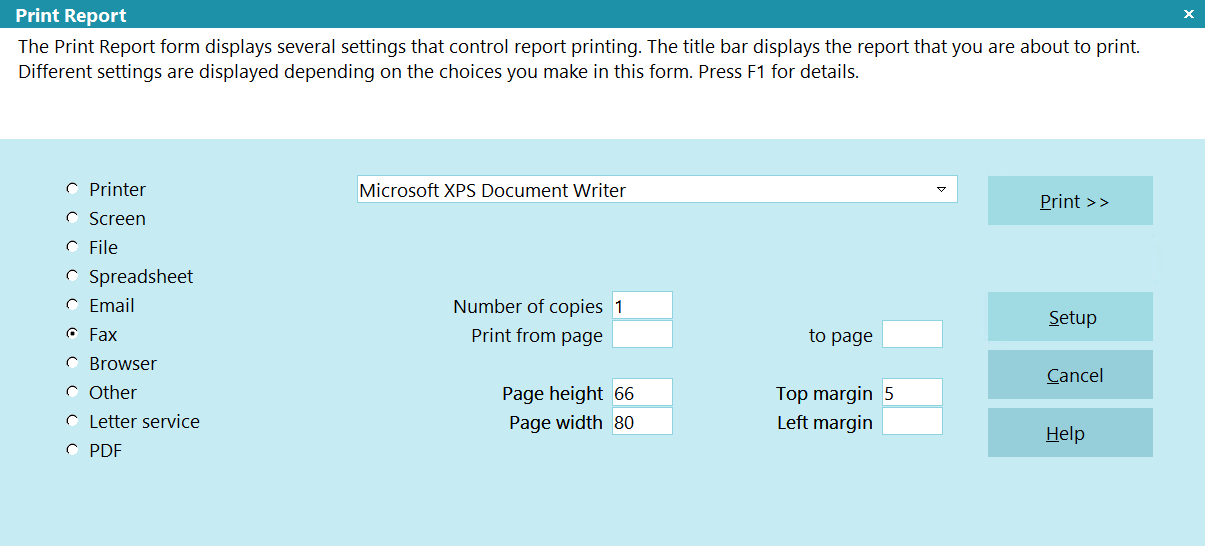
Print Report - Fax
Browser
This selection will print the report to an HTML document
which can either be printed to your printer or previewed
in your default web browser.
Output is in HTML format using style sheets,
when you have chosen to Print Via Browser in
your Report and Printer Setup.
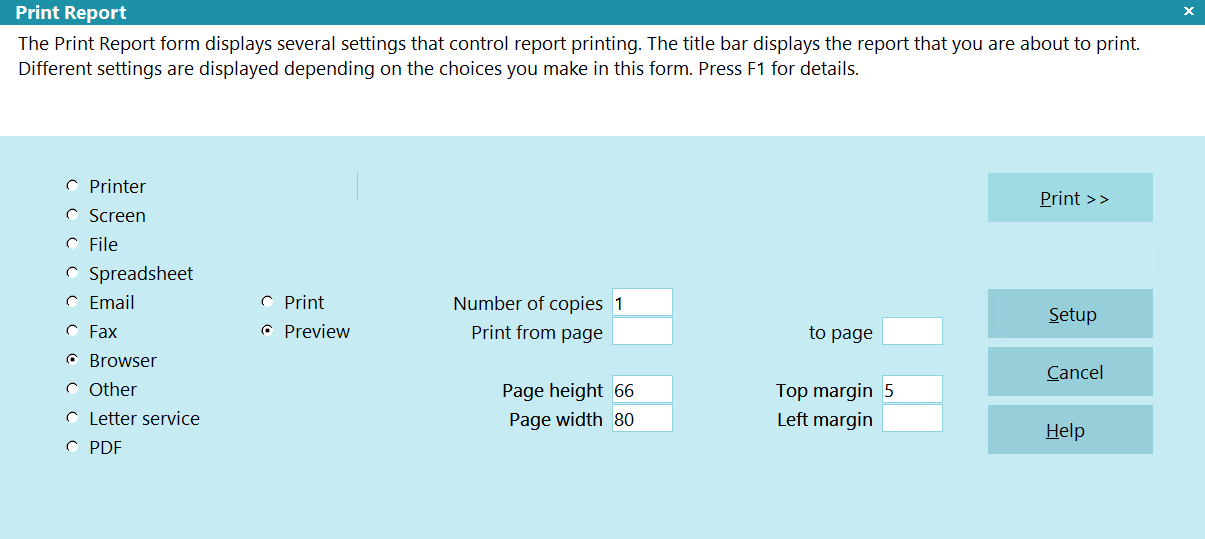
Print Report - Browser
Other
Choose this option to print the report to an alternate
word processor, such as Word Pad or MS Word.
Put the correct name of the document in the Path
field. This is useful for mail merge reports using
an MS Word label template document that you
previously designed.
This option is identical to FILE. The exception
here is that when this destination is selected
in the report options, you get the option to
redirect to an external application or script.
Click here for information
on Open, Edit, Print file, and Save to file only
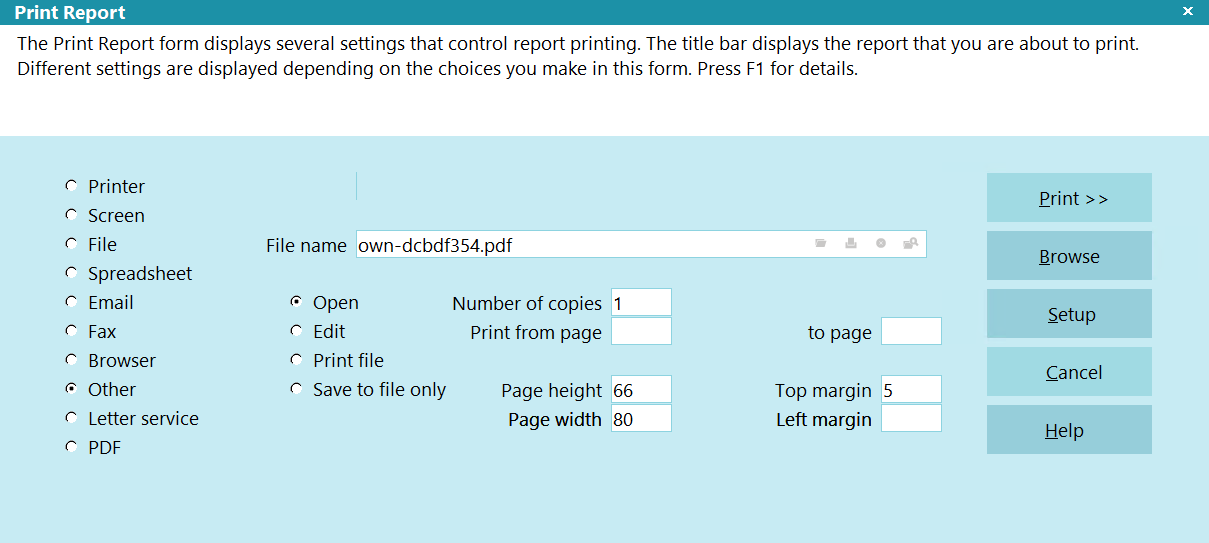
Print Report - Other
Letter Service
This option is visible when you have chosen
Letter Service Bureau from the Print menu,
Daily Reports option. The output is a file of batch
letters. Four additional fields, relating to files, are
visible when you choose this option. As well, the
File Name field is displayed to hold the path of
your letter service file.
Click here for information
on Open, Edit, Print file, and Save to file only
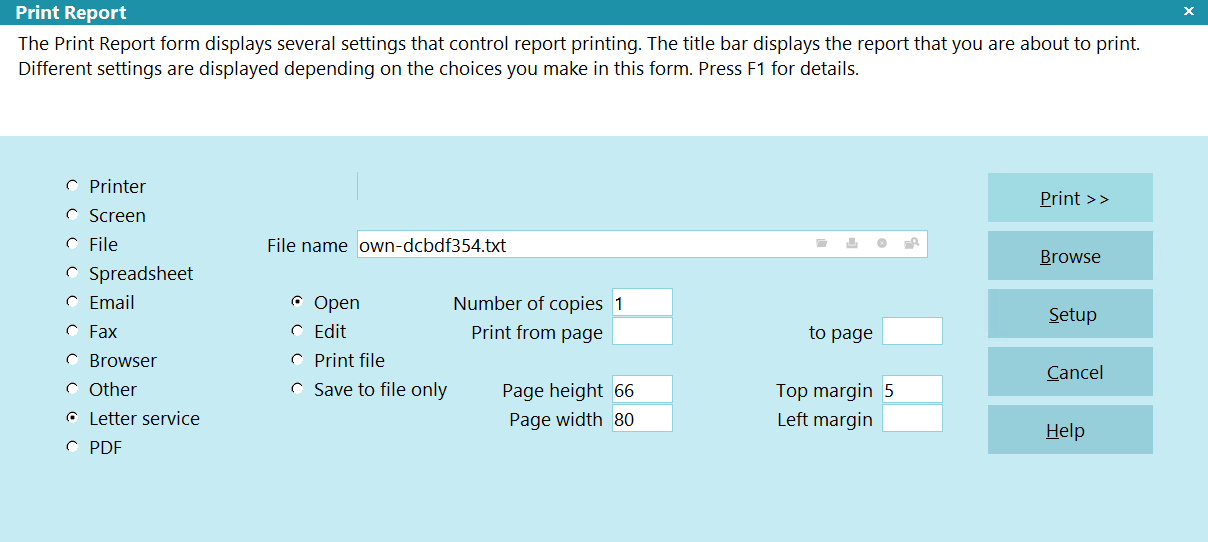
Print Report - Letter Service
Pdf
This option will take the Report Body and submit it
to the wkhtmltopdf API to convert it to PDF.
For this reason, the Report Body MUST be in HTML
format for the API to work properly.
When running against a tagged list, this option will
create a separate PDF for each tagged item.
Click here for information
on Open, Edit, Print file, and Save to file only
Print Report - PDF
Additional Output Options
You can control the margins and other settings
pertaining to your report output. Some experimenting
may be necessary to achieve desired results.
Number Of Copies
Enter the number of copies you want to print.
Print From Page
This field tells the program which page to start printing on.
If you leave it blank, the report will start printing on
the first page. If you enter a number, printing will start
on the page number you entered.
To Page
This field tells the program which page to stop printing on.
If you leave it blank, the report will print from the start
page to the end of the report. If you enter a number, printing
will stop on the page number you entered.
Ensure that your printer is turned on and
ready to receive characters (online) from
the program. If the program finds it cannot
properly communicate with the printer, it
retries for about 10 seconds, and then
displays an error message.
Page Height
This displays the number of lines per page. Normal
dot matrix printers are 66 lines per page, while laser
printers are 60 lines high. This information is used to
know when to insert a footer, if there is one defined for
this report.
Page Width
This will determine where printed lines wrap automatically.
This is especially important for the Quick Print option.
If you find that your columns are wrapping, try changing
the value in this field to 132.
Top Margin
This is the number of lines to be left blank at the top of
the page.
Left Margin
This is the number of spaces (character positions) you want
to leave blank on the left side of the printed page.
When printing to the screen, the left margin
is ignored. After you review or edit the letter,
you can print with the F5 key. Then you can
specify a left margin before printing.
Print
Select this button to begin printing to the
destination you have chosen.
Setup
Select this button to display the Report and Printer Setup
form where you can adjust your default settings.
Cancel
Select this button to cancel the printing
process and return to the previous screen.
Help
Select this button for help on the options in this form
and other topics related to printing reports and letters.
| 
Was this page helpful? Do you have any comments on this document? Can we make it better? If so how may we improve this page.
Please click this link to send us your comments: helpinfo@collect.org