How To Enable Multi Factor Authentication
Multi-factor authentication (MFA) is an authentication method in which a computer user is granted
access only after successfully presenting two or more pieces of evidence (or factors) to an
authentication mechanism:
- Knowledge (something the user and only the user knows)
- Possession (something the user and only the user has)
- Inherence (something the user and only the user is)
Two-factor authentication (also known as 2FA) is a type, or subset, of multi-factor authentication.
It is a method of confirming users' claimed identities by using a combination of two different
factors:
- something they know
- something they have
- something they are
Two-step verification or two-step authentication is a method of confirming a user's claimed identity
by utilizing something they know (password) and a second factor other than something they have or
something they are. An example of a second step is the user repeating back something that was sent
to them through an out-of-band mechanism. Or, the second step might be a six digit number generated
by an app that is common to the user and the authentication system.
For the purposes of Collect!, we use 2FA to supplement a user-controlled password with a one-time
password (OTP) or code generated or received by an authenticator (e.g. a security token or
smartphone) that only the user possesses.
If MFA is enabled, after signing in with your user name and password you will be presented with a
QR scan code that must be processed by an authenticator which will return a timed one-time password.
The secret key embedded in the image is also copied to the clip board so you can paste it into a
3rd party website to calculate the password for you.
Once you have been authenticated once, you will no longer be presented with a QR scan code but will be
required to enter your timed password. This can only be obtained from the secret key.
As a supplement, you can enable Email MFA, which will email a user their code that they can enter into
Collect!.
Enable MFA
Enabling MFA will enable it for both the Collect! application and Web Host application. Enabling MFA
is done on a per Operator basis.
Navigate to the Operator Security Form via System -> Rights -> Operators -> select an operator
On the Security Tab, select Enable MFA. Optionally, you can set MFA Email to email the code to the
user.
Once MFA is enables for an Operator, when the Operator signs in, they will be presented with the
following window. From there, you can use an authentication app to scan the QR code and provide the
one-time password. The authentication app will store the user's secret, which will be used to
generate the one-time password the next time the user signs in.
 If MFA Email is enabled, the user will receive an email with the one-time password.
The time window is set to 30 seconds. This means, every 30 seconds a new MFA code is generated.
If the code the user enters in is rejected, the system will try again using the previous time window
to account for a delay in waiting for the user entering in the code and the server verifying it.

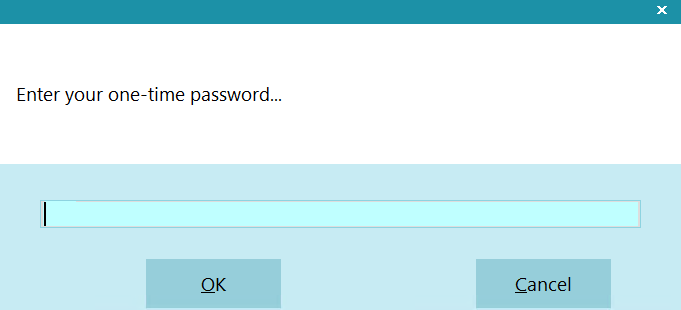
MFA Dialog Box with QR Code
MFA Dialog Box without QR Code
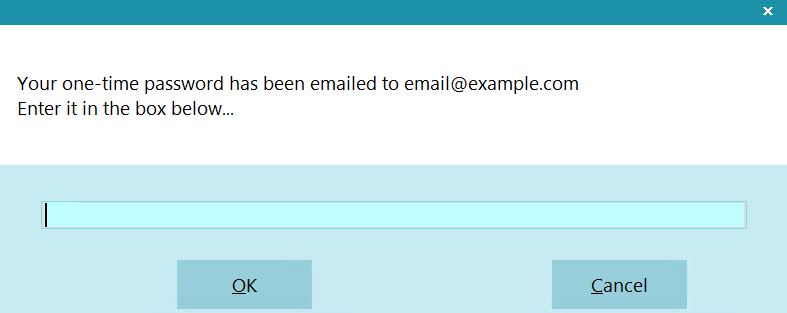
MFA Dialog Box - Password sent to Email

Description Of Switches
Enable MFA
If this switch is on, MFA will be enabled for the operator and the user will be expected to type in
an MFA code after signing in with the normal user name and password.
MFA Verified
This switch is turned on the first time they sign in with a valid MFA code. If the switch is turned
off a new secret will be generated when they sign in and they will be presented with a new bitmap
to scan. If the switch is on, their existing secret will be used to verify the MFA code they enter.
MFA Email
If this switch is on, an email will be sent to the operator with their one-time password. This
requires a valid email on the operator record and is meant as an alternative to the QR Code. This
requires Collect! to be setup for email and the operator record to have a valid email address.
Please see the Help topic How To Setup Sending Email In Collect! for more information.
Creating A Custom Email Template
By default, Collect! will send a plain text email with the validation code. The subject line will
read "Your <@cd.na> Verification Code" (EX: Your ABC Company, Inc. Verification Code).
You also have the option of creating an HTML formatted email with more text and your company brand.
There are 2 file naming conventions:
- mfa.html
- <@op.id>_mfa.html (EX: OWN_mfa.html)
Collect! will look for the file associated with the Operator ID first and if it doesn't find one,
it will use the default mfa.html file.
For instructions on how to create and edit the file, please refer to the Help topic
How To Edit The Style Sheets For Browser Reports for more information. The instructions reference
the Browser report file system.html, but the editing instructions are the same, particularly with
the <!End Header> and <!Start Footer> tags.
| 
Was this page helpful? Do you have any comments on this document? Can we make it better? If so how may we improve this page.
Please click this link to send us your comments: helpinfo@collect.org