How To Use Aliases
You can customize form titles and field labels in Collect! to suit the type of business you are in.
Perhaps you work a variety of account types. Each group of operators can have forms displayed with
labels that make sense to them. If you work in multiple languages, each language group may have
forms and fields displayed in its own language.
First, we will show how to use aliases to change field or form labels for all users. Then, we will
discuss changing labels for only certain user levels or operator groups.
We will change the Debtor form to "Medical Account" and the Debtor Name to "Guarantor" as shown below.
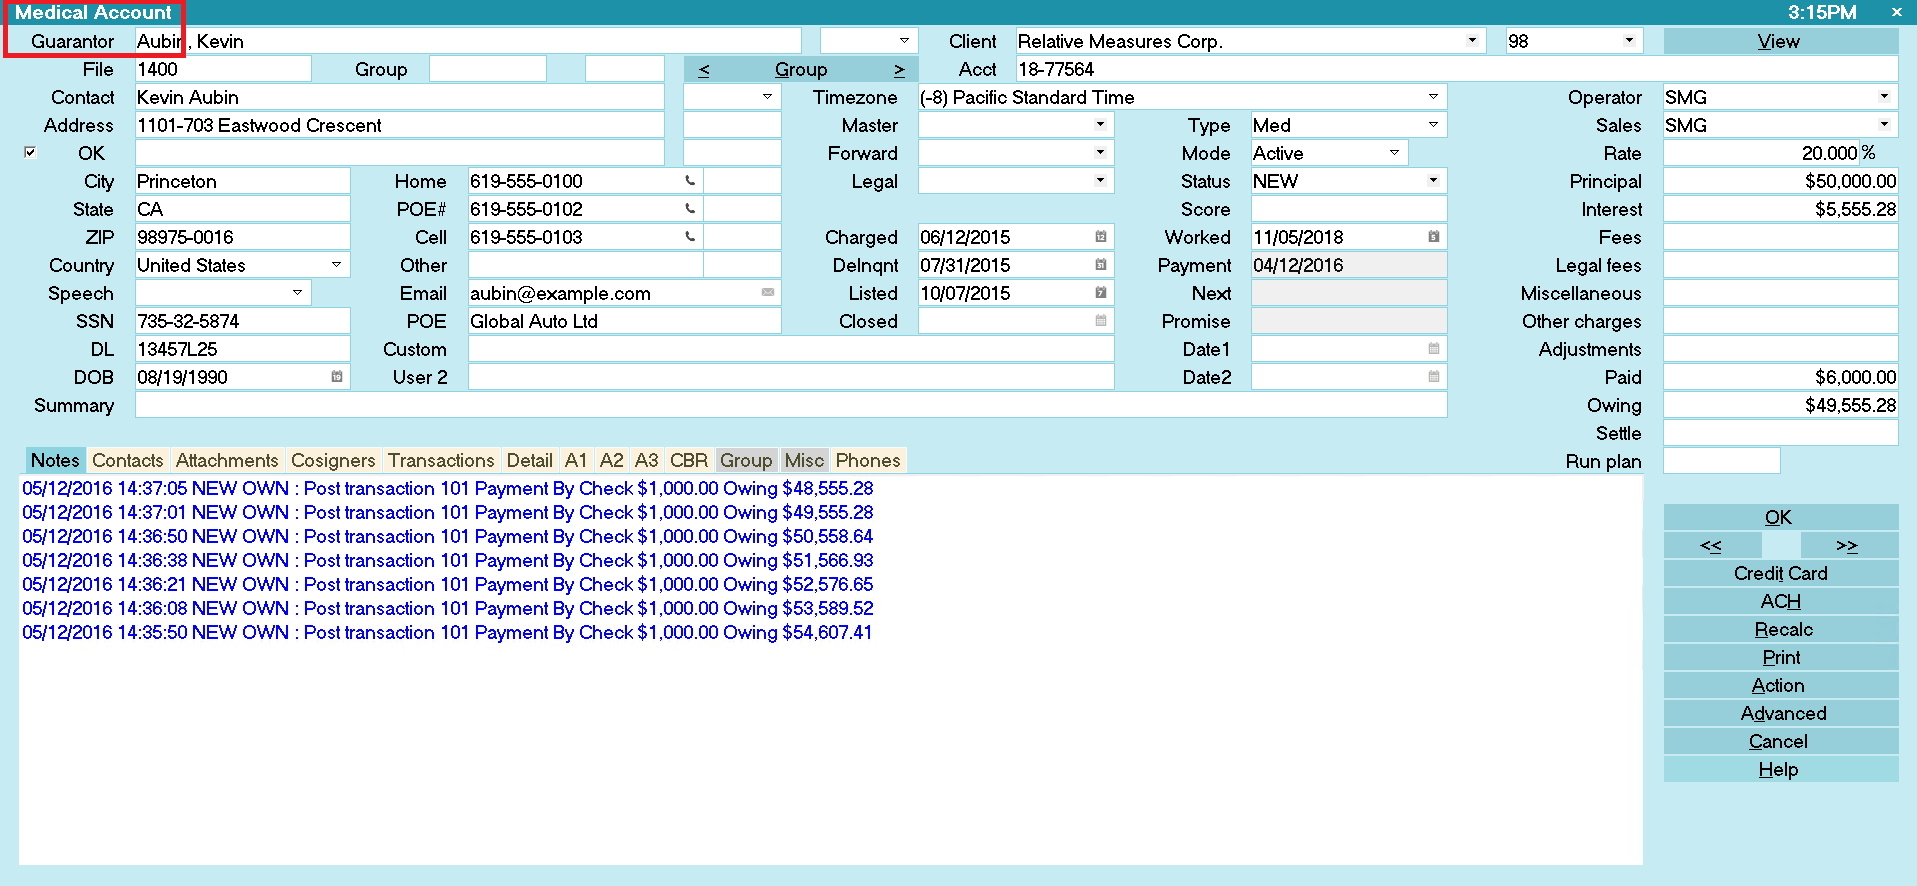
Debtor form showing Field and Form Aliases
Please be aware that User Level 99 cannot see Aliases.
 Please refer to How to Use Access Rights before making any alterations to your access rights
settings.
Please refer to How to Use Access Rights before making any alterations to your access rights
settings.
Change Field Label For All Users
To change a field label and apply the change to all of your users,
- Sign into Collect! at User Level 99.
- Tab into the field you want to edit so that it is highlighted in blue. For this example, we
are using the Debtor Name field.
- Select System from the top menu bar and then select Layout and Languages, Field Properties
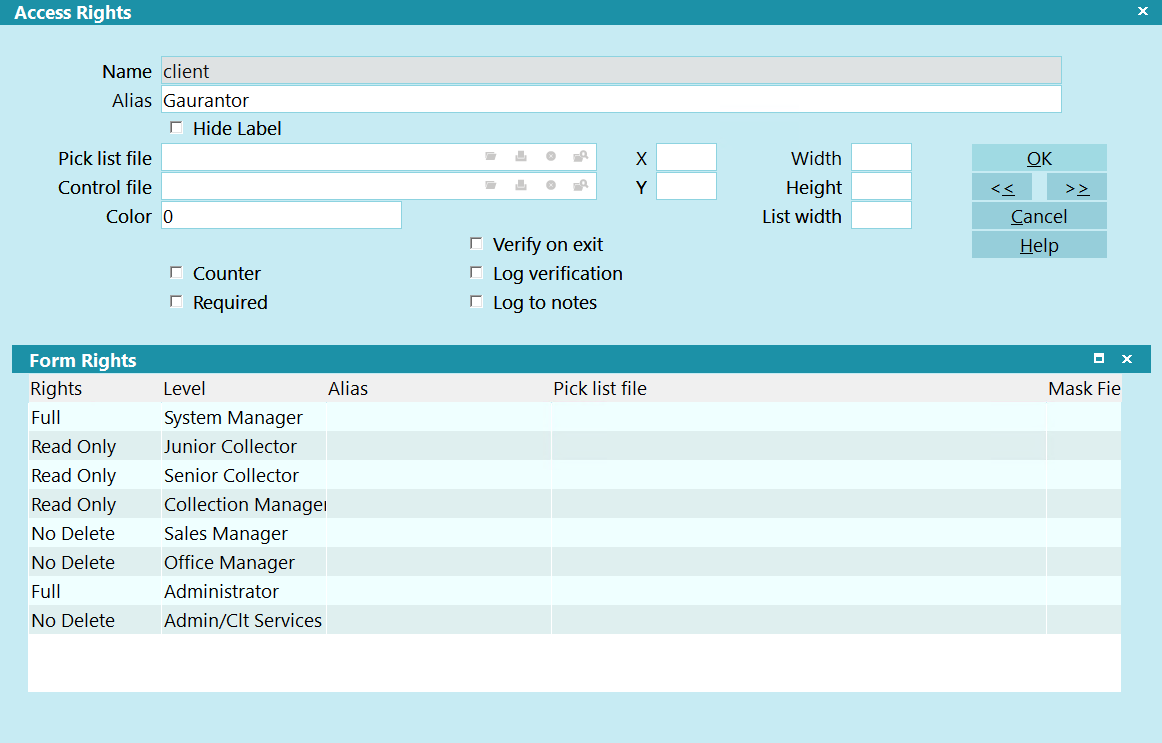
from the drop-down choices. The Access Rights form will appear.
- Check the field labeled Name in the Access Rights form to make sure you are
editing the correct field.
- Enter a field label name of your choice in the field labeled Alias. For this
example, we are using the Alias "Guarantor."
Access Rights with Field Alias
- Select the OK button to save the changes.
- After making changes to access rights, it is very important to rebuild rights. Select System
from the top menu bar and then select Rights, Access Rights. Select the REBUILD button to
update Collect! to recognize your changes.
 This change apply to all users. If you would like to change a field label for a certain User
Level only, do not change the Alias field on the Access Rights form, but use the Form Rights
sub-form instead as described below in the section entitled "To Apply Changes To Specific
User Levels."
This change apply to all users. If you would like to change a field label for a certain User
Level only, do not change the Alias field on the Access Rights form, but use the Form Rights
sub-form instead as described below in the section entitled "To Apply Changes To Specific
User Levels."

Change Form Title For All Users
You can use a similar method to change the name of the form you are viewing. To change a form label
and apply the change to all of your users,
- Sign into Collect! at User Level 99.
- Open the form you want to edit. For this example, we are using the Debtor form.
- Select System from the top menu bar and then select Layout and Languages, Form Properties from
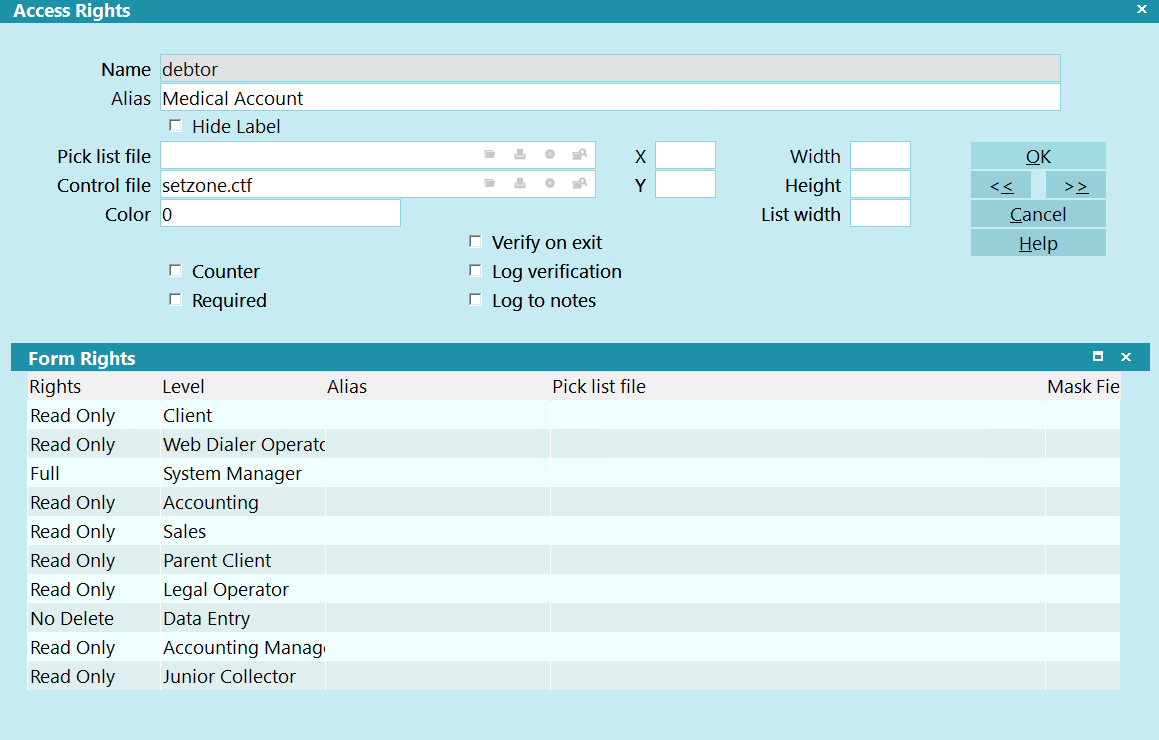
the drop-down choices. The Access Rights form will appear.
- Check the field labeled Name in the Access Rights form to make sure you are
editing the correct form.
- Enter a form name of your choice in the field labeled Alias. For this example,
we are using the Alias "Medical Account."
Access Rights with Form Alias
- Select the OK button to save the changes.
- Sign out and back in to see your changes.
This change apply to all users. If you would like to change a form title for a certain User
Level only, do not change the Alias field on the Access Rights form, but use the section
entitled "To Apply Changes To Specific User Levels."
To Apply Changes To Specific User Levels
There are two ways to change aliases and field labels for specific user levels. One is through the
Form Rights form and the other is through the Operator Level Rights form.
Set Alias Using Form Rights
- Sign into Collect! at User Level 99.
- Open the Access Rights form for the correct form or field that you want to modify. For this
example, we are using the Debtor form.
You may see one or more user levels listed in the Form Rights sub-form already. These are
user levels that the form or field properties already apply to. You can modify this list,
delete entries, or add new ones.
- Check the field labeled Name when the Access Rights form is displayed to make
sure you are editing the correct form or field.
- Click into the Form Rights sub-form. If there are no entries in it already, you will be
prompted to create one. Choose YES to open the Form Rights form. You can also open this form
by selecting an existing entry in the list, by pressing the NEW button on the form, or by
pressing F3.
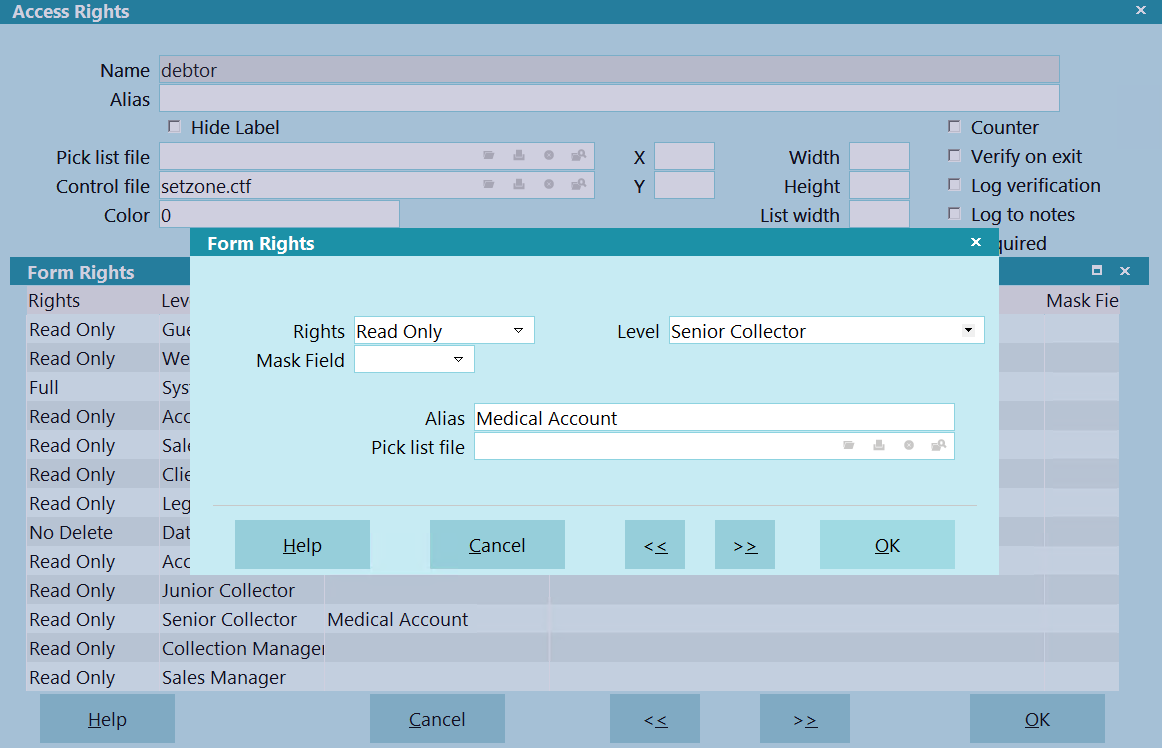
- Press the down arrow next to the field labeled Level and select the User Level
you want to see your modified field labels. For this example, we are selecting Senior
Collector.
- In the field labeled Alias, type in the alias or field label that you want
this User Level to see when they are signed into Collect! For this example, we are using the
Alias "Medical Account."
Form Rights with Alias
- Leave the other settings as they are for now and press OK or F8 to save your changes and
return to the Access Rights form. Now you will see this User Level displayed in the Form Rights
sub-form.
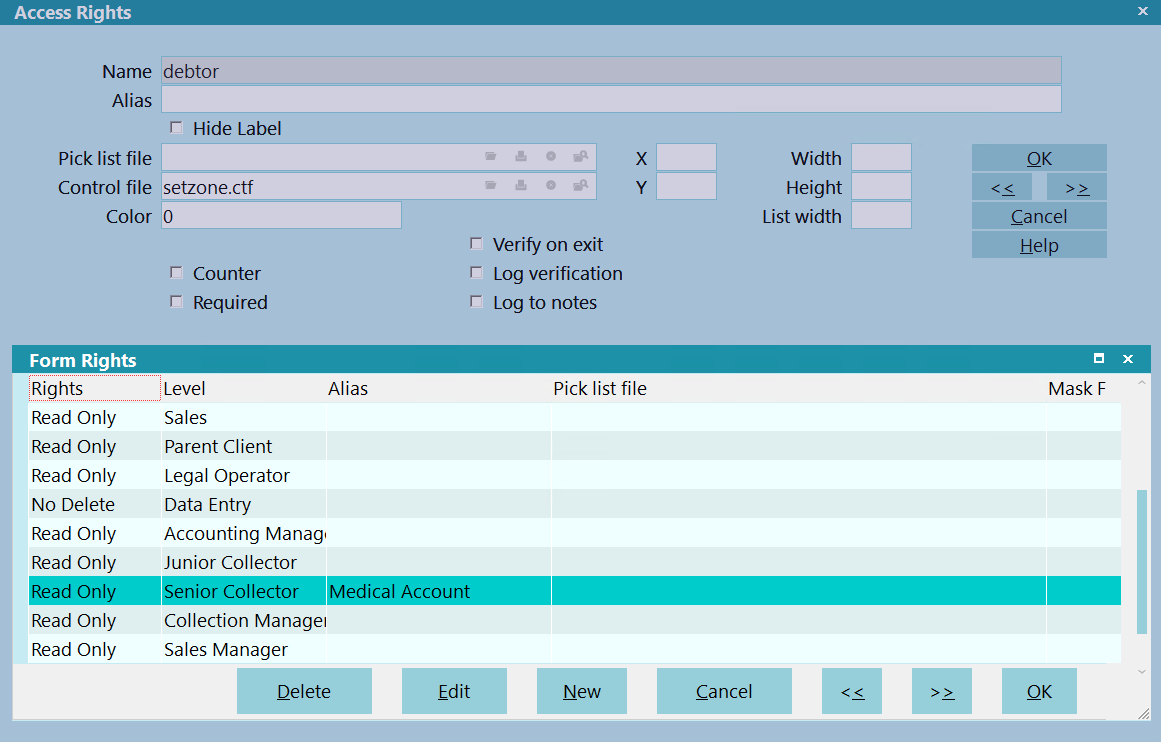
User Level displayed with Alias
- Press the NEW button again, or select from the Form Rights list, if you want to enter an Alias
for this form or field for another User Level.
- When you are finished, press OK or F8 to save your changes.
- Sign out and back in to see your changes.
You must sign out of Collect! completely, returning to the Desktop, whenever you change to a
different User Level, or some of the rights from the previous level that you were signed in
as may still be in effect.
This method allows you set an alias for a particular operator level or group of users.
If you wish to use aliases for several or all user groups, you should use the methods above
to change the form title or field label for ALL users. Then any user level that has access
to these forms or fields will see the alias that you have set.
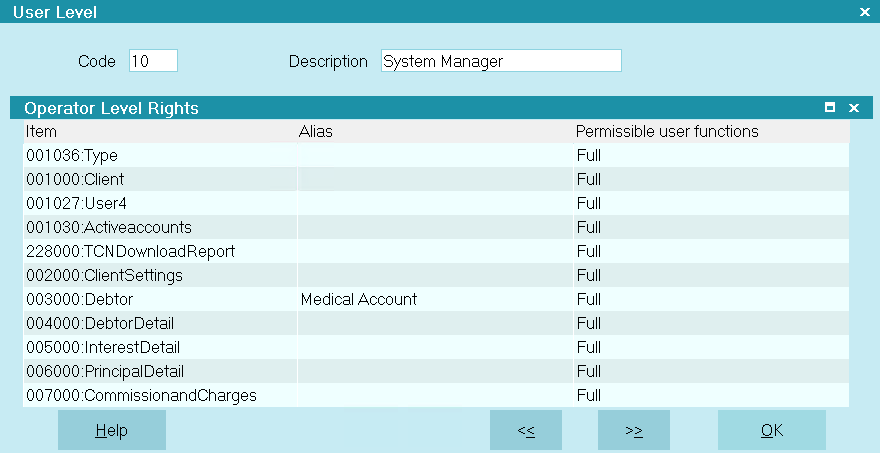
- Sign into Collect! at User Level 99.
- Open the User Level form for that you want to modify. For this example, we are using Level 10,
System Manager.
You may see one or more operator levels listed in the Operator Level Rights sub-form already.
These are forms and fields that have properties set specifically for this user level. You can
modify this list, delete entries, or add new ones.
- Check the fields labeled Code and Description when the
User Level form is displayed to make sure you are editing the correct level.
- Click into the Operator Level Rights sub-form. If there are no entries in it already, you will
be prompted to create one. Choose YES to open the Operator Level Rights form. You can also
open this form by selecting an existing entry in the list or by pressing F3.
- Ensure that the form or field displayed in the field labeled Item is the item
that you want to modify. For this example, we are selecting the Debtor form as the item we
want to modify.
- If you are creating a new entry, select the down arrow next to the field labeled
Item to select the item from the list of all forms and fields.
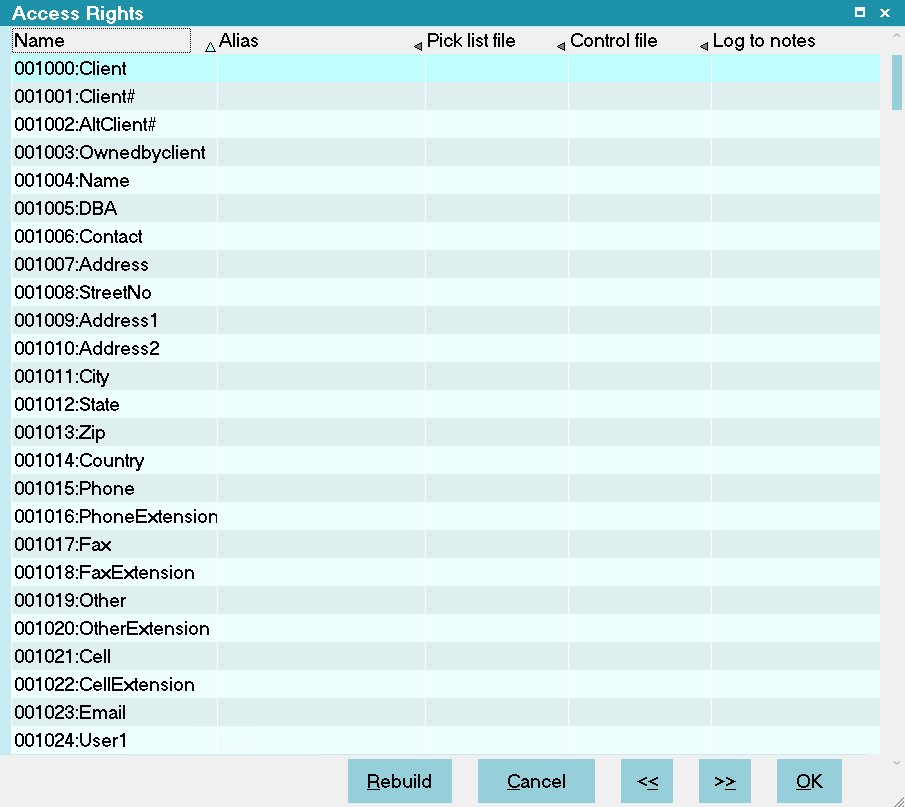
Forms and Fields list
Be sure to scroll to the correct item in the list. We are using the Debtor form. Notice that
this is number 003000.
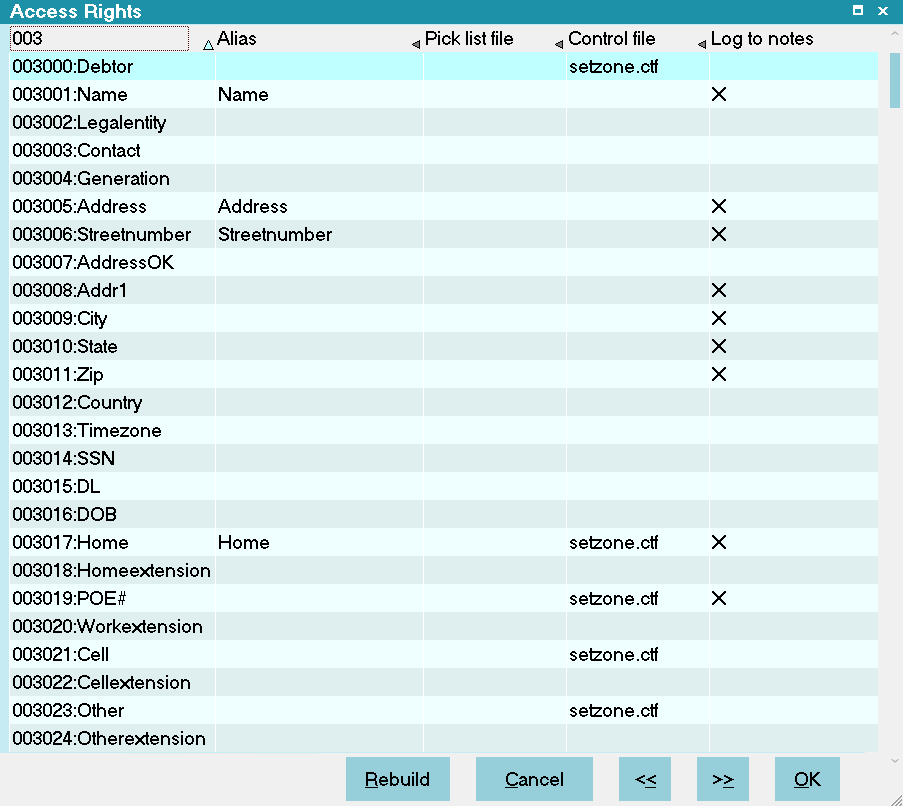
Debtor form entry in Forms and Fields list
- In the field labeled Alias, type in the alias (form title or field label)
you want operators assigned to this User Level to see when they sign into Collect! For this
example, we are using the Alias "Medical Account."
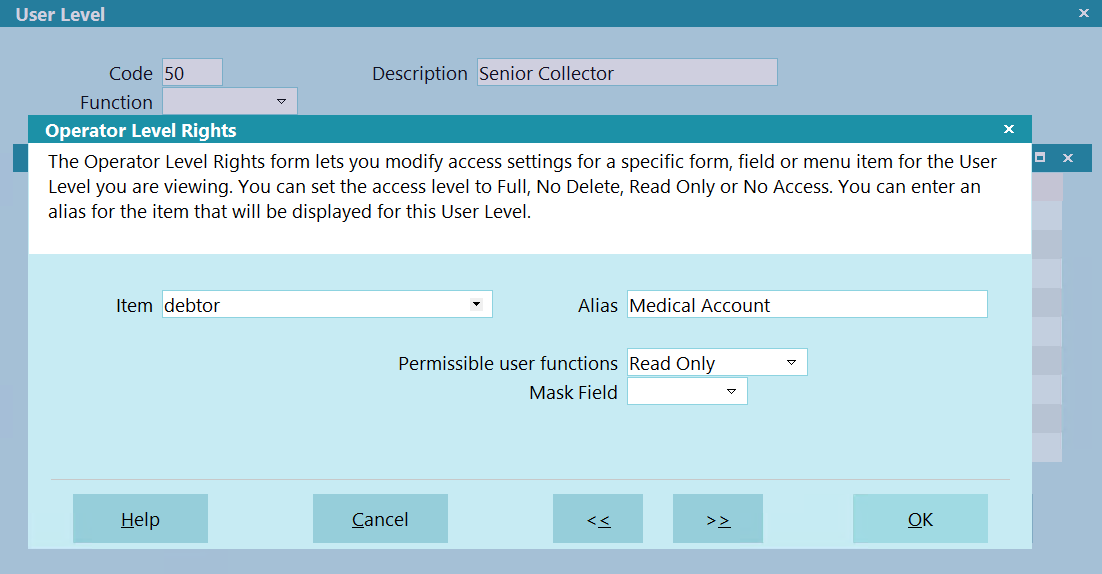
Operator Level Rights with Alias
- Leave the other settings as they are for now and press OK or F8 to save your changes and
return to the User Level form. Now you will see this item displayed in the Operator Level Rights
sub-form.
User Level with Alias
- Press F3 again, or select from the Operator Level Rights list, if you want to make changes to
another form or field for this User Level.
- When you are finished, press OK or F8 to save your changes.
- Sign out and back in to see your changes.
You must sign out of Collect! completely, returning to the Desktop, whenever you change to
a different User Level, or some of the rights from the previous level that you were signed
in as may still be in effect.
You can also use a control file to change the field label according to conditions that you
set. This is beyond the scope of the present topic. Please refer to How To Use Control Files
for more information.
Changing A Field Width To Show A Label
You can also create a label for a field that normally does not have a label, provided you make space
for the label to display. This example shows you how to make the Name field narrower, so that you
can show a label from the Legal Entity field.

Default Layout for Name and Legal Entity
- Right-click on the Legal Entity field and choose Properties to display the Access Rights
form.
- Give the field a label.

Giving the Legal Entity an Alias
- Now we need to make the Name field display narrower so that the label shows. This does not
shorten the actual field. You can still enter a long name. It just narrows down the
display.
- Right-click on the Name field and choose Properties to display the Access Rights form.
- Put the number "27" in the Width field.

Giving the Name a Custom Width
Now when you return to the Debtor form, you can see the label for the Legal Entity field.
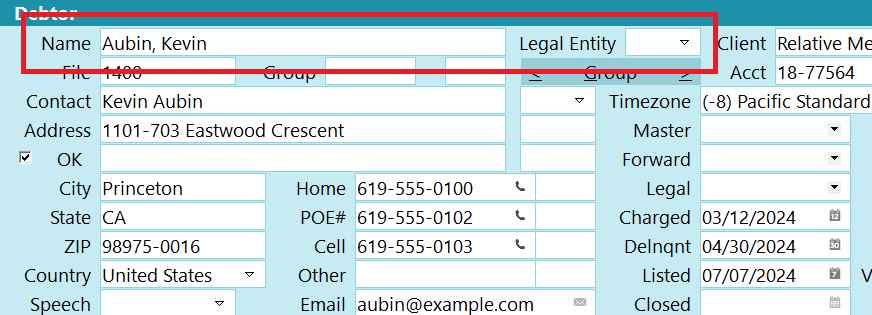
Debtor Screen Shows Legal Entity Label
These steps may be applied to other fields as needed.
Summary
Form and field labels can be customized easily, giving you endless possibilities for fine-tuning
Collect! to suit your needs. You can change aliases for all users or particular user levels. You can
also display labels for fields that do not have a label, provided you do the additional steps for
making space to show the label.
| 
Was this page helpful? Do you have any comments on this document? Can we make it better? If so how may we improve this page.
Please click this link to send us your comments: helpinfo@collect.org