User's Guide - Working Accounts
This user's guide is an orientation to familiarize
all Operator types with Collect! basics.
Starting Collect!
Once you have launched Collect!, you will see the splash
screen below.
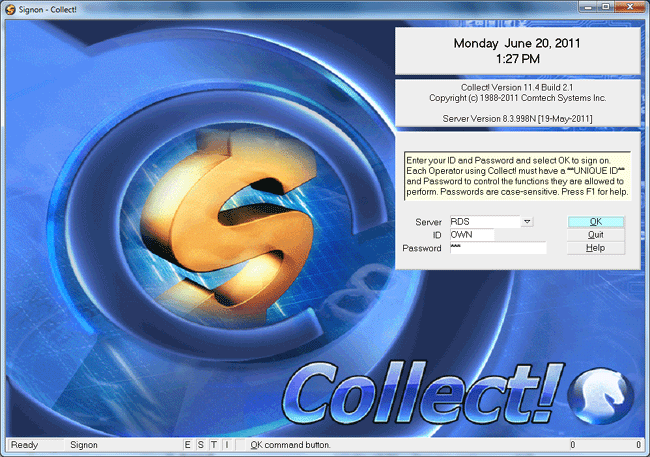
Collect! Splash Screen
Enter your login credentials in the ID and Password fields
indicated.
IDs display as block capital letter entries irrespective
of how you input the ID. Passwords are case sensitive. If
you get an 'invalid' message, check your cap-locks and retry.
Depending on your site's preferences, your password may be
all lowercase, uppercase or a mixture of cases. Your entry
must match exactly.
When you have entered your login credentials, you will be
advanced to the Welcome screen.
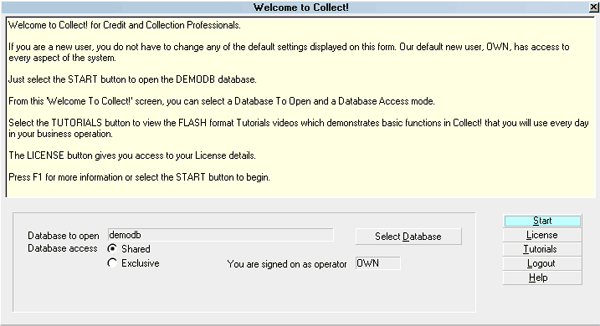
Welcome To Collect!
Click START to enter the program.
Your Operator Type and User Level will determine what screen
you are presented with next. Administration/Data Entry/Management
see a Main Menu screen while collection personnel are navigated
directed to their WIP windows.
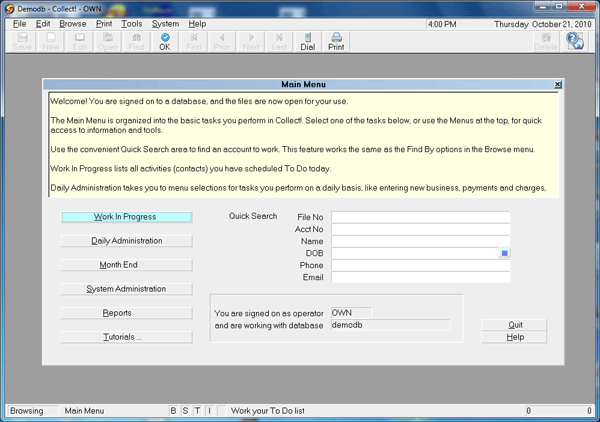
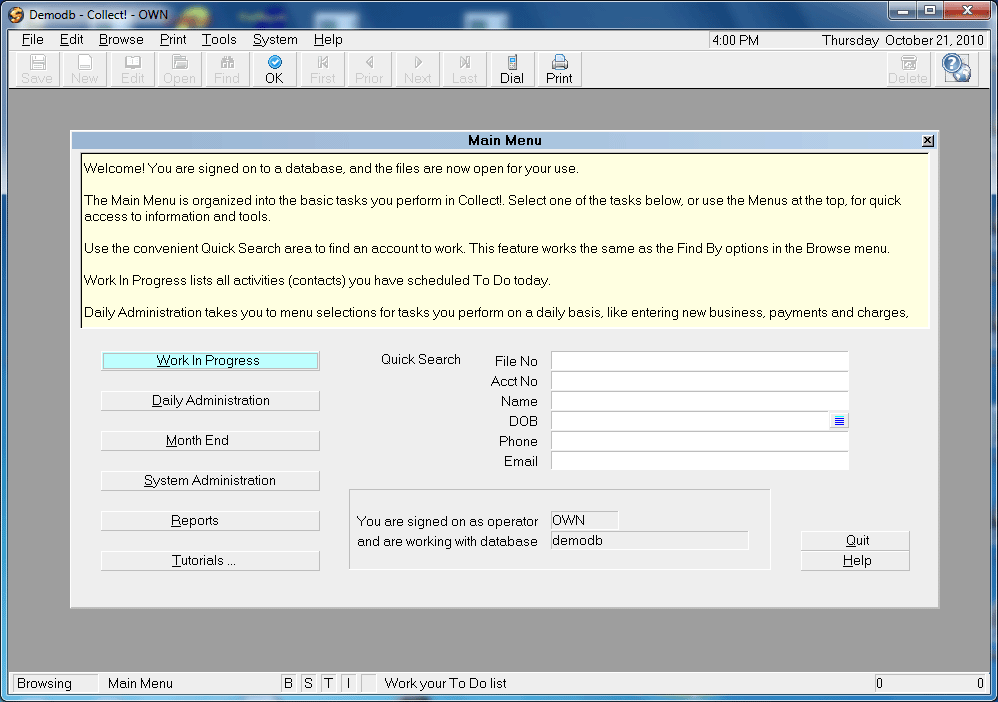
Main Menu
The choices in the Main Menu are described in the User's
Guide - Administration.
Work In Progress
For collection personnel, the WIP screen provides all-points access
necessary to work their accounts.

Daily Collection Activities
As your WIP list is generating, it will be gathering all accounts
which have a scheduled, In Progress contact associated with
your Operator ID which is dated for the current day PLUS
anything which you had in Priors (dated prior to current but not
yet worked).
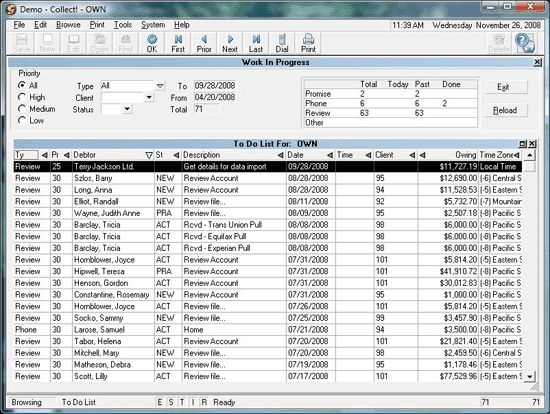
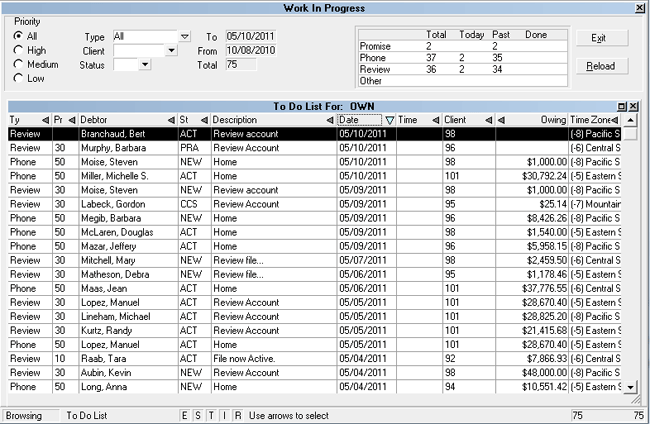
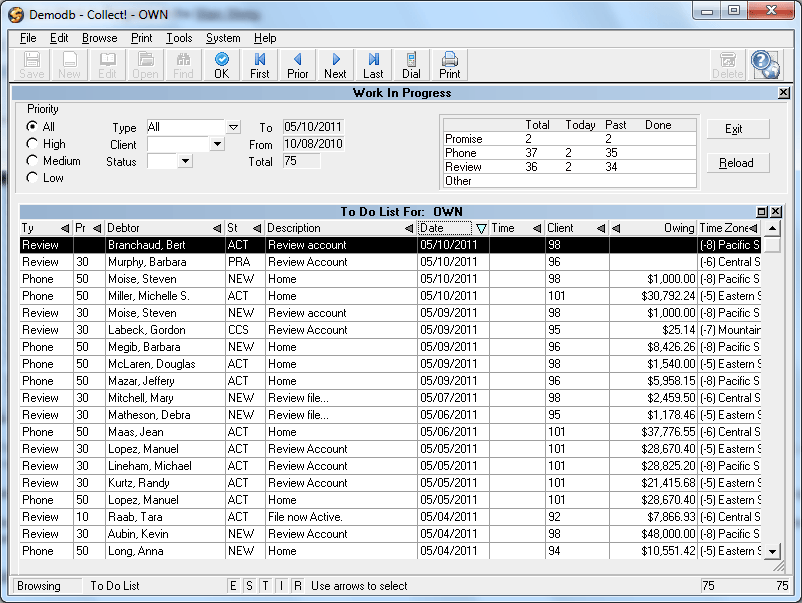
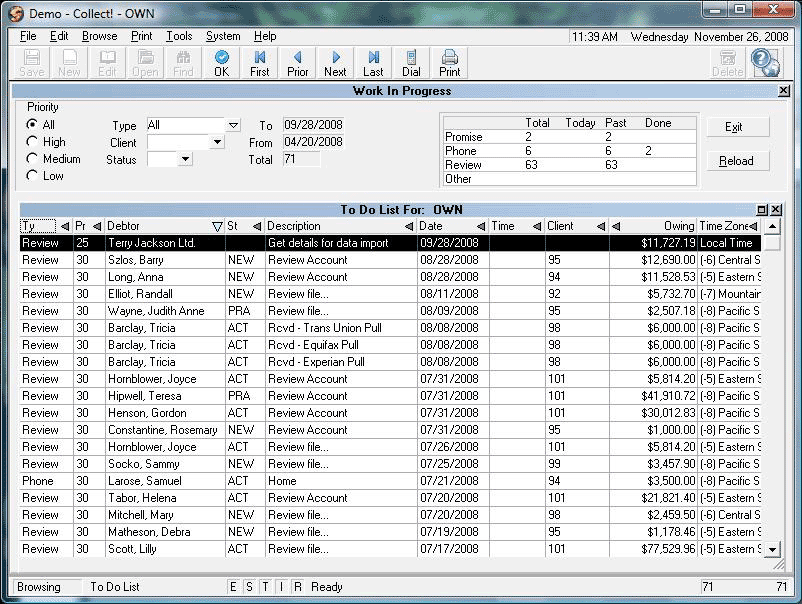
Work In Progress To Do List
Entering The To Do List
The list displays contacts scheduled to be worked today. It is
called your " To Do List." What you see in your list depends on
how your office as configured your WIP settings. Typically, it
is contact event types Review, Phone, Promise and Other which are
used to build a collector WIP list.
The following describes the significance of the screen features
and options available to you.
TO DO LIST COLUMNS
Collect! ships with default list views, meaning the columns
being shown and order they appear in are general. A highly
popular feature in the software is the ability to customize your
list views to present you with the information that is most
relevant to you and restructure the column order to meet your
own preferences.
By right-clicking your mouse on the column header row, you
will be presented with the options of adding or removing
columns from your view. You can also click into the label of
a column to expand or narrow the width to suit your view as well
as drag-and-drop the column to a different position in the column
order.
The same capability to modify list views exists for most browse
lists in the system.
Any columned list in Collect! which shows you it has a triangle
on the right end of column label is an indicator that you may
sort that column in ascending or descending order by clicking your
mouse on that triangle.
In the upper portion of the WIP screen, you will see a series of
radio buttons and drop-down picklist menu options. These are your
Filtering options. By making selections within these pick lists,
your WIP will regenerate, showing only those accounts which meet
the selected criteria.
For collections personnel, these sub-WIP tools allow for strategic
working of accounts. For administration and management, these tools
provide easy access to desk counts and inventory breakdown data for
operations monitoring and metrics.
Type is the kind of contact event that you
have scheduled; Phone, Promise, Review, or Other.
Priority is a value from 1 to 99 that indicates
how urgent you designated this contact event to be. It may be used
to further sub-WIP your accounts within the same Type. For example,
a Priority 99 can be used to alert you to handle this right away,
while a 20 may indicate non-primetime hour attention.
Debtor is the name of the debtor whose
account the contact refers to.
Status is the Status on the debtor's account.
Description is what you have typed into this line
when the contact event was created. Collectors can use this as their
'next step' note to themselves to negate redundant noteline review
each time an account is scheduled to be worked. Events scheduled
by automated processes will have a generic description which is
associated with the Contact Plan that was used to insert the event.
For example, your office may have " New Business - Work Account" in the
description line of Review contacts created when new listings are
entered. Phone events do not permit free-form description entry; they
require selection from a picklist of which phone you plan to dial on
your next contact.
Date is the scheduled work date.
Time may be used to time queue an account. Use
this feature to meet a specific request for call-back, night calls
and when you are endeavoring to adhere to attempts at different times
of day standards in your workplans. It is important to NOT time queue
every account on your desk. This may cause non-timed accounts to
be left unworked due to the over-queuing of timed calls.
Client is the Client Number for the debtor's
account.
Owing is the Balance on the debtor's account.
Timezone tells you which of the timezones that
debtor account is located in on the basis of area code on the
phone number(s). Use Sort in this column to assist you in
making the most efficient use of legal calling hours. For example,
if you are located in a Pacific timezone, you can start Eastern night
calls by sorting your timezone column for Eastern accounts anytime
after 3pm in your local timezone.
Debtor Screen Basics
Viewing Account Information
The Debtor screen contains all known information about the
debtor since it was received by your office. The upper portion
of the screen contains the tombstone details and demographic
contact information known about the account. The upper right
corner identifies which client this debtor owes. Below the
client information and client account number, you will see the
financial summary information down the right side of the screen.
This shows you to-date totals of what is owing in any of principal,
interest, costs and also a total of what has been paid to-date, if
applicable.
The Tabs running horizontally in the lower part of the screen are
separate sub-folders associated with the account. When a tab is
grey in color, there is nothing in it. When it is yellow, see this
as the 'light is on' and something is in there to be viewed.
Any tab which opens with 2 small square buttons in the upper right
corner of the tab display is a window which may be expanded to
full screen size by clicking on the square. The tab contents will
return to regular size when you click the square a second time. You
may exit the tab view by clicking the "x" to close it or by pressing
your Esc key.
In addition to the Tabs, there is further information on the account
which may be viewed by clicking into fields of selecting from the
bank of buttons in the lower right corner of the screen, beneath the
OK button.
Any screen you enter may be exited by clicking an associated "x" in
the corner of the pop-up window or by pressing your Esc key. In other
views, you may be prompted to acknowledge a pop-up by clicking an OK
button or clicking on a choice for Yes (or No).
Actions you can take on a debtor screen include review all existing
information, add notes, add payment plan, post a payment, establish
your next work date by adding a new contact event, update address
information (depending on your User permissions), update status,
send a letter, send an internal request to a coworker or manager
via contact event, or run a contact plan to invoke one or more
events.
Navigation around the screen is via your mouse point/click or if
you prefer keyboarding, you can use your Tab key to migrate from
field to field on the screen.
Viewing Debtor Notes
A complete set of notes on the debtor may be viewed by selecting
the Notes tab on the Debtor screen. Click into the Notes area. In
addition to the tab window expansion, if you are presented with a
scroll bar on the right of the tab display, then there is additional
information which you can't currently see because it doesn't fit in
the regular/contracted tab display size. Use the scroll bar to page
down through additional information if you do not wish to expand the
tab display to full screen.
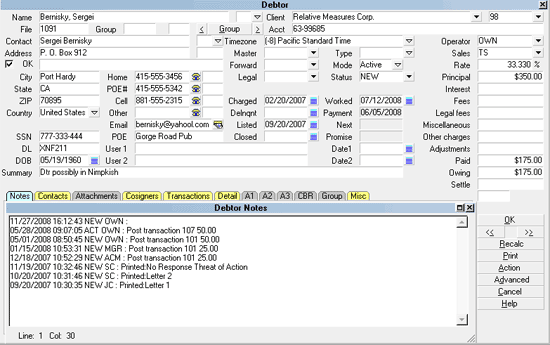
Typing Debtor Notes
Unlimited notes may be entered either free-hand by clicking into
the Note tab body area, you will be presented with a prefilled
date/time/user ID stamp and a flashing cursor waiting for you entry.
It is also possible to enter notes via action/result contact plans
which your office may set up to eliminate redundant noteline entry.
For example, a Contact Plan action/result code could be defined to do
all of auto-write a noteline such as "Tel Res - NA" for you as well as
update your account status code from NEW to ACT once it has been worked.
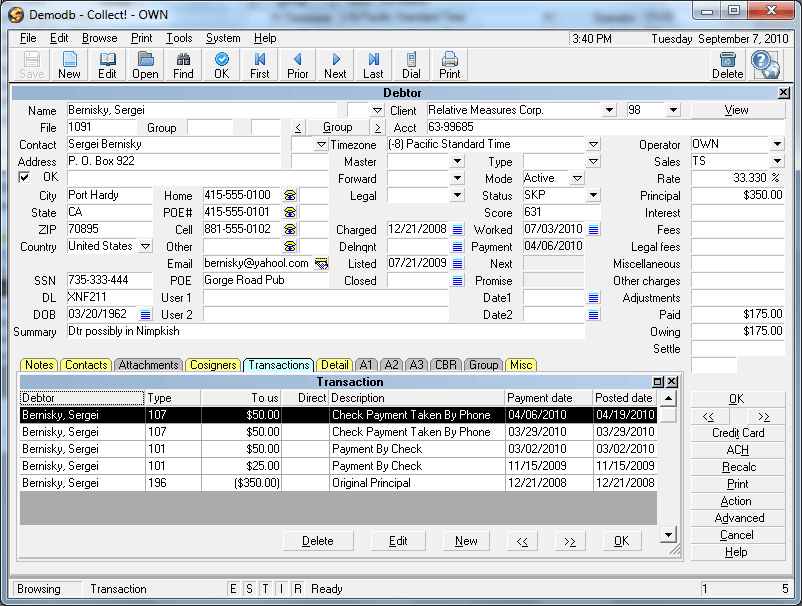
Viewing Payment History
Select the Transactions tab to view a list of individual payments
made as well as any charges levied on this account. Click into the
Transactions area and scroll down to view the entire list of line
entries, or, expand the window to full screen by clicking the square
in the right corner.
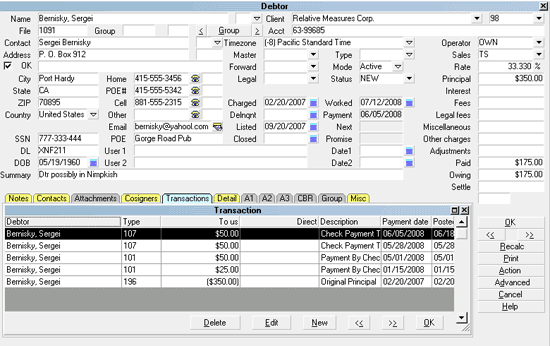
Debtor Payment History
Summary payment information may be displayed by clicking into the Owing
field on the main debtor screen to obtain the Debtor Financial
Summary pop-up. This window shows you totals for original amount(s),
paid amount(s), accrued amount(s) for interest/ other costs or charges,
arriving at the balance owed and displaying this with a breakout into
the balance component parts.
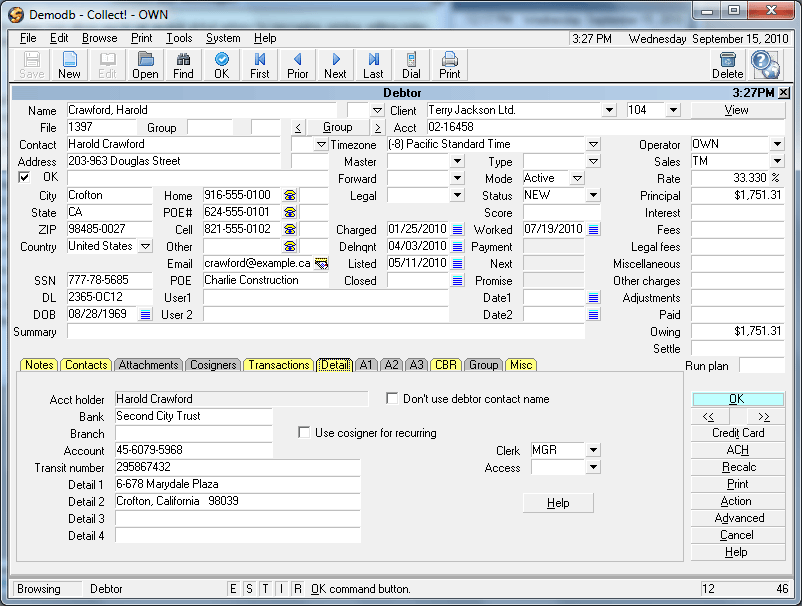
Viewing Additional Account Information
Additional information pertaining to the account is stored in the
Detail, Attachments, Cosigners, Credit Bureau, and Group tabs.
Select the Detail tab to enter bank account information.
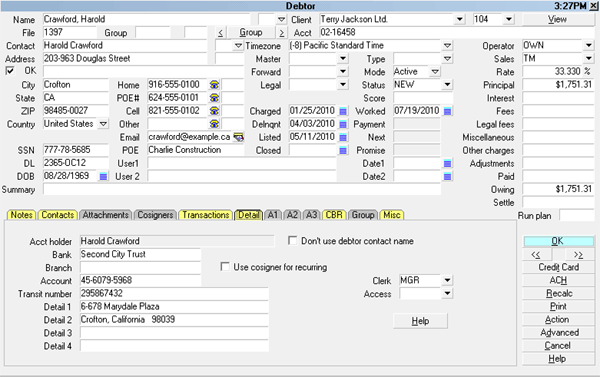
Debtor Detail
Select the Cosigner tab to enter either additional responsible
parties on the debt AND use this feature to store associated information
such as employer, attorney, references, next of kin, spouse (not
responsible), alternate or previous address details, and alias names.
Utilizing the window Class and Type descriptors allows you to set up
as many windows as you need for each account to store relevant data.
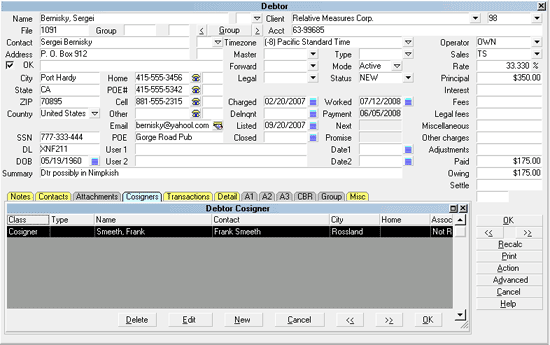
Debtor Cosigners
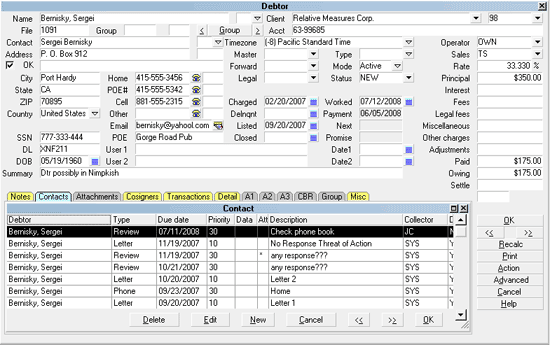
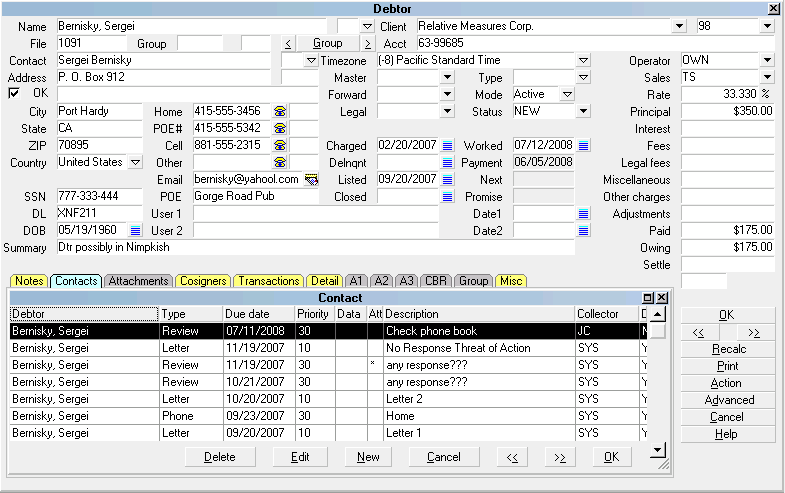
Viewing Contact History
Select the Contacts tab to view a list of all contacts for
this debtor. Within this tab you will see the full complement of
events which have taken place on this account including letters sent,
how many updates have been sent to the Credit Bureau (if applicable)
as well as all collector and manager events completed.
If you need to see the contents of any letter sent, highlight the
letter event of interest and click on it to open. In the line
labeled "Attachment", you will see the word [METAFILE]. This means
there is an image of the letter and what it contained exactly as it was
sent on the indicated date that the contact event was completed.
Contact Schedule
From a WIP list, you will select a contact event to work and click on
it to open the file.
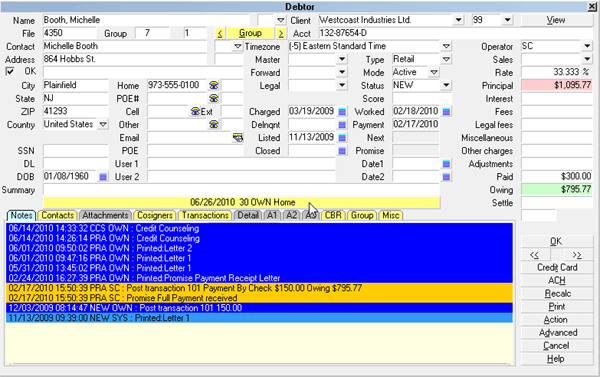
WIP Scheduled Debtor Account
The yellow bar beneath the "Summary" field displays
information from the contact event you selected from your WIP
list. The reason for this is two-fold; (a) it saves keystrokes
in that you do not need to stop to open your Contact tab and
(b) it identifies exactly which contact item you selected in
the event that you have more than one scheduled contact with
the same work date on the same debtor account.
When you have completed all the work you wish to do on this
account today and are ready to advance to the next account
in your queue, you need to do 2 things before advancing. Each
site will make an individual decision as to how they want
contact events to be managed; voluntarily or by automatic
prompt. Please see your management to find out which process
you should follow:
If your office is using WIP Option "Always show next contact
when" switch checked On:
1. After selecting and working your WIP account, click the
right pointing arrow key (under the OK button) to advance to the
next account. You will receive 2 pop-ups. The first will ask
you to choose between marking the current contact event done,
leaving it in your WIP or staying on the account. If you are
done, proceed to step 2.
2. Click the Mark it Done button.
3. You will immediately be presented with the second pop-up
which will be the item you need to setup your next work date
by assigning a new contact event with a new date to be worked.
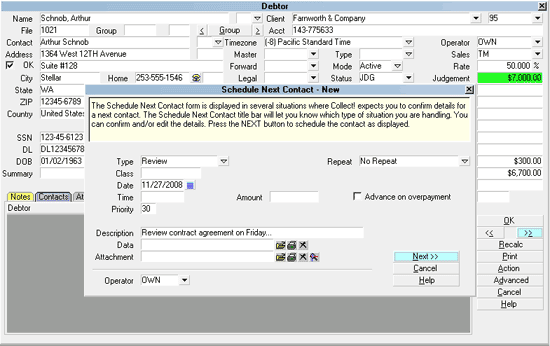
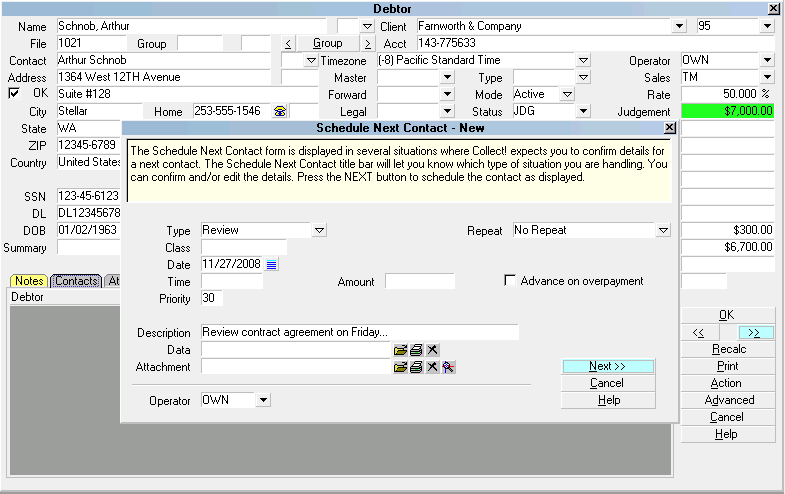
Schedule the Next Contact
If your office has not using the "Always show next contact
when" feature:
1. Click into the Contacts Tab, and then click the New button or
F3 to generate a fresh event window to set your next work date.
Choose the contact Type and Date for your next event and enter
your 'next step' Description, if applicable.
2. Click the double arrow button pointing right under the OK
button on the main debtor screen. You will receive another pop-up.
3. Choose whether to Mark it Done, Leave it in WIP list or
Stay on Account. If you are ready to advance to the next file,
and you do not need to return to this account for any reason
today, choose Mark it Done. If you need to return to it today,
click Leave it in WIP list. You will then be advanced to the
next account or back to your WIP list itself.

Prompt to Complete the Contact
4. Click the double arrow pointing right to advance to
the next account in your WIP list.
Schedule the Next Contact
It is necessary to enter a next work date contact event.
Accounts which do not have an In Progress contact scheduled
no longer appear in a WIP list and become an 'orphaned'
account. Orphaned accounts can be located and sent back
to the current collector's WIP or an alternate operator's
ID by running an internal inventory management report that
will insert a current dated Review event with a Description
of Forgotten.
 We recommend that each site run the Orphaned
Account Search report weekly. It is located
in the menu path "Tools\ Utilities".
We recommend that each site run the Orphaned
Account Search report weekly. It is located
in the menu path "Tools\ Utilities".
Letters On Demand
While administration/clerical departments will be looking
after scheduled letters to be printed, collectors may have
occasions where outputting a letter must be created/printed
immediately.
Printing a single letter on a specific account right away
is accomplished in these easy steps:
1. The account to receive the letter needs to be on your
screen.
2. Depending on personal preference and user level, there
are two ways to access the Print menu: (a) by clicking
the Print button in the lower right hand corner where
the OK button is located, or (b) by clicking the drop-down
menu Print from the top of the screen and selecting the
option Reports and Letters.
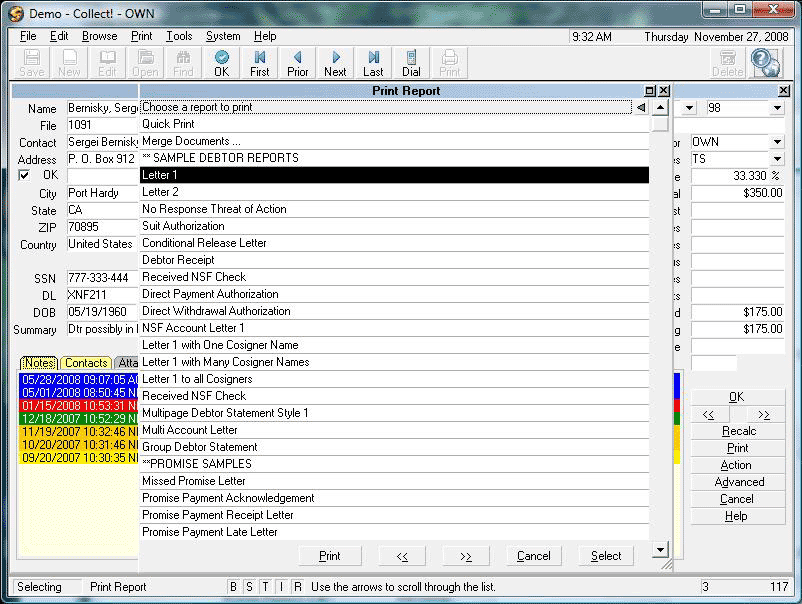
A list of available letters/ reports is displayed.

Printing a Letter Immediately
3. Select the letter you want to print and either click on it or
press the Enter key. You will get a pop-up to launch the print
task as follows:
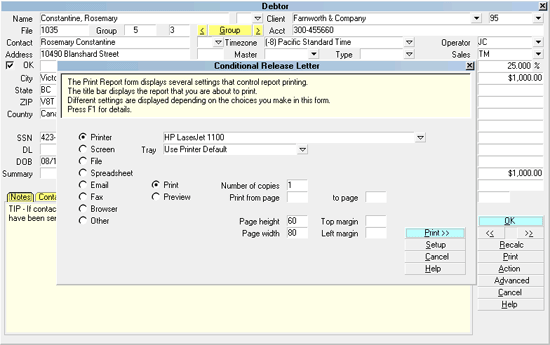
Print Window
The configured default printer name will appear as the
device your letter is going to be sent to. To select
a different network printer, click the drop-down arrow
at the end of the field displaying the printer name an
select which device you wish to have the print job sent
to.
4. Click the button labeled Print>> and your letter will
be sent to the chosen printer to be produced.
If you have opened the Print Menu and can't see
any of the debtor letters you expect to
see, then you are likely in one of the
associated account Tabs and not really on
the main debtor file. The solution is to
exit the Print Menu, click into the background
in the upper portion of the debtor account
display to re-establish your location in the
system and retry clicking Print. This time
you should see debtor related reports/letters
in the menu listing.
All reports and letters have a designation of where in the
system they may be initiated from. For example:
Anywhere - a report which may be run from any
part of the system.
Debtor - must be run from a debtor list or an
individual debtor file.
Client - must be run from a client list or an
individual client.
See Also
- Topics Collections
| 
Was this page helpful? Do you have any comments on this document? Can we make it better? If so how may we improve this page.
Please click this link to send us your comments: helpinfo@collect.org