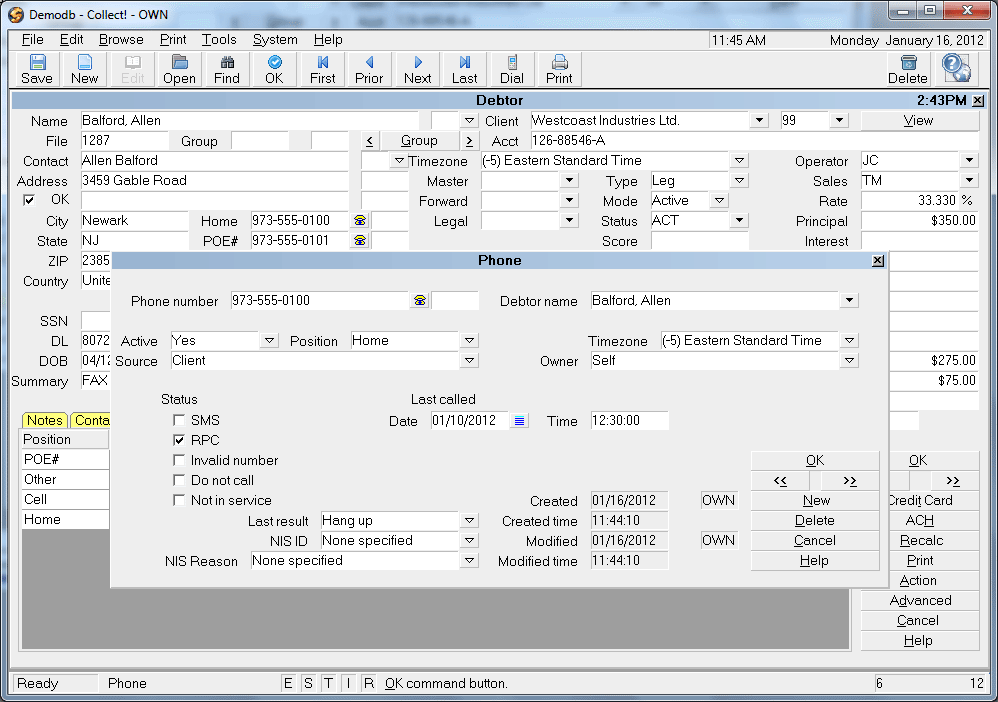
Phone
The Phone record stores information about each phone number
related to your Debtor accounts. You can store as many phone
records as needed. Active numbers can be transferred to the
Debtor screen to display to the end user in one of Collect!'s
Debtor phone fields. Whenever you type into a phone field on
the Debtor screen, Collect! will create a new Phone record if
one does not exist for the phone number you are typing.
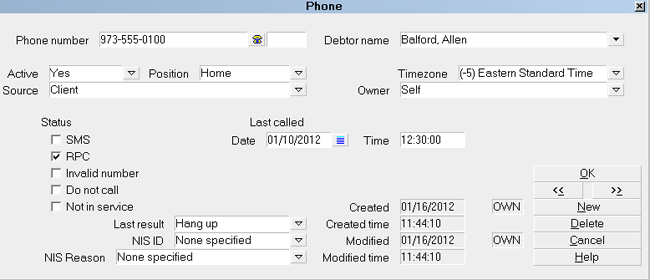
Phone Record
Whenever you update an existing number in a phone field,
including adding or changing an extension, Collect! will
create or modify the Phone records as needed.
When you leave a Phone record or tab out of a phone field
on the Debtor, the Phone Record list is sorted with all the
ACTIVE = YES at the top, sorted by "most recently modified,"
then all ACTIVE = NO sorted by "most recently modified."
Phone Number
Enter the Phone number. The maximum number of
characters can be 23. Many formats can be used. Be
consistent throughout the database when entering
phone numbers. You can easily manage the format if
needed to be shown differently.
 You can switch ON 'Only numerics in phone
fields' in Screens and Messages to
remove any non-numeric data from your
phone fields.
You can switch ON 'Only numerics in phone
fields' in Screens and Messages to
remove any non-numeric data from your
phone fields.

Extension
Enter the Phone extension, if needed. This fields holds
up to 5 characters. Whenever you update an Extension
field for one of the Phone numbers on the Debtor screen,
Collect! will automatically update the Phone record as
well.
Debtor Name
This field contains the name of the Debtor attached to
this Phone record.
Active
This field tells you if the phone number is an active number.
It is used with the field on the Debtor screen that matches
the value displayed in the "Position" field. You can change
the value to "No" if this is not an active number.
 If you switch this to "No" Collect! will clear the
number from the corresponding field on the
Debtor screen. Further details can be recorded
in other fields on this Phone record.
If you switch this to "No" Collect! will clear the
number from the corresponding field on the
Debtor screen. Further details can be recorded
in other fields on this Phone record.
You may need to tab out of the Phone field on the
Debtor screen to see it clear when you set
Active to NO.
Position
This is the position on the Debtor screen which this
Phone number applies to. The four choices are Home,
POE, Cell and Other. If the Phone number is not
displayed on the Debtor screen, select "Not on main
page."
Timezone
This field displays the Timezone for the
Phone number.
The control file that manages Debtor
timezones is called setzone.ctf and is stored
in your "\CV11\masterdb\control" folder.
As of version CV11.6.2.1, control files to
set timezones for Cosigners/Other Parties and
record items stored in the Phone tab are available
for download from the Member Center. They are
DCsetzone.ctf and PHsetzone.ctf, respectively.
If you are not currently a Member, contact
Administration at 250-391-0466 option 3 for pricing.
Source
This field may be used to hold information about where
the Phone number was obtained. Several default values
are supplied but the pick list may be modified as needed.
Owner
This field may be used to specify a relationship of the Phone
number to the Debtor. Several default values are supplied
but the pick list may be modified as needed.
Status
This area displays check boxes that may be used to
add details to the phone number displayed in this
Phone record. These options can be used in reports
and searches.
SMS
Select this option with a check mark if this phone number
can be used for SMS text messaging.
Rpc
Select this option with a check mark if this phone number
is a right party contact. This information is displayed when
you view the Phone list from the Debtor.
Invalid Number
Select this option with a check mark if this phone number
is not a valid number.
Do Not Call
Select this option with a check mark if there is a Do Not Call
order on this number.
Not In Service
Select this option with a check mark if this phone number
is not in service. You can select further options for explaining
your choice in other fields on the Phone record.
Last Called
This area can store the Date and Time of the last
attempt made to phone this number.
Date
Enter the Date of the last attempt made to phone this
number. The information you enter will be displayed when
you view the Phone list from the Debtor.
Time
Optionally, you can enter the Time of the last attempt
made to phone this number.
Last Result
Select a value from the attached pick list to note the
result of the last attempt made to phone this number.
You can add a pick list of result codes to use with
your call campaigns and reports. This information
is displayed when you view the Phone list from the
Debtor.
Nis ID
Select a value from the attached pick list to identify
this phone record. You can add to the pick list
as needed for your own purposes.
Nis Reason
Select a value from the attached pick list to explain why
this phone number is NIS. You can add to the pick list
as needed for your own purposes.
Created
This read only field displays the Date this Phone record
was created. Next to it, is the ID of the Operator who
created the record.
Created Time
This read only field displays the Time this Phone record
was created.
Modified
This read only field displays the most recent Date when
this Phone record was modified. Next to it, is the ID of the
Operator who edited the record.
Modified Time
This read only field displays the most recent Time when
this Phone record was modified.
OK
Select this button to save any changes you have
made and return to the previous form.
<<
Select this button to navigate to the
previous record in the database.
>>
Selecting this button to navigate to the
next record in the database.
New
Select this to open a new blank Phone form.
Delete
Select this to delete the displayed or highlighted
Phone record.
Cancel
Select this button to ignore any changes you may
have made and return to the previous form.
Help
Select this button for help on the Phone form and
links to related topics.
Update Phone Records
You can create and update Phone records through
the Tools menu, Utilities, Update Phone Records
option. Please refer to Help topic,
Update Phone Records for details.
Create Phone Records
You can create Phone records during the manual upgrade
process. Please refer to Upgrade Database for details.
Importing Phone Records
You can create Phone records in an import routine. Please
refer to Help topic, Import Phone for details.
See Also
- How To Start Using Collect!
- Update Phone Records
| 
Was this page helpful? Do you have any comments on this document? Can we make it better? If so how may we improve this page.
Please click this link to send us your comments: helpinfo@collect.org