Report Body
The Report Body contains the body of the report. When you
view or modify an existing report, this list displays, line by line,
the actual code in the report.
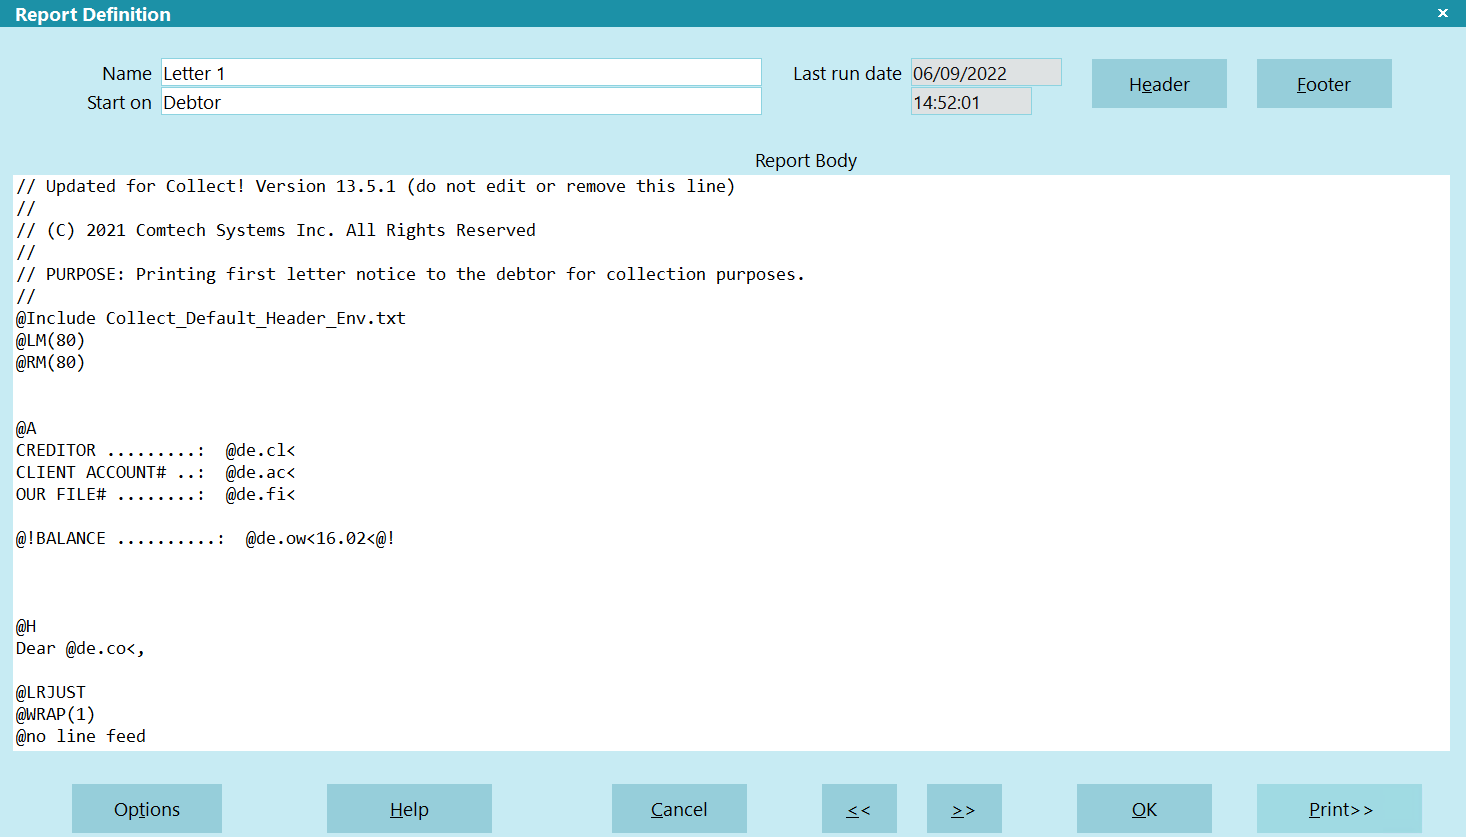
Report Definition
 This is also referred to as the Report Writer. It is
the text editor where you compose and edit your reports and
letters.
This is also referred to as the Report Writer. It is
the text editor where you compose and edit your reports and
letters.
Access The Report Writer
- Pull down the Print menu at the top of the Collect!
screen and choose Customize Printing, Edit Report
Templates.
- When the Report Definition list is displayed, press the New
button at the bottom of the screen. This will open a new
Report Definition.
- Click into the large gray area beneath the gray title bar that
says "Report Body" and you will be in the Report Writer.
If you open an existing report there will be codes, symbols
and text in this window.
 Here is a link to a list of codes and symbols you can use
in report writing. View the Report Writer Reference.
Here is a link to a list of codes and symbols you can use
in report writing. View the Report Writer Reference.

View An Existing Report
If you are viewing a report that is already in your Collect! system,
there are several different kinds of information that you are looking
at. Basically, reports contain several types of codes to tell
Collect! what to print.
- Printable Information codes - these are codes that represent
the fields in your database
Examples: @de.na, @cl.na
Please refer to the topic Printable Field for further explanation.
- Printer Control codes - these are codes that affect what your
report looks like. They include:
Various kinds of fonts and different font sizes
Examples: @A, @H
Codes for making your print bold or italicized
Examples: @!, @%
Codes for making your report print sideways (landscape) for extra
wide columns
Example: @L
Codes for inserting a page break where you want it to be
Example: @f
Please refer to the topic Printer Control Code for
further explanation.
- Date and Page Number codes
Codes insert a date in your letter or report at the
position you choose
Examples: @e, @d
Page number
Example: @p
- Text - This is actual text that is typed into the
Report Body. Whatever you type in will be printed
each time you print the report or letter.
Print Report Codes
Here are steps to PRINT the codes that you see in the
Report Body.
If you are already viewing the report body now, you can
skip to Step 8
- Select PRINT from the top menu bar, a drop
down menu displays.
- From the drop-down menu select EDIT REPORTS.
- A Report definition dialog box displays with a list of various
reports and letters.
- Search for the desired report by using the UP and DOWN
arrow keys.
- Select EDIT located at the bottom of the dialog window to
view the codes.
- A report body displays.
- To view the text select the report body or press F5.
- To print the page with the codes select PRINT from the
printer icon.
- Select the appropriate printer and select the highlighted
PRINT button.
Report Or Letter Creating
A new report will show nothing in the Report Body until you
click in it. Then the text editor will present you with a blank
screen where you can enter text and field identifiers for
database information. The types of information you enter
are similar to what you see when you view an existing report.
You can use an existing report and modify it to suit
your needs. See How To Edit Reports Or Letters
Choose Report Item
When the Report Body is displayed, press F2 to pop up
the Choose Report Item form. You can use this form to
help you in your report design. There are several types
of information that you can use in your report. The most
common types of code are accessible from the
Choose Report Item form. Use this form to choose fields
from your database, printer control codes for fonts, formats
for dates, page numbers, etc. Press F1 when this form is
displayed for information about each of its options.
Entering Text And Codes In The Report Body
Type as you would on a typewriter. The editor uses the
following commands.
Function Keys
F1 Help............. Opens up this Help topic
F2 Pick............. Pick from database fields and other items
F5 Print............ Print all your notes
F7 Delete........... Delete the current line
F8 Save and Exit.... Save the report and exit
Exiting
Press F8 to save and exit.
Click the left mouse button outside the report to save and exit.
Press ESC to not save and exit.
Click the right mouse button outside the report to not save
and exit.
Moving The Cursor
You can use the arrow keys, Page Up, Page Down, Home,
End and Backspace keys to move anywhere on the screen.
Or use your mouse and click to the location that you want
to go.
Selecting
You can select sections of text by either holding down the
left mouse button and dragging it over the text that you want
to select or hold down the Shift key and use the Arrow keys
to select the text.
Copying
After you have selected the text that you want to copy pull
down the Edit menu and select Copy. This is useful if you
want to customize letters and reports.
Deleting
After you have selected the text that you want to delete pull
down the Edit menu and select Delete. This is useful if you
want to remove text from a letter or report before printing.
Pasting
When you want to paste text that you have already copied
pull down the Edit menu and select Paste. The text will be
pasted at the current cursor location.
Paste with OVERSTRIKE mode on leaves the
cursor where it is. Paste in INSERT mode moves the
cursor to the end of the pasted section.
Printer Control Codes
You may see commands such as {RESET} or {BOLD}
and {/BOLD} in the text when you Print to screen. These are
printer commands. They are the names of the
printer control codes the report contains at that spot in the
Report Body. Some commands, like bold or underlining, for
instance, can be turned on and off.
For example, where bold is turned ON with @! in your design,
you will see {BOLD} when you Print To Screen. This is because
these attributes don't show up until they are printed to a printer or
browser. Where you turn bold off with another @! you will see
{/BOLD} when you Print To Screen.
| 
Was this page helpful? Do you have any comments on this document? Can we make it better? If so how may we improve this page.
Please click this link to send us your comments: helpinfo@collect.org