Operator Basics
What is an Operator? An operator can be defined as
1. A user who physically needs to sign into Collect! to
do their work.
2. A desk, task or identifier to allocate different responsibilities
for different accounts.
3. A group of operators bound to one Operator ID enabling
you to breakdown commission on teams and to assign
accounts to the members of the Sales Team Operator.
4. A group of operators bound to one Operator ID enabling
you to set account access control for several operators at
once.
5. A Client to whom you wish to grant access to view their
accounts in your system.
6. A user who needs to sign in from the Internet or
intranet to take advantage of Collect!'s Internet access.
If you are a single user site, you are already set up.
Collect! has a default operator installed that gives
you full access to every area of Collect!. Even as a
single user, you may want to create other operators to
help you separate your work by different functions.
Operator ID
Used wisely, the Operator ID adds efficiency and flexibility
to your management tasks.
The unique Operator ID for each operator enables Collect!
to timestamp who worked an account and when the
account was worked. An operator ID is used when
creating notes and records, or when deleting. Contacts can
be assigned automatically to any operator you choose and
you can set up work queues. Many records have a 'Created
by' field to show you who created the record. Log entries
created by Collect! for "Operator" have the operator's ID
in each log entry.
The Operator ID may be used in reports, automatic
commission calculations, contact plans and any other
place where you need to access or set information that
depends on your operator's identity. Individual queues may
be created for batch letters, imports and credit bureau
reporting by creating Operator IDs for specific functions.
Many system administrators set up an operator with a
code of SKP to assign accounts to the skip desk. When an
account goes to legal, you may want to assign the account
to the LEG desk. Letter operators are handy to have if you
use different paper for different letters. You may have a fancy
first letter paper that you use when printing your Letter 1.
Assigning a letter contact to LT1 operator will allow you to
print all your letters assigned to LT1, isolating only the first
letters, in your daily print batch.

Operator User Level
A very important related topic is the User Level that you
assign to each operator. User Level defines what the operator
can see or do when they have signed into Collect!. Your
System/IT staff operators will want access to everything, while
your Junior Collector operators will need very limited access
when using Collect!.
Collect! ships with sample User Levels developed by listening
to our users. Settings in these user levels are generally useful
to the majority of our users. These settings are fully modifiable
if needed, as explained in the more advanced topics of
working with Collect!. Try out the various sample user levels
before attempting to make changes. It is safer to modify a
User Level after you have more experience with Collect!'s
interface.
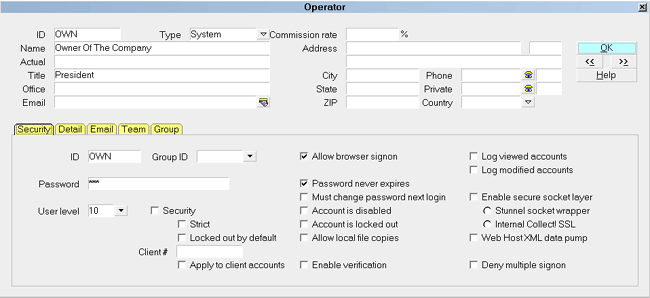
Operator form
Operator Type
Another important setting is the Type you select for each
operator. This determines what form the operator sees when
they first sign into Collect!. This is useful for security reasons
and also to simplify the user interface for collectors. Also, the
Client Type enables you to set up a Client Operator to view
their accounts in your system.
Accessing Operator
The Operator form may be accessed in many ways. Providing
you have access to the various menus and forms, you
can use one of the following ways to get to the Operator form.
1. Using the menu bar at the top of Collect! select
System to display the drop-down menu. Select Operators from
this menu and the list of existing Operators will appear.
2. Or, you can also gain access to Operators from the Main Menu.
Select the System Administration button to display the
System Setup menu. Select the SETUP AND CONFIGURATION
button to display the System Setup form. Select the
SECURITY AND ALIASES button to display the Security and
Aliases form. Select Operators and Sales Teams to display the
list of existing operators. When highlighting an operator,
simply select the EDIT button at the bottom of the list to display
the Operator form.
3. Or, while on ANY form that has a pull-down list to select an
Operator ID, you can use the pick list arrow. The Operators
list will display the existing operators that are currently in the
system. When highlighting an operator simply select the EDIT
button at the bottom of the list to display the Operator form.
See Also
- Operator
- Operator Samples
| 
Was this page helpful? Do you have any comments on this document? Can we make it better? If so how may we improve this page.
Please click this link to send us your comments: helpinfo@collect.org