How To Use Payment Plans
What is a Payment Plan? A Payment Plan is a schedule of equal regular payments set up on an account
when a debtor has contracted to pay a debt in a timely consistent manner. Transactions are posted
for the entire plan with dates ranging into the future as far as necessary to satisfy the debt.
Posted Dates are left blank to be filled in when each payment is received.
Payment Plans and Promises are similar in that they both are for tracking future payments. Payment
Plans require post-dated payments and Promises do not. It is possible to use both. Please refer to
the Help topic How To Use Promises for more information.
When you have proceeded through the steps below:
- You should be more familiar with the concept of payment plans
- Be able to start a payment plan on a Debtor
- Be able to automatically track planned payments and any account activity regarding the payment
plan.
We will cover:
- Payment Plan Details
- Entering Payment Plan information
- Viewing the Debtor form
- Viewing the Transaction List
- Posting A Payment Plan Payment
- Filling in a planned payment transaction
- What Collect! does when you post a planned payment
- Reviewing Unfulfilled Promises
- When an NSF Check is returned
- Special Settings
Payment Plan Details
To start a Payment Plan for an account, we must first access the Payment Plan form while on the
debtor's account.
- Once the Debtor form is displayed, select the Principal field to open the Financial Detail
form.
- Select the PAYMENT PLAN tab to display the Payment Plan form.
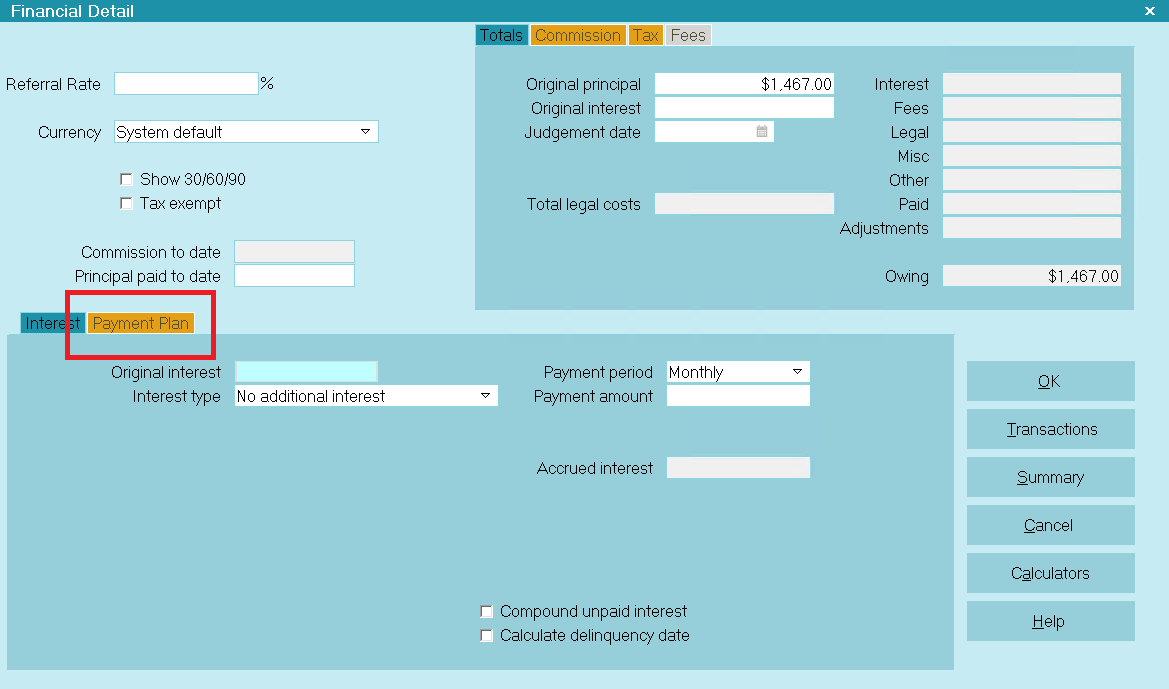
Accessing the Payment Plan form
- Once the Payment Plan form is displayed, fill in the details of your payment agreement.
In the field labeled Payment period select the interval of the payments. The default
is ' Monthly' for one payment per month.
In the field labeled Number of payments enter the number of payments and Collect!
will calculate the dollar amount of each payment. Or, you can enter a payment amount, instead, in
the field labeled First payment in the Amount column and Collect!
will calculate the number of payments.
There are many options available on this form. You only need to fill in the ones that apply to the
agreement that you have contracted with the debtor.
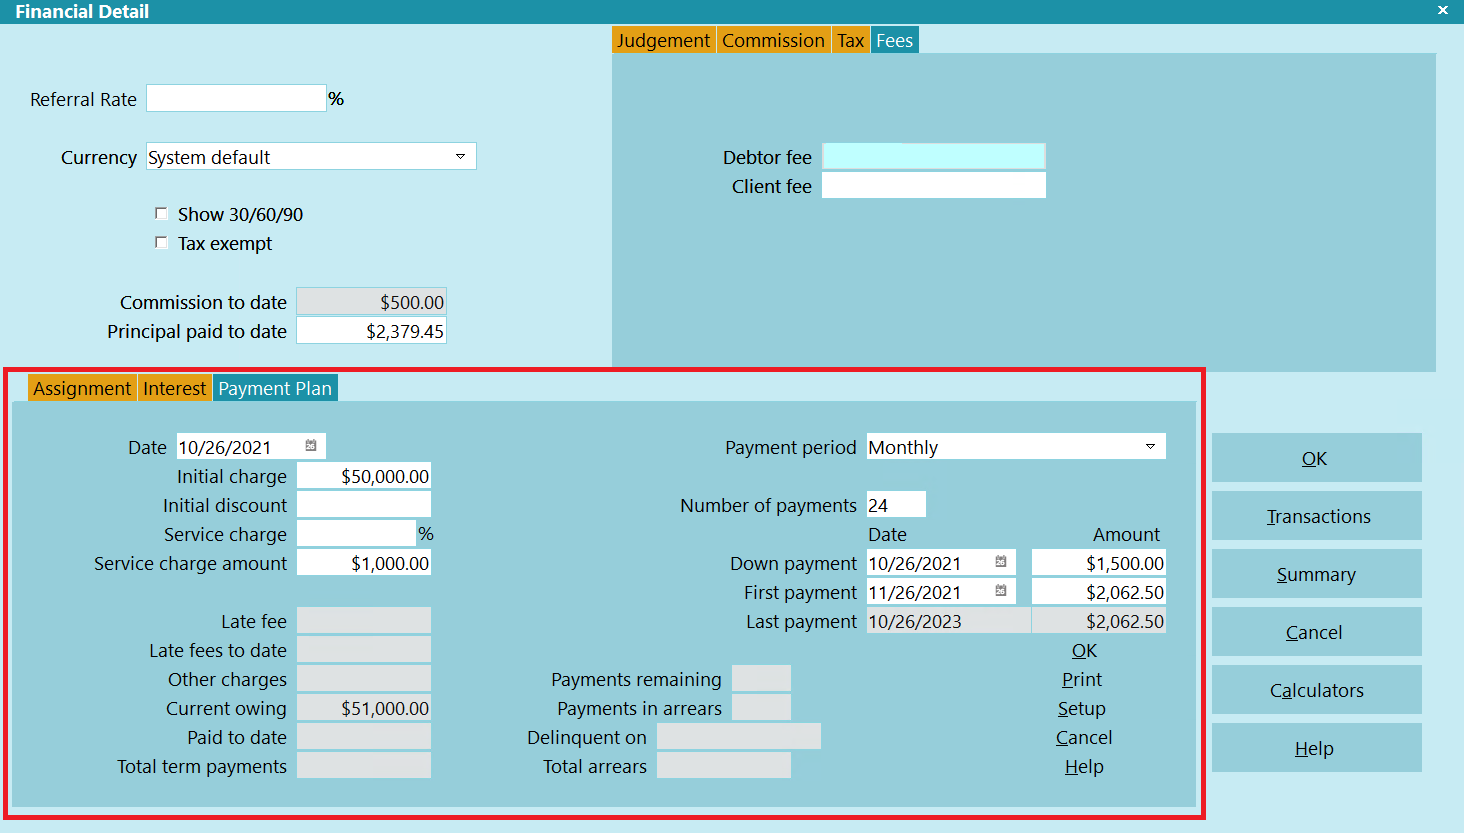
Payment Plan form with Details
The example shown above displays an initial discount, a service charge and a down payment. Collect!
takes into account all discounts, down payments and charges when calculating the dollar amount of
the plan payments.

Adjusting Values And Lump Sum
If necessary, you may adjust the Down Payment and First Payment dates. You may also adjust any of
the Payment amounts. Collect! will redistribute the payments over the period you have entered in
the Number of Payments field.
For example, you may want the Monthly Payment, in the example shown, to be $200, with any remaining
amount paid as a lump sum in the last payment. Simply change the First Payment amount to $200 and
Collect! will redistribute the amounts, resulting in a lump sum final payment of $1165.95, in the
example shown below.
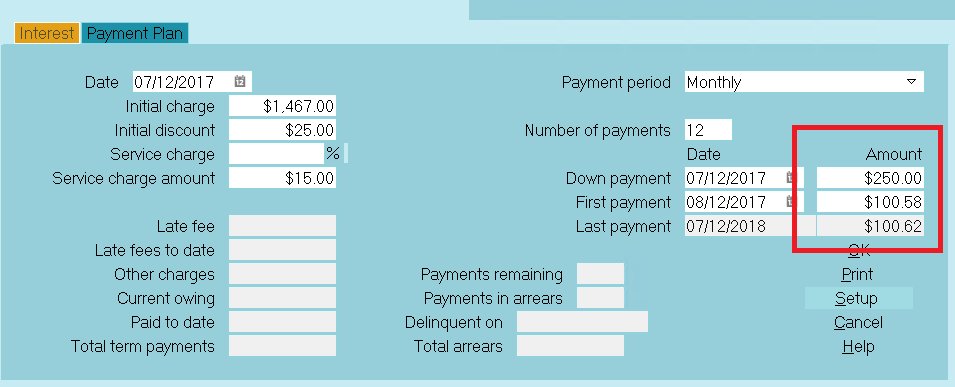
Payment Plan form with final Lump Sum
Posting The Payment Plan
After you have entered all of the Payment Plan details in the Payment Plan form, select the
inner OK button to post the Payment Plan. Collect! gives you a chance to confirm
your choice before it creates all the transactions for the plan.

Prompt to Post the Payment Plan
Select YES. Collect! will quickly create as many transactions as necessary to schedule all the
payments for the plan. Then you will see a message letting you know how many planned payments were
posted to the account.
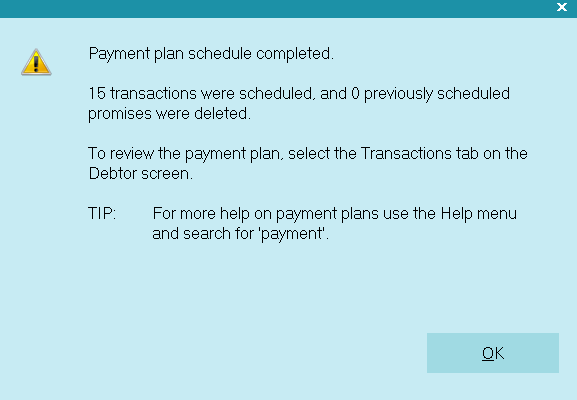
Payment Plan Schedule Completed
Select the OK button to close the message window. You will be returned to the Debtor screen.
Viewing The Debtor Form
By default, Collect! runs a contact plan when a Payment Plan is posted to an account. You may see
that the Status has changed to PPA or " Payment Plan Active" and that a line has
been written to the debtor's Notes.
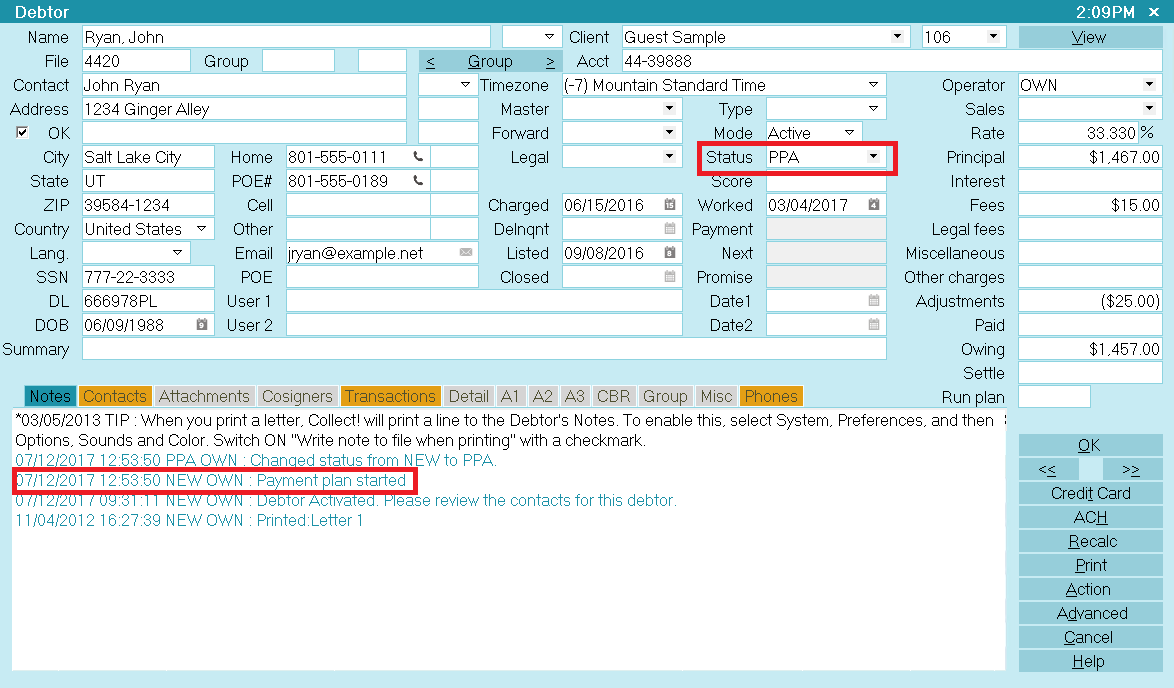
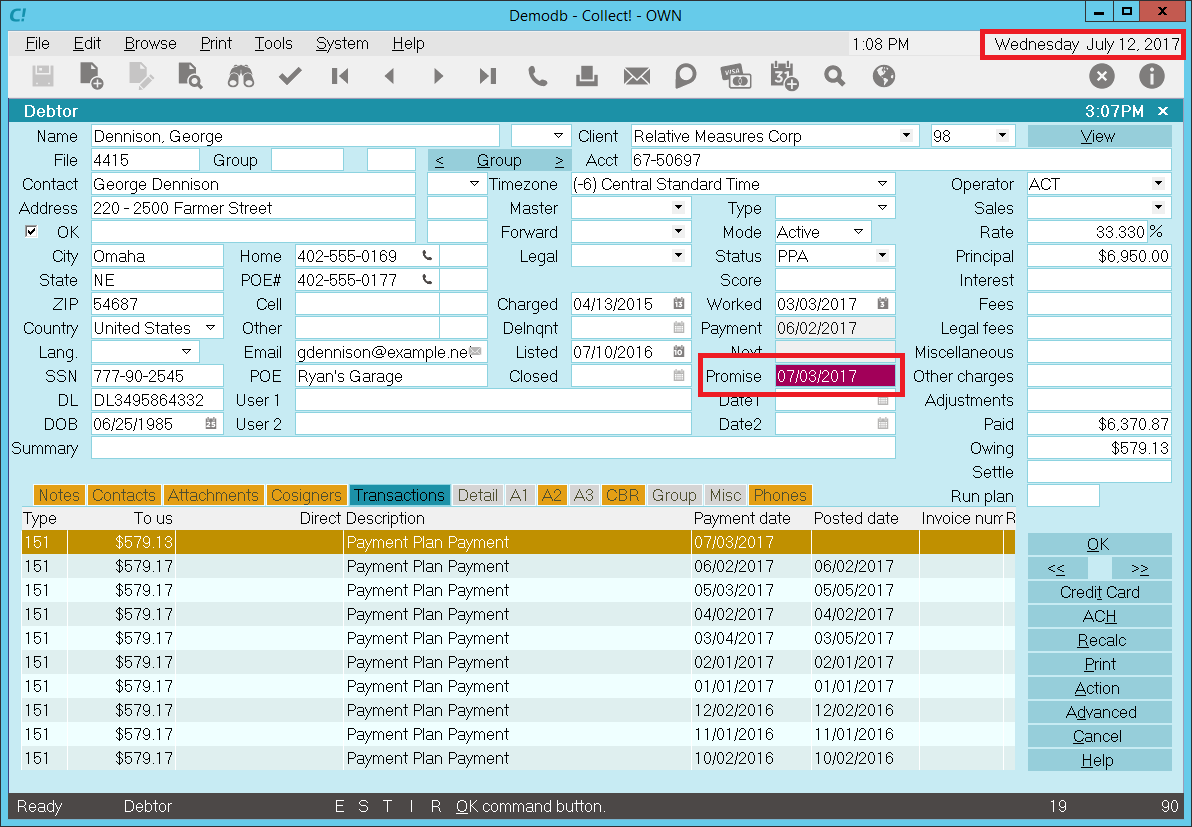
Debtor Screen with Promise Date
The 'Promise' field shows the date that the first payment is due. If the promised payment is not
received by this date, the Promise field will turn RED.
Debtor Screen with Promise Date Delinquent
 To automatically refresh the financials on the Debtor form, switch ON 'Automatic recalc' for
the Operator. This switch is set in the Operator form.
To automatically refresh the financials on the Debtor form, switch ON 'Automatic recalc' for
the Operator. This switch is set in the Operator form.
Viewing The Transaction List
You can view the list of transactions on the account to see all the transactions posted for the
Payment Plan. To do this, select the TRANSACTIONS tab to display the list of transactions posted to
the account.
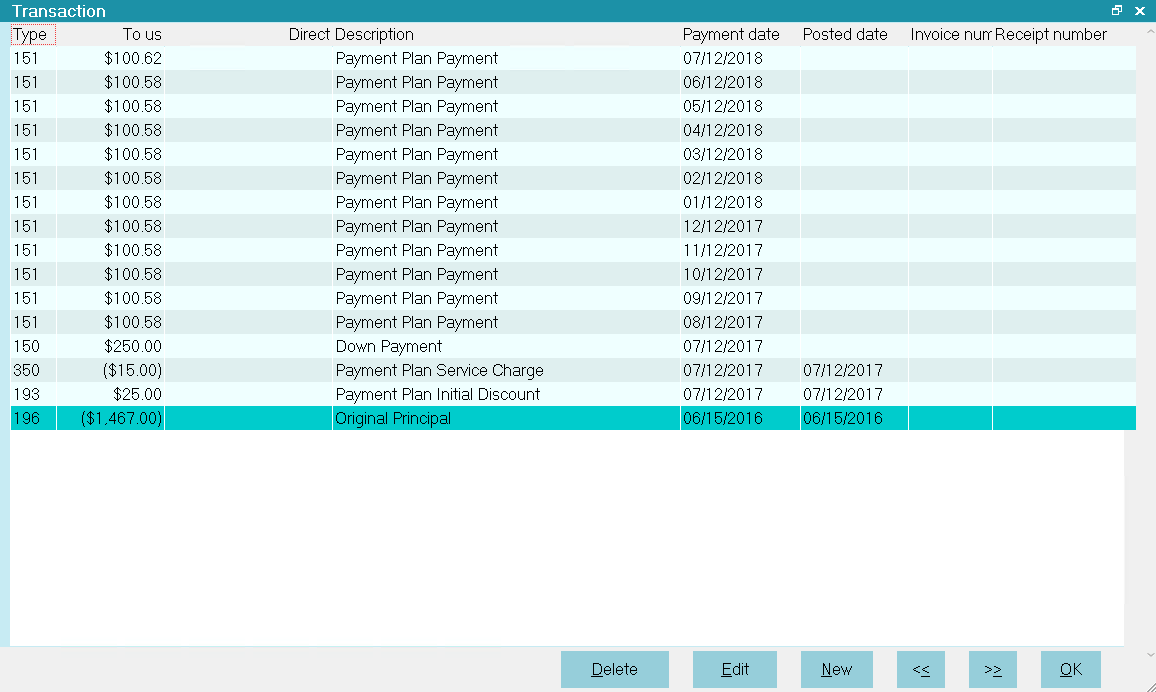
Payment Plan Transactions
- By default, Payment Plans use the Transaction Type 151 for planned payments.
- Service charges and discounts are posted according to the Payment Plan details. Planned
payments start on the date set in the Payment Plan 'First Payment' field.
- The default Payment Period is 'Monthly', so the planned payments are scheduled one month
apart as far as necessary into the future to satisfy the debt.
- The last payment is adjusted if necessary to complete the payment. In the example shown, if
we let Collect! perform all the calculations without modifying any values ourselves, the last
payment is $226.90, while each monthly planned payment is $226.83.
Posting A Payment Plan Payment
All of the payments scheduled for the account are present now as transactions with Payment Dates
ranging into the future and no Posted Dates.
When a payment is received, you simply locate the appropriate transaction. The transaction already
has the Payment Date filled in and the amount of the Payment.
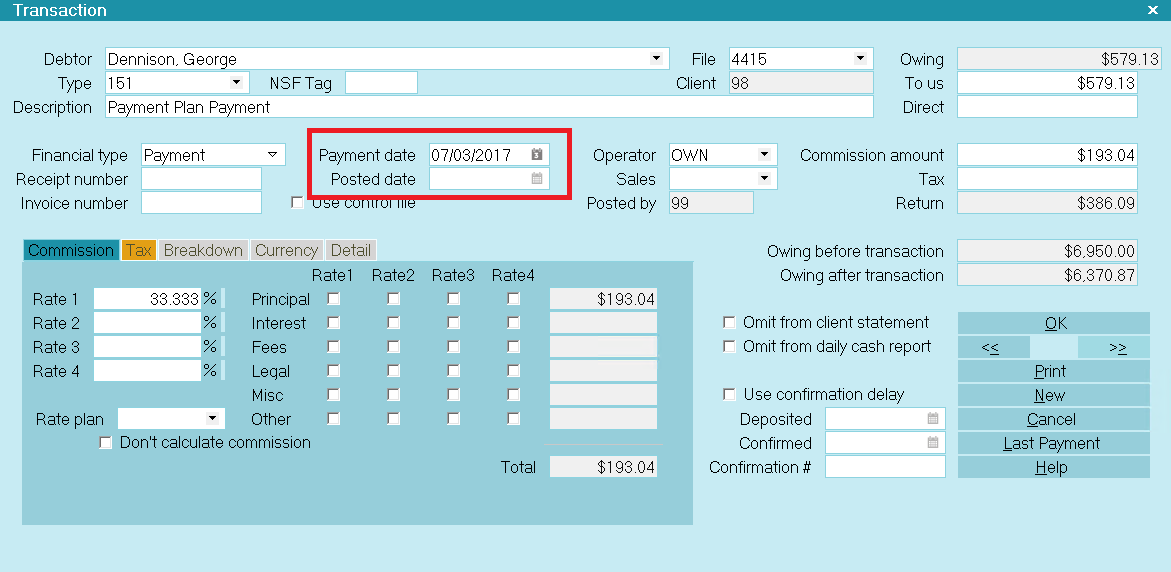
Planned Payment Transaction with no Posted Date
Select the calendar icon next to the Posted Date field. The Calendar will be displayed, set to today's
date. If you do not need to modify this, select OK to put today's date into the Posted Date field.
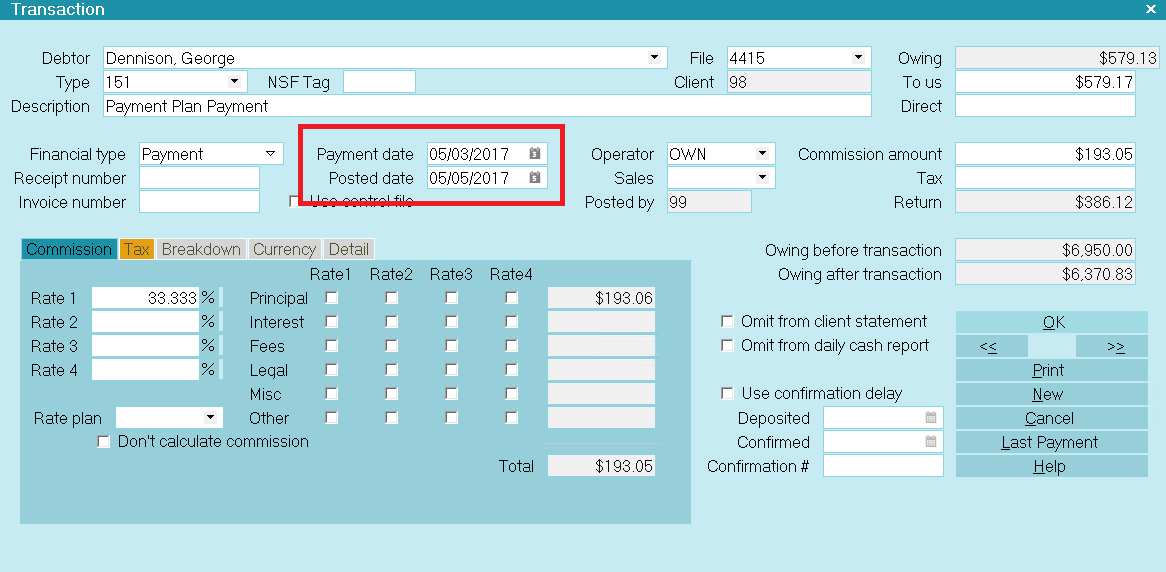
Planned Payment Transaction with Posted Date
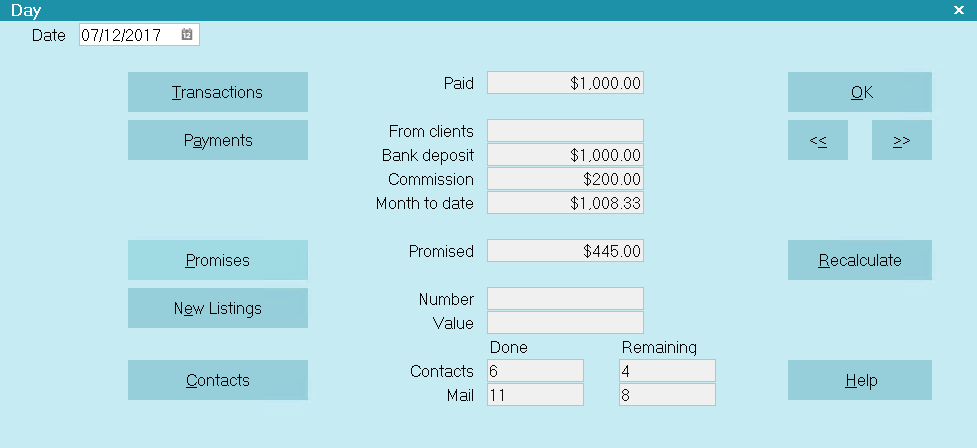
Reviewing Unfulfilled Promises
Daysheets provide a convenient way to review promised payments. Select Browse from the top menu bar
and then select Daysheets from the drop-down choices. Select a Date to review. This will display the
Daysheet for the chosen date.
Select the PROMISES button.
Select Promises for a Daysheet
This will display any promised transactions that have not been posted on this due date.

Unpaid Payment Plan Payments Due Today
These payments are now delinquent.
When An NSF Check Is Returned
When an NSF check is returned, you need to post two transactions to continue with the planned
payments.
- Post a new Payment transaction with a NEGATIVE value to indicate NSF. You can use the same
Payment date as the payment that went NSF and today as the Posted Date. This will negate the
payment that went NSF.
- Then post another Payment transaction with NO Posted Date and the same Payment Date as the
payment that went NSF. Enter the plan's Payment Amount as a POSITIVE value in the To Us field.
This will reactivate the planned payment that went NSF and is now outstanding.
Special Settings
Several settings in Collect! influence how planned payments are handled. These are described below.
Payment Plan Actions
Use Payment Posting Options to run contact plans for Overpayment, Underpayment, and Full Payment.

Payment Posting Options Payment Plan Actions
Each code in the Payment Plan Actions section is a contact plan set up in the database to be
evaluated when Collect! posts a planned payment. These are demonstrated in the Demodb database and
may be copied to your Masterdb. You may modify the events in the plans if you need to.
If you do not want to run any contact plans, just erase the codes from each one of the
Payment Plan Actions.
Payment Values
Set up default values to consider as over or under payment in the Payment Values form accessed
through the ADVANCED button on the Payment Posting Options form.
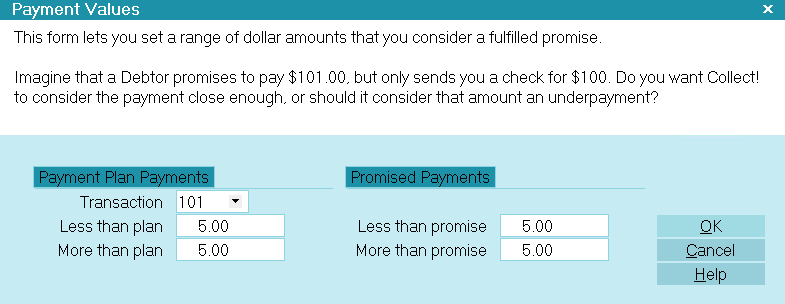
Payment Values form with defaults entered
These defaults will be evaluated whenever a planned payment is received. They will affect whether or
not one of the payment plan actions executes.
Payment Plan Setup
The Payment Plan Setup form stores default values and transaction types that apply to payment plans.
You can set an initial charge amount, discount, payment amount, late payment fee, down payment amount,
interest rate, number of payments, payment period and a contact plan to run when you start the plan
for an account. Special transaction types may be assigned for posting payment plan transactions. The
payment plan transaction types must exist in your system.
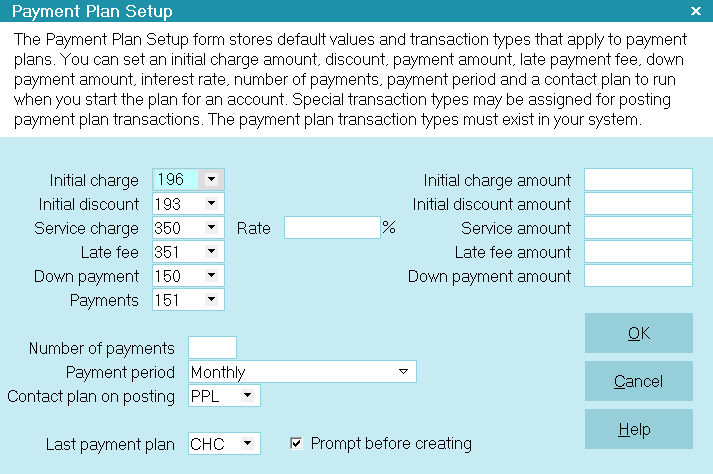
Payment Plan Setup form
All options on this form are used as default settings when you create a new plan. Default amounts
are automatically loaded into each new payment plan. This reduces typing and minimizes errors. You
will be able to change any of these settings on an individual basis when you set up the plan for a
particular account.
Coupon Books With Payment Plans
A Coupon Book is a printed schedule of payments that may be given to a debtor when a payment plan
is set up on an account. A coupon is printed for each scheduled payment. The Due Date and Payment
Amount are printed to make it easier for the debtor to keep track of when payments are due.
A sample Payment Plan Coupon Book report is shipped with Collect! in the Demonstration
database. This report expects transaction type 151 for the regular scheduled payments.
The sample coupon book is very simple but you may modify it to include borders or your company logo.
The coupon book may be added as a Letter event to the contact plan you run when you post your payment
plan.
Summary
Schedule a Payment Plan when you can be reasonably sure that an account will be paid consistently
and on time. This sets up regular payments as transactions with no Posted Date ranging into the
future as far as necessary to satisfy the debt. Posted Dates are filled in when each payment is
received.
Additional settings are available for automatically handling payments and defaults may be set for
entering new plans.
If you cannot be sure of consistent and timely payment, please use Promise contacts instead.
| 
Was this page helpful? Do you have any comments on this document? Can we make it better? If so how may we improve this page.
Please click this link to send us your comments: helpinfo@collect.org