How To Import Reports
This topic gives you the steps to import a report into your database. Importing a report takes only seconds
and saves you from having to enter the code manually. You can import, test and see results within minutes.
If the report is exactly what you want, great. If not, delete it and import another very quickly.
You can get report codes from several sources:
* Collect! has many sample reports in the Demodb database. You can export them and then import them into your Masterdb database.
* Collect!'s web site has a great many reports that you can download and import.
* Comtech Systems support team may send you a custom report or a report that you are having a problem with.
* You may receive a report from another Collect! user.
To use these reports, you import them into your database.
Is the report attached to an email from Comtech Systems? Then please save this attachment to a location on
your computer where you know you will be able to find it. For example, save it to your Desktop.
Are you downloading the report from Collect!'s web site? Then you will be prompted to save it when you do
this. So please make note of where you save it on your computer. Also, make note of the name you save it as. Save it with the
*.rpt extension.
 Collect! can only read *.rpt or *.rft files. If you save to file as *.txt, please Right click on it, select
rename and either take off the .txt, or replace it with .rpt.
Collect! can only read *.rpt or *.rft files. If you save to file as *.txt, please Right click on it, select
rename and either take off the .txt, or replace it with .rpt.
When you have the report on your computer and you know where to find it, proceed with the steps below to import your report
into Collect!
1. Sign into Collect! as you would normally and select Print from the top menu bar.
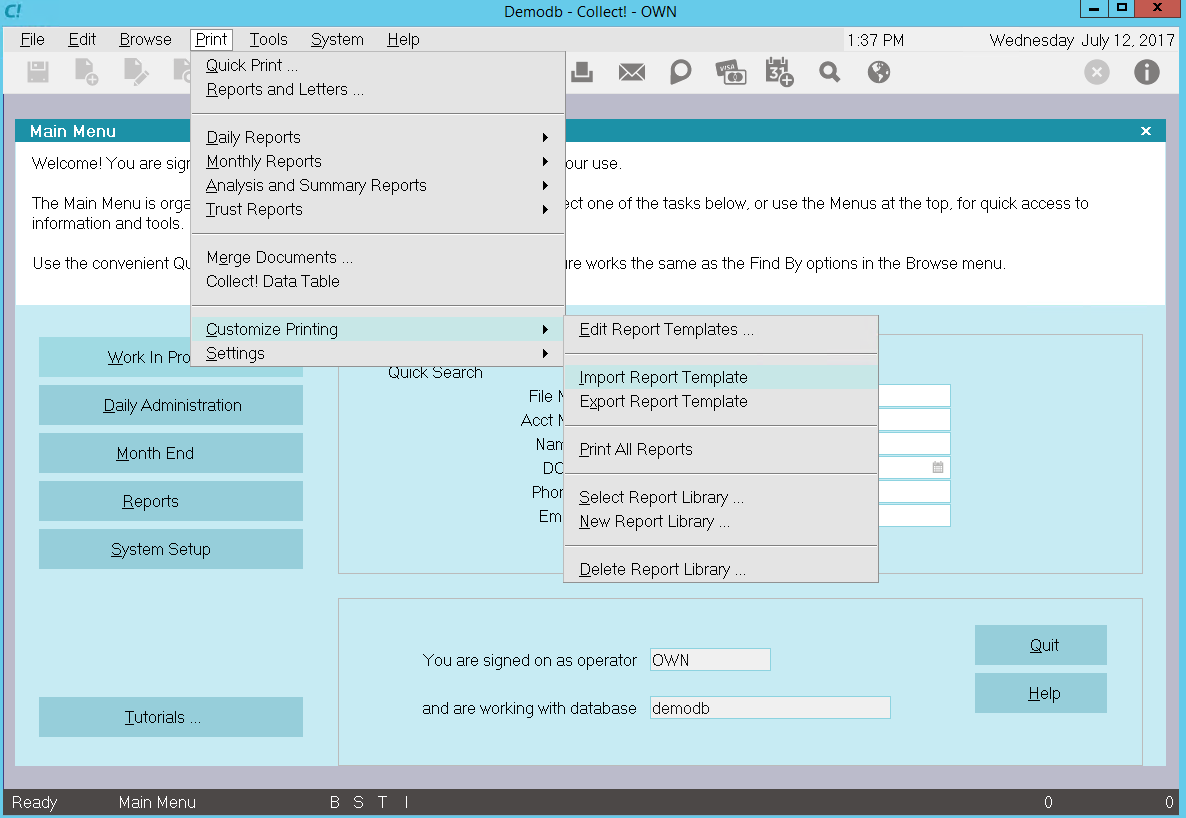
Print Menu
2. Then select Customize Printing, Import Report Template. The Import Collect! Report dialog pops up.
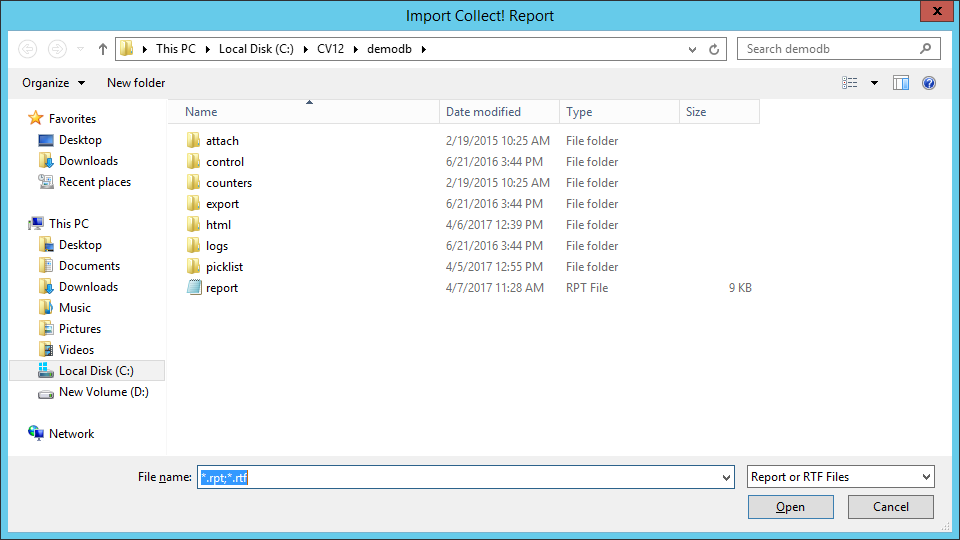
Import Collect! Report Dialog
3. Locate your report file. If you know the location and name, you can type this into the Filename: box.
Or, you may use the down arrow next to the Look In: box to navigate to the Desktop or to the folder where
you saved your *.rpt file. When you see your *.rpt file, click on it and the name will appear in the
Filename: box.
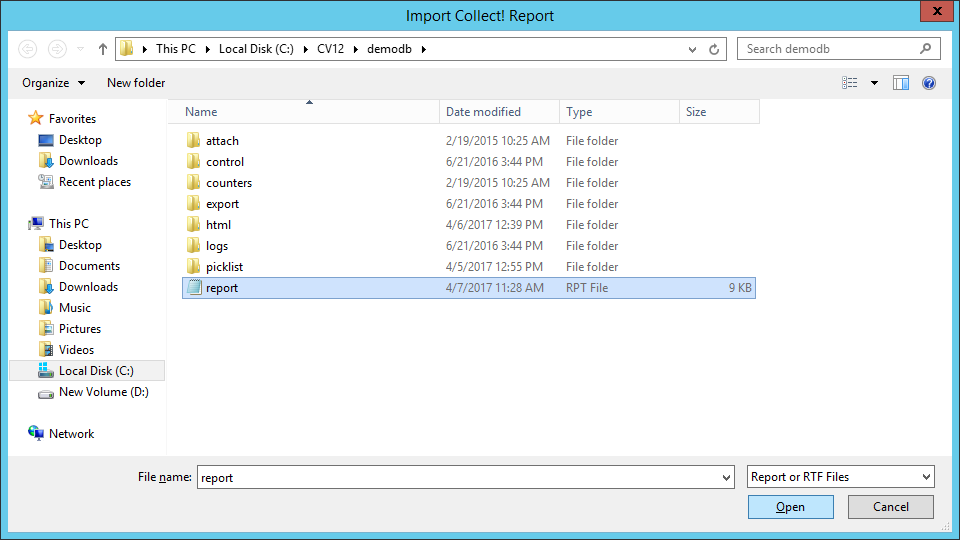
Report File To Import
4. Select Open to import the report. You may be asked: "Printer codes detected. Do you want to overwrite
your printer control codes?"

Prompt to Import Printer Control Codes
Select NO unless you are sure you want to overwrite your current printer control codes.
If you are importing a report that has updated Printer Control Codes, please select YES here to overwrite your
report codes with the new updated set.
5. Your report will be imported immediately and a message will show the full name of the report you imported on the very
first line.
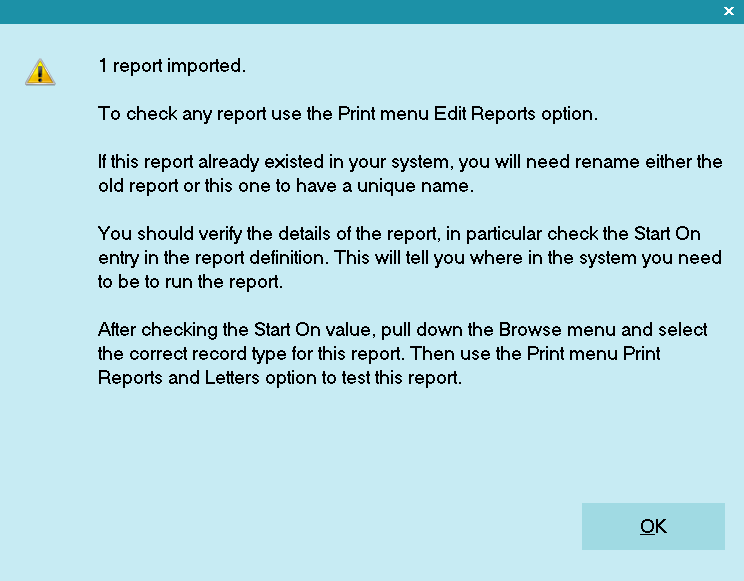
Imported Report Confirmation Message
Please make note of the full name of the report you just imported. This is the name that you will use to locate it
in the Report Definition list. Select OK to close the window.
6. Now check out the report's results! Print a sample to make sure the output is what you expect. Please
see How To Print A Sample Report Or Letter for more details.
Tech Notes
Placing report in the report list
To place the imported report in a particular section of your Report Definition, open the Report Definition list before you
start the import process and select the place in the list by pressing your space bar.
@include files
If the report you are importing uses an @include file, make sure that you save the @include file to your Collect! application's
STYLES folder, (e.g. Collect\styles) so that your report can load it when you print the report.
Viewing a report outside of Collect!
If you try to open your report, or print it, and you generate an error message or see gobbledy-gook, it may be that the report
was opened in a word processor and is corrupted. Collect! imports ASCII text report files. If you need to open an *.rpt file
outside of Collect!, please open with a text editor that will not change the format. If you open with a word processor, MAKE SURE
you save it as a text file and not in the word processor's default format as this will make the file unusable by Collect!.
Please be aware that imported reports DO retain any additional settings contained in the report definition's
Report Options.

Importing RTF Files
Collect! support Rich Text Format files (RTF) created with a standard Word Processor. Please refer to the Help topic,
How to Create an RTF Report, for more information.
Before you import the report, if you created it with MS Word, you need to open it with WordPad and save the file before
proceeding. This will remove the Microsoft specific code from the header of the file. Once done, import the report as per
the instructions above. Once imported, you need to make 2 modifications:
If you have any loops or variables in the RTF file, you need to open the file with a text editor like Notepad first
and ensure that the loops and variables are on the left margin without any formatting text like "\par" on the same
line. As loops and variables match are not output during printing, you can simply delete the "\par" text. Any other
formatting commands should be moved to the next line.
1. Set the Start on of the report to be either Client or Debtor.
2. Set the Destination in the Report Options to be Other.
You will notice that the report body will reference an external file. The actual RFT file is copied to the Collect! STYLES
folder. If you edit the RTF file, you need to delete it from Collect! and re-import it.
| 
Was this page helpful? Do you have any comments on this document? Can we make it better? If so how may we improve this page.
Please click this link to send us your comments: helpinfo@collect.org