How To Setup A Local Email Server Using Hmailserver
This topic discusses setting up an Email Server on your local network to relay emails to your email provider.
 This is not an official email server. It acts more like an email client where emails are queued up
and sent to your email server for processing.
This is not an official email server. It acts more like an email client where emails are queued up
and sent to your email server for processing.
The product we recommend using is called hMailServer. It is a free, open-source tool for Microsoft Windows.
If you are on Collect! Cloud, this tool is already installed. Please contact us for assistance in
configuring it.
Hmailserver
1. Download and install the latest hMailServer with default settings.
https://www.hmailserver.com/download
- accept the agreement
- default path
- full installation
- use built-in database
- specify a main password and remember it
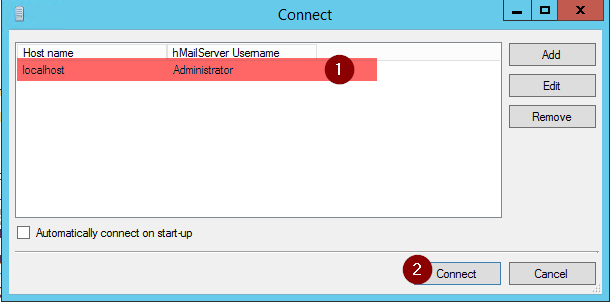
2. Start hmailServer Administrator and connect to the localhost server and enter your password.
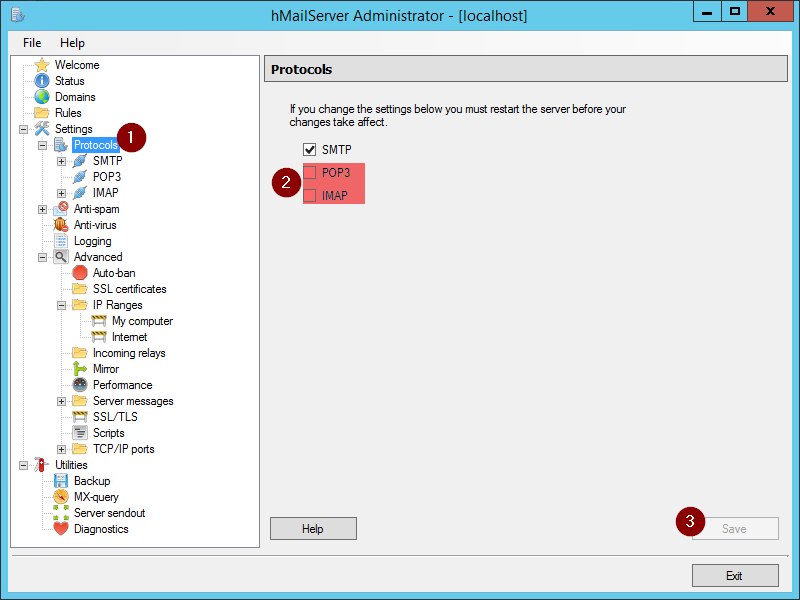
3. You only need SMTP, so navigate to Settings -> Protocols and uncheck POP3 and IMAP, then save.
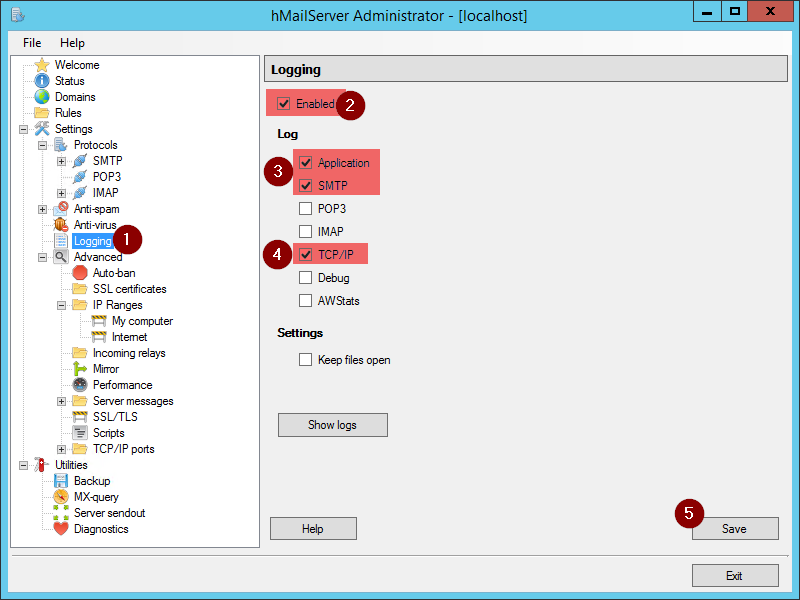
4. Navigate to Settings -> Logging and check Enable, Application, SMTP, TCP/IP, then save.
5. Navigate to Settings -> Advanced -> IP Ranges and remove the INTERNET range.
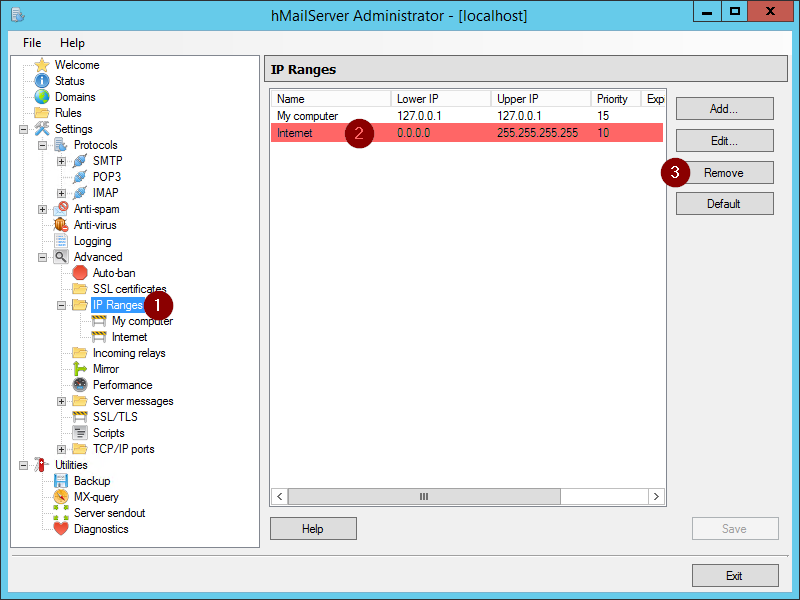
If you are planning to run hMail on a central server, then you will need to add your
local area network to the list and you may have to open port 25 on the server's firewall.
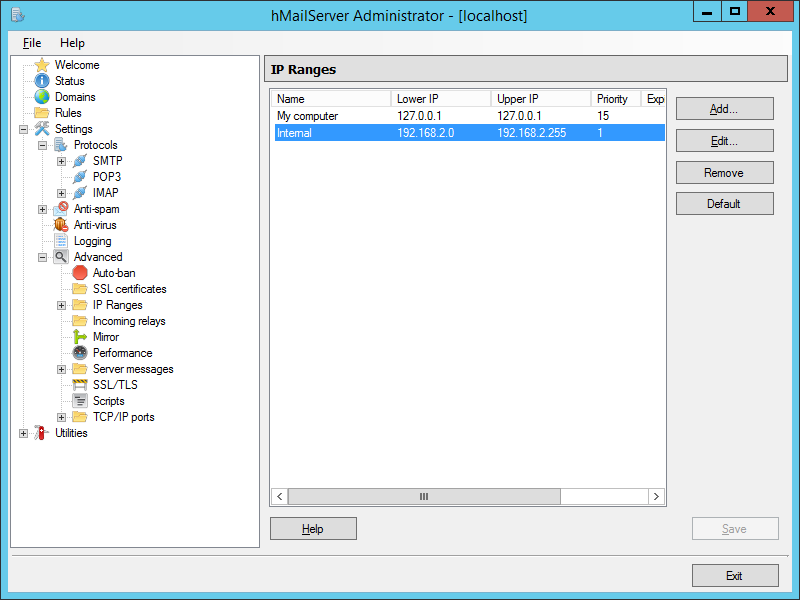
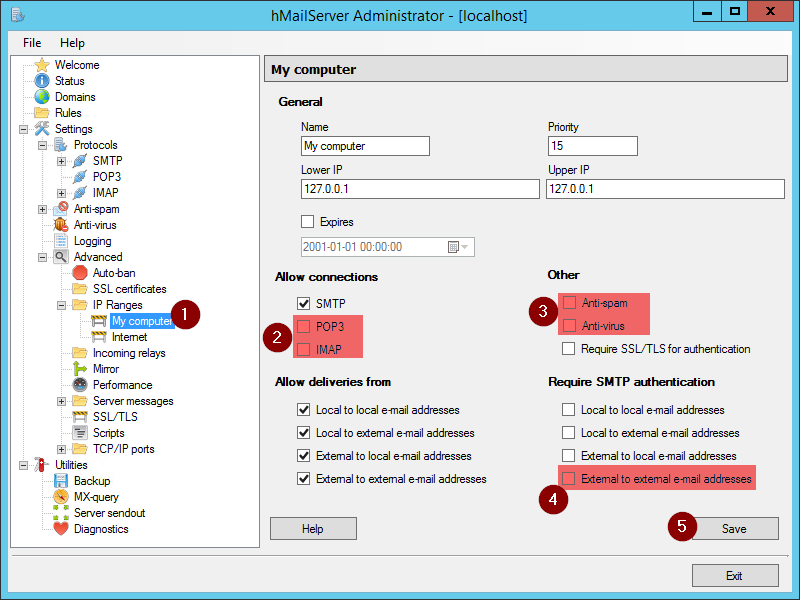
6. Click on the MY COMPUTER range and click Edit. Uncheck the following boxes, then save:
- POP3
- IMAP
- Anti-spam
- Anti-virus
- External to external email addresses
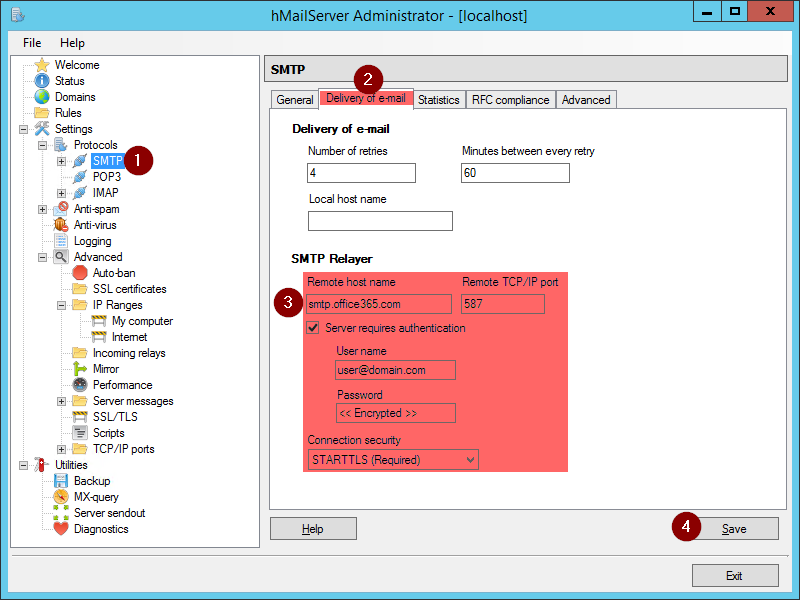
7A. Option 1: Setup hMailServer to act as a relay server (same concept as an email client):
Navigate to Settings -> Protocols -> SMTP, click on the Delivery of email tab and fill in the SMTP relayer
information. Try to pick a generic email account as this will be the reply email, but a specific user's
account can be used. More information is below when you get to the EMAIL SERVER section.
7B. Option 2: Setup hMailServer to act as a mail server:
Navigate to Settings -> Protocols -> SMTP, click on the Delivery of email tab, leave the SMTP relayer
information blank, and fill in the Local host name field with the IP reverse lookup host name. Here is a tool
to assist with the lookup. You need to enter the external IP address for your mail server.
https://mxtoolbox.com/ReverseLookup.aspx
*** Warning: This option send the email directly to the recipient without going through your email server;
as a result, a copy of the email is not put into the sent items folder and this method has a
higher probability of being marked as spam. You can mitigate the spam issue by creating an SPF
record for the reverse DNS host name or your external IP address. For more information, please
consult a network or email specialist.
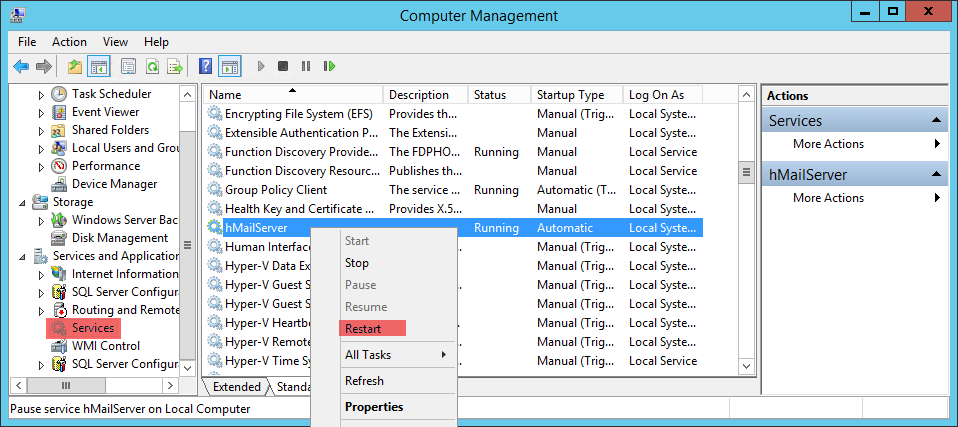
8. Restart the hMailServer service in Windows.

Collect!
1. Sign into Collect!
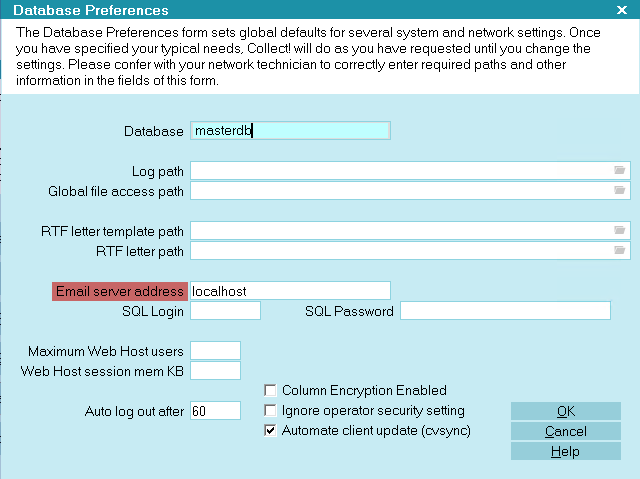
2. Navigate to System -> Preferences -> Database Preferences
3. Type in the IP address or server name of the server that you just installed hMailServer on to
(EX: server01 or 192.168.1.10).
4. Navigate to your operators that you want to allow to email, go to the Email tab, and check the Enable SMTP box.
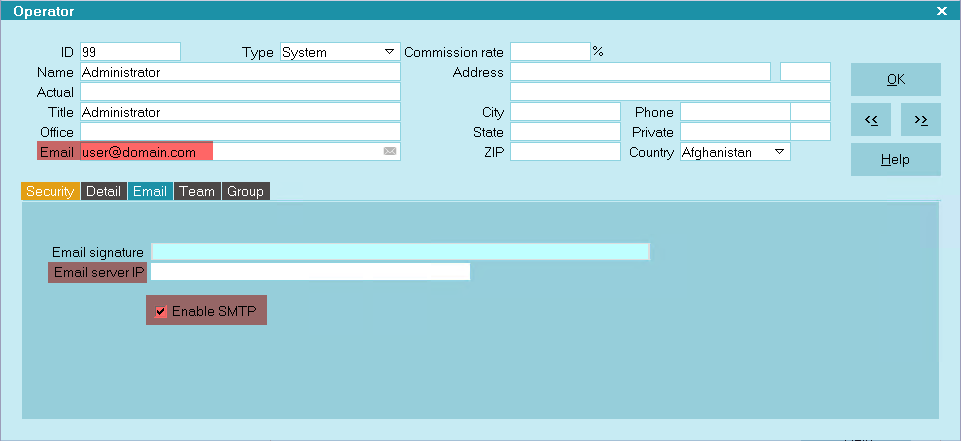
5. Please refer to the next section regarding reply email addresses.
Leave the Email Server IP field blank in order to use the Global one that you just set.
Email Server
There are 2 methods to send emails from Collect:
- via a report
- via the email field ( Send Mail form)
Reports that are sent via email, included Scheduled Batch Letters, uses the email in the company details as
the reply to address. Emails sent via the Send Mail form uses the operator's email as the reply to address.
As you just configured a specific username to login to your email server and send the email, this requires
some attention. Typically, the reply email should match the email of the account used to sign in, but this
may not be feasible if you want the reply address to match your operator.
Option 1: Set all email fields ( Company Details and Operator) to use the same email account that you setup.
Option 2: Configure the email account to relay emails from other accounts.
Some email servers like Zimbra will have an option called 'Allow sending email from any address'
Office 365 uses a different configuration:
1. Sign into your Office 365 account and navigate to the admin section.
2. Navigate to Active Users.
3. Select a user that you want to be able to email with their personal email.
4. Under Mail Settings, click the Edit Exchange Properties link.
5. On the left Navigation Bar, click on Mailbox Delegation.
6. In the Send As section, click the plus (+) sign.
7. In the list, double-click (or select and click add) the account that you configured in hMailServer, then click OK.
8. Click Save on the bottom right.
9. Close the tab and repeat for remaining users or research Microsoft's batch process method for this.
Spf Record
This needs to be done on the DNS server that manages your domain. Typically, it's the same server or
service provider that manages your web site.
An SPF Record is only needed if you chose not to setup hMail as an email relay.
1. Sign into your web site console.
2. Navigate to the DNS Editor.
3. Check to see if you have an existing TXT record configured with SPF settings.
4. If you do not have an existing TXT record, create a new one:
Host: @
Value: v=spf1 +a +mx +ip4:123.123.123.123 ~all
Where 123.123.123.123 is the public IP of your email server that you installed hMail on.
5. If you do have an existing TXT record setup for SPF, then add your IP to the value:
EX: +ip4:123.123.123.123
6. Save changes and allow up to 24 hours to propagate.
Troubleshooting
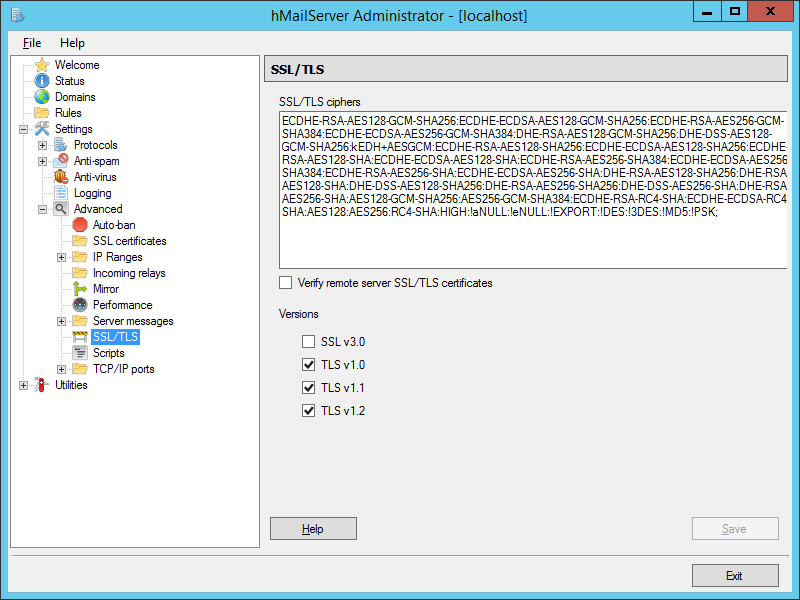
If you are having trouble sending emails, you can use hMailServer's logging tool to troubleshoot issues.
One known issue is remote certificates. To disable remote certificate checking, navigate to
Settings -> Advanced -> SSL/TLS and uncheck Verify remote server SSL/TLS certificates.
| 
Was this page helpful? Do you have any comments on this document? Can we make it better? If so how may we improve this page.
Please click this link to send us your comments: helpinfo@collect.org