How To Move Collect! To A New Server
This topic steps you through moving your entire Collect! system to a new location - to a new server,
or to a different drive on the same server.
It is recommended that you print this document so that you can refer to it while you are
moving your database. It contains detailed instructions and a settings reference table with
handy check-boxes to track your progress.
The steps we need to perform are:
- Prepare to move your database. It is always recommended that you maintain a
current backup of your entire Collect! folder.
- Move your installation by copying the ENTIRE Collect! folder to the new
location.
- Restore your Database using MS SQL Management Studio.
- Modify your settings on the server and the workstations to use Collect! in
its new location.
- Test Collect! in your new location to make sure everything is behaving
correctly.
- Contact Comtech Systems Inc. to obtain a new license code.
 A remote session will be required to implement this.
- Get everyone back to work!
The rest of this document gives the details of these important steps, as well as suggestions for
a successful move.
Prepare To Move Your Database
On your new server, ensure that you have Microsoft SQL Server installed with the features that you
require. Please refer to the Help Topic How to Install Microsoft SQL Server for more information.
This is the one time when you do not need to back up your Collect! folder, as you are only copying
files and folders, but you will need to make a backup of the database files to make this easier. Do
not erase Collect! from the original location. This may be needed if something goes awry with the
data on your new drive or server.
It is always recommended that you keep a recent backup of your system on hand. Moving to a
new machine, you will want to be aware of backup utilities' version sensitivity. Your new
server's operating system backup utility may not read your old backup media. Use a third
party backup utility if you need to span different operating systems. Does the new server
support the same backup media as the old?
- Make sure that no one is using Collect!. Stop the Collect! Companion Service to ensure
this.
- On the old server, run the backupSQL.bat file in the Collect\bin folder to create a BAK file
of each database. If will be located in the Collect\snapshot folder compressed into a .TAR.GZ
file.
 If you are comfortable with moving the MDF and LDF files as is, you can skip this step. If
you are moving Collect! to a new drive on the same server, then you can skip this step also
as the file permissions on the MDF and LDF will still work.
If you are comfortable with moving the MDF and LDF files as is, you can skip this step. If
you are moving Collect! to a new drive on the same server, then you can skip this step also
as the file permissions on the MDF and LDF will still work.
- In the MS SQL Management Studio, detach all of the Collect! databases (prefixed with cv_, cvr_,
cvx_).

Encrypted Columns
If you haven't already done so, export your column encryption certificate(s) and key(s) and import
them to the new server.
Click here
for more details.
Move Your Installation
To begin, we will move your entire Collect! folder to its new location. This should be done after
hours, when you have exclusive access to Collect!.
- Copy your entire Collect! directory to your new location. Make sure the copying operation
successfully copies all Collect! folders and files without interruption.
Use a compression software to create a ZIP/TAR/GZ file, then copy the compressed file to
the new server.
These instructions assume that you have a default setup of Collect!. That means all files
and folders are contained within the Collect! directory. If you have a custom setup, with
folders outside of the Collect! directory, please see the TROUBLESHOOTING section below.
Restore Your Database
- Once you have Collect! copied to your new location, uncompress the database backup in the
Collect\snapshot folder.
- Open MS SQL Management Studio and sign in to your new instance.
- Create a new login under the Security with the server role of sysadmin. We recommend the
Username collect and a random password.
- Right-click 'Databases' and select 'Restore Database...'
- On the General page, choose 'Device' then click the browse button '...'
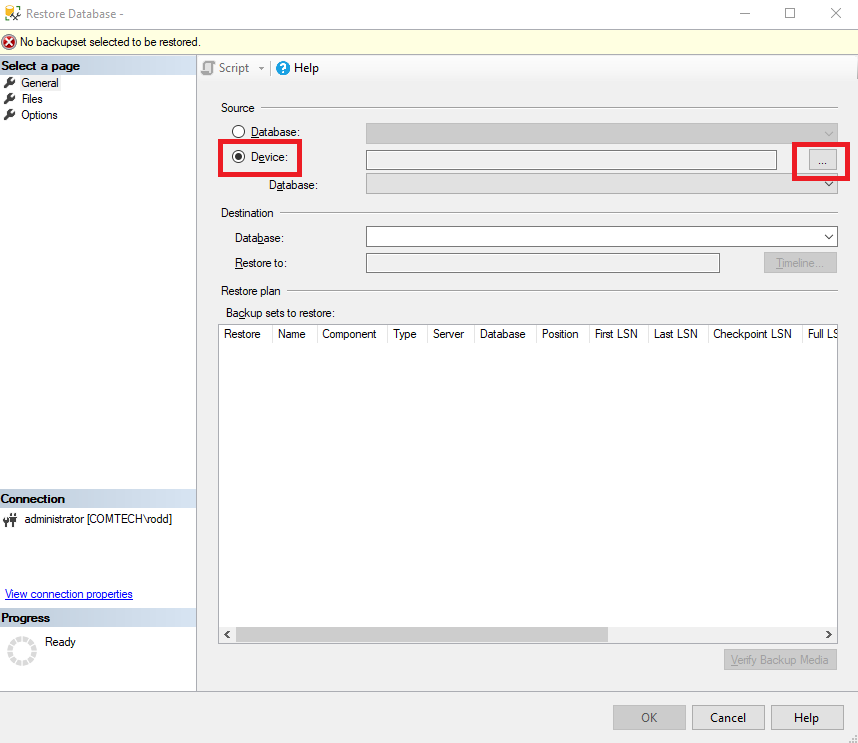
Restoring a Database
- On the Select backup devices window, click 'Add'
- On the Locate Backup File window, navigate to the location you extracted the database backup
files to.
- Select the Database you want to restore and click 'OK' then click 'OK' again on the Select
backup devices window.
- Everything on the General page should remain the same.
- On the Files page, ensure that the 'restore as' file paths are correct. Here are the default
folders using the masterdb as an example; though you can choose any location you wish.
* cv_masterdb - Collect\masterdb
* cvr_masterdb - Collect\masterdb
* cvx_masterdb - Collect\masterdb
* cvr_masterdb_w - Collect\masterdb{\html\db}
* cvx_masterdb_w - Collect\masterdb{\html\db}
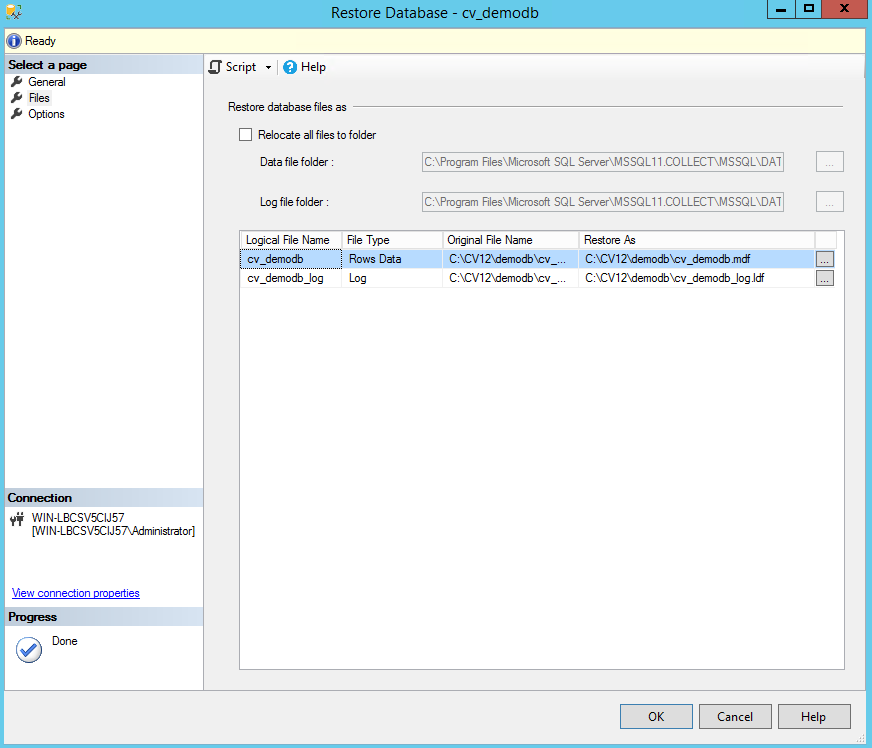
Restore File Location
- On the Options page, you may need to select 'Overwrite the existing database (WITH REPLACE)
if you copied over the old MDF and LDF files.
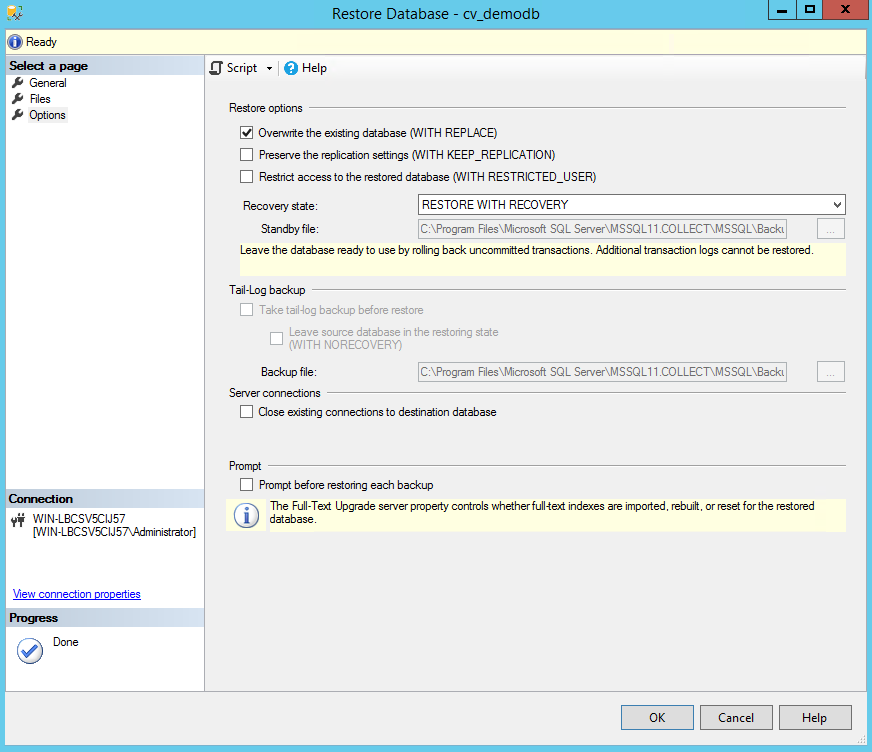
Overwrite Existing Files
- Click 'OK'
- Repeat for remaining databases, including the alternate libraries (cvr_alt... and
cvx_alt_...).
Modify Your Settings
Your server and workstations communicate with each other as you use Collect! This involves many
settings.
Right after the move, all of your icons and shortcuts are still pointing to the old setup. Collect!'s
initialization files are still pointing to the old server's IP address and TCP/IP Port. If you were
to start up Collect! and sign in, you would go to your old location!
Now you want to modify your settings so that all Collect!'s functions are performed at the new
location.
The following Settings Checklist table should be printed out with this document. This table
details all the settings that must be changed when Collect! is moved to a new location. Please use
it to track your progress to ensure that you have completed all necessary steps.
The necessary changes are divided up into two scenarios:
- New Drive indicates that Collect! is being moved to a new hard-drive
on the same computer.
- New Computer indicates that Collect! is being moved to an entirely
different server.
The actions you must perform on the settings are divided up into three categories:
- Create indicates that new files must be created.
- Modify indicates that existing files must be modified.
- OK indicates that no changes should be made to this setting.
| Settings Checklist |
| Setting
| New Drive
| New Computer
| Check When Completed
|
| Desktop Icons - Server |
Modify |
Create |
[ ] |
| Desktop Icons - Workstation |
Modify |
Modify |
[ ] |
| Windows Scheduler |
Modify |
Create |
[ ] |
| fsrv.ini |
OK |
Modify |
[ ] |
| sqlconfig.ini |
OK |
Modify |
[ ] |
| Network Share Folder |
Modify |
Create |
[ ] |
| Third party utilities' settings |
Modify |
Modify |
[ ] |
Program Folder
Unzipping the Collect! contents to a new drive or server will automatically create the files. We
recommend using the root of a drive like C:\Collect or D:\Collect.
Desktop Icons
These include the desktop shortcut icons for Collect! and the Collect! Web Host. The Target and
Start In paths must match your new location, i.e. {new path}\Collect\bin.
If moving Collect! to a new drive, you must edit or re-create the desktop shortcuts for the server
and it would be easier to re-map the network share to the new drive with the same name. This way
you don't have to modify your workstation shortcuts. If moving Collect! to an entirely new server,
you must create new shortcuts on the Desktop of the new server and edit the shortcuts on the
workstations to to the new server name.
Windows Scheduler
If you move Collect! to a new drive, you will need to update the file path in each event to the new
location.
If you move Collect! to a new server, you will need to create or transfer the events to the new server.
fsrv.ini
This file is in the Collect!\bin folder. If you are moving Collect! to a new drive on the same server
and intend to use the same IP address and Port, you do not have to change these settings.
If you are moving Collect! to an entirely new server, you must modify the Host and Port entries in
this file to match the IP address and Port of your new server. Once you have updated the fsrv.ini
file, run the fsrv - install.bat file to install the Collect! Companion Server. Then run the
fsrv - start.bat file to start the Collect! Companion Server. If you have trouble with this, you can
go to the Services section in Control Panel or the Task Manager to start the task.
If you have multiple IP addresses or network cards, you should 'force' the IP address to
remain the same by putting an upper carrot (^) in front of the host line.
Example: ^host=192.168.1.10
sqlconfig.ini
This file is in the Collect!\bin folder. If you are moving Collect! to a new drive on the same server
and intend to use the same SQL Server Instance, you do not need to change these settings.
If you are moving Collect! to an entirely new server and are planning to connect to a different
SQL Server Instance, you must modify the server entry to match the new server instance name.
Once on the new server, if you use auth=login in the sqlconfig.ini file, you will need to use a
semi-colon (;) at the beginning of the line to comment it out temporarily (;auth=login). After you
are able to sign in to Collect!, you will need to navigate to System -> Preferences ->
Database Preferences. On the Database Preferences form, update the SQL Login and SQL Password with
the one that you created above in the SQL Security Logins. The ID must have sysadmin privileges for
Collect! to work. Once done, close Collect!, uncomment the auth=login line, then re-open Collect!
and try to sign in.
If you have multiple SQL server instances, you should 'force' the server to remain the same
by putting an upper carrot (^) in front of the server line. Example: ^server=server\sqlexpress
Network Settings
You will need to alter your shared folders, drive mappings and permissions. These will have to be
modified if you have moved Collect! to a new drive. If you have moved to a new server, they will
have to be recreated on your new server.
Share the new Collect! folder as described in How to Network Collect!. Recreate any previously
existing drive mappings, and be sure to set permissions to allow your operators to read and modify
items in the Collect! database.
Third Party Utilities' Settings
Confirm that any third party utilities you are using with Collect! have all path information modified
to point to Collect! in its new location, including batch files or scheduled tasks that may have been
created by your technicians. This is especially important if you have scheduled maintenance to run
automatically at a particular time.
Test Collect!
Keep your old system in place until you are sure all the connections are correct with your new drive
or server and that all operators can sign into Collect! from their workstations.
- Sign into Collect! with ID 99 and password 99.
- Sign in with a normal user (level 1 or 10).
When you are sure you are ready to use your new system, make sure to remove any icons that point to
the old system.
Do not erase the installation of Collect! on the old server right away. This is a perfect backup for
now while you are proving your new system.
If you use Web Host, and ran it from the old server, ensure that any ports that were pointing to the
old server are now pointing to the new server.
Licensing
After you move Collect! to a new server, it will automatically detect that you have moved. The
license will still function for 60 days, but you will need to contact us to obtain a new license.
During this period, when a user level 1, 10, or 99 signs in, they will get a message that
"Collect! has detected a problem with your license."
Troubleshooting New Server
Custom Setup
Are you using a custom setup for notes, attachments, log files, or any other files referenced by
Collect!?
Do you store your attachments, log files, etc. outside of the Collect! folder?
If the answer is 'yes', you may have to copy additional folders from your original location, or change
your new settings so that Collect! can find the files. Please keep your original settings in mind and
make adjustments as necessary when moving Collect!
Old Collect! Server Still Running
A user copied Collect!, but left the Collect! Companion Server service or the SQL Server service
running on the old server for a few days while the workstation shortcuts were pointing to the new
server's Collect! copy. Consequently, his notes and attachments were being updated where the shortcut
was pointing (the new server), but his old database files were being updated!
The solution is to create an SQL backup on the old server and restore it into the new server. Then
check the fsrv.ini and sqlconfig.ini files to ensure they are pointing to the correct server.
Can't Connect to Server
Does your new server have a firewall that needs to be disabled or configured to allow connecting to
ports 1433 or 2530? For instance, you may have your own professional firewall, you
can disable the Windows firewall if it is also running on your new server.
Upgrading While Moving Collect!
It is never recommended that you upgrade at the same time as you move Collect! to
a new server. First make sure Collect! is working as you expect and your operators are using it.
Unless directed to, you should save upgrading for at least a month's cycle through Collect! Wait
until after the monthly financial crunch, when your administrative staff have verified that their
month end processes are complete. This will give you some breathing room for testing the upgrade.
Upgrading your Collect! can introduce additional unknown factors into your operations. If you attempt
to upgrade while moving your Collect! to a new location it may make potential errors almost impossible
to track down and correct.
When your hardware, operating system, network and Collect! are working to your satisfaction and you
are ready to consider upgrading, please refer to How to Upgrade Collect! for details.
Conclusion
Moving Collect! to a new location involves preparation before you move your database and configuring
settings afterward. A successful move depends on following all of the steps presented in this document.
If you want to upgrade as well, please wait until you are completely satisfied with and settled into
Collect!'s new working location.
If you need to contact Collect! Technical Services about issues experienced during moving Collect!
or issues that appear to be the result of moving Collect!, please have the Settings Checklist from
the above document on hand, as well as any relevant information relating to your network settings
and specifics of the issue you are experiencing.
| 
Was this page helpful? Do you have any comments on this document? Can we make it better? If so how may we improve this page.
Please click this link to send us your comments: helpinfo@collect.org