How To Install Microsoft SQL Server
This topic outlines installing the Microsoft SQL Server database engine. This topic only covers what
is required to run Collect!.
You will need to obtain the installation media from microsoft.com. MS SQL Server Express supports up
to 10GB of data for free. If your database is larger than that, you will need to contact an MS reseller
to obtain a license. For the purposes of Collect!, the Standard edition will do. You will need the
following installation media:
- Database Server (MS SQL Express)
- SQL Server Management Studio
- Go to Microsoft's website, or use a search engine to download the latest version of
SQL Server.
- Run the installer when it downloads. On the installation page, select 'Download Media.'
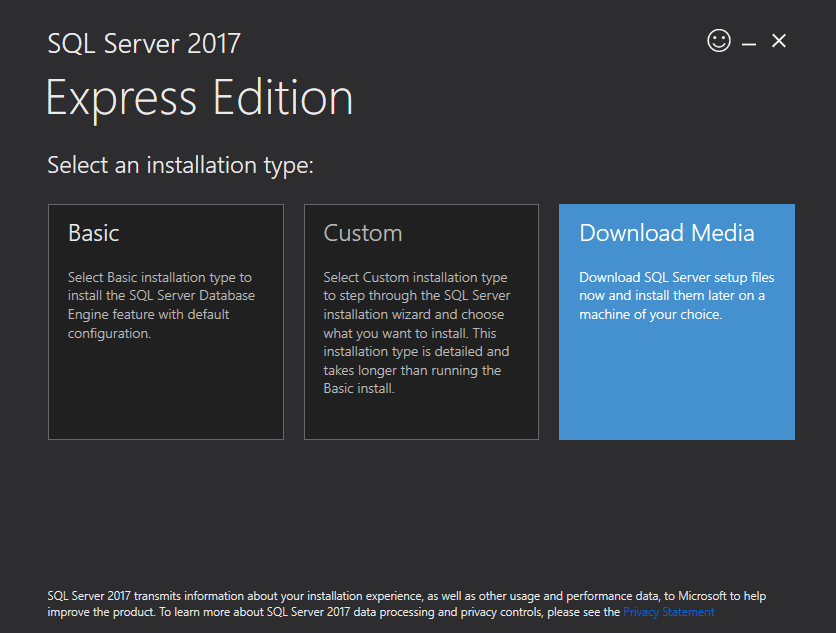
SQL Server Installer
- Select 'Core' or 'Advanced' depending on whether or not you plan to install other features.
For this help topic, we used 'Advanced.'
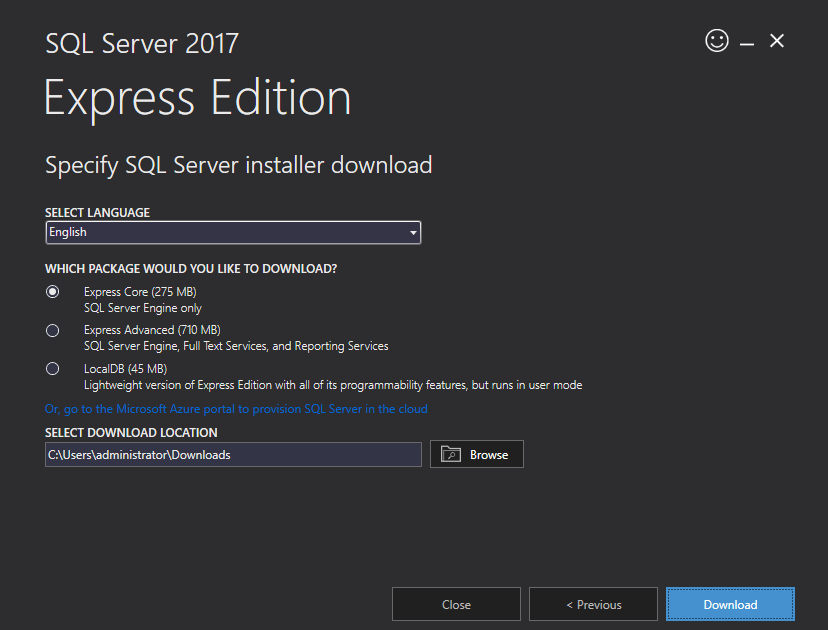
SQL Server Edition
- When the files download, select 'Open Folder' and run the SQL installation file.
- On the 'Installation' page, select 'New SQL Server stand-alone installation'
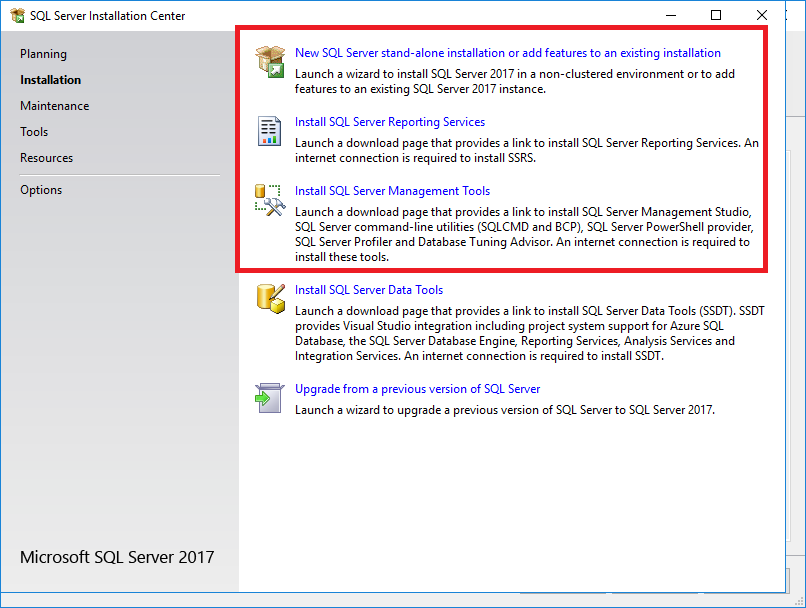
SQL Server Edition
 After SQL Server has been installed, it will require a reboot, so plan for this accordingly.
We recommend that you also install the 'SQL Server Management Tools' as it provides a user
interface for the database. If you plan to utilize the Collect! Dashboard, we also recommend
installing 'SQL Server Reporting Services' You don't have to configure it at this time. We
will provide configuration details as part of the dashboard installation documentation.
After SQL Server has been installed, it will require a reboot, so plan for this accordingly.
We recommend that you also install the 'SQL Server Management Tools' as it provides a user
interface for the database. If you plan to utilize the Collect! Dashboard, we also recommend
installing 'SQL Server Reporting Services' You don't have to configure it at this time. We
will provide configuration details as part of the dashboard installation documentation.
- Select Next on all the installation prompts until you get to the 'Install Rules' section. On
this page, make note of anything that is in red. The Firewall warning can be ignored. This
will apply when it comes to the help topic How to Network Collect! If you get a warning on the
domain controller section, it will be dealt with in 'server configuration' section below.
Click Next.
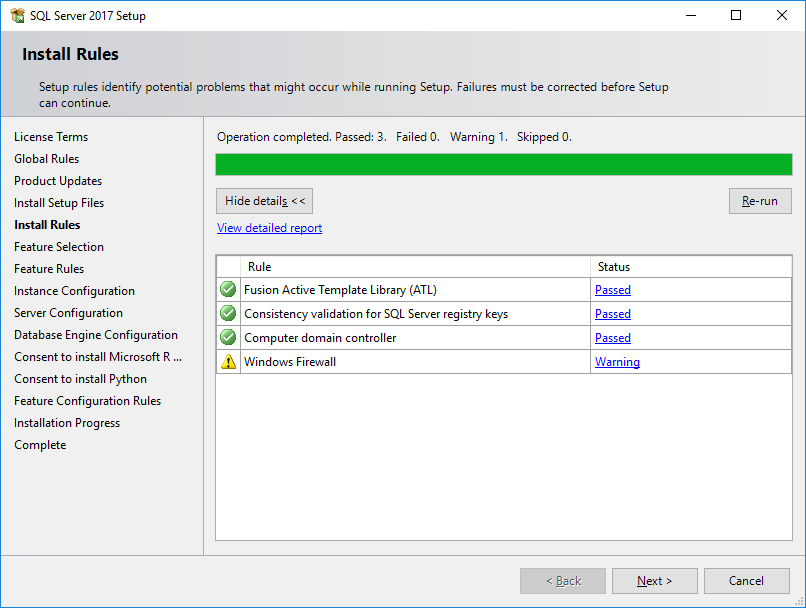
SQL Server Warnings
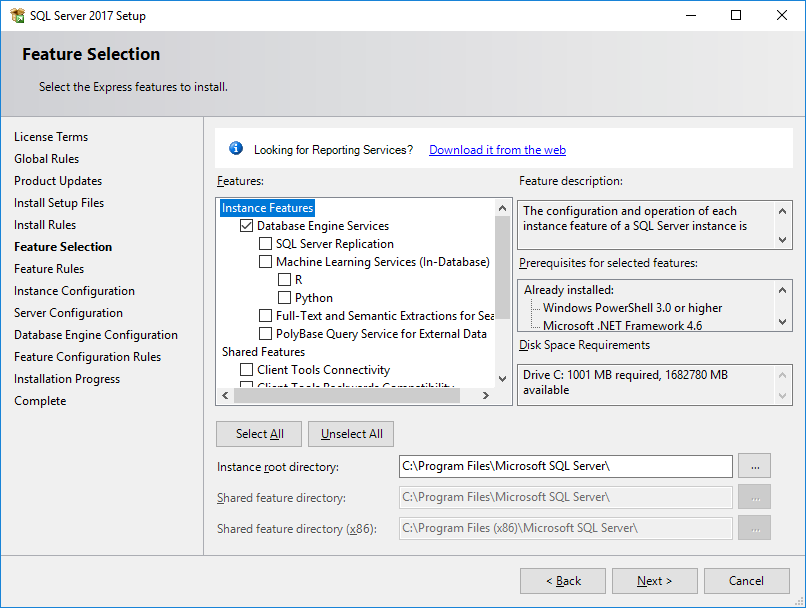
- On the 'Feature Selection' page, select 'Unselect All' and then check 'Database Engine
Services' as it is the only feature that Collect! needs to run. If you want to install other
features, this is up to you. Click Next.
SQL Server Features
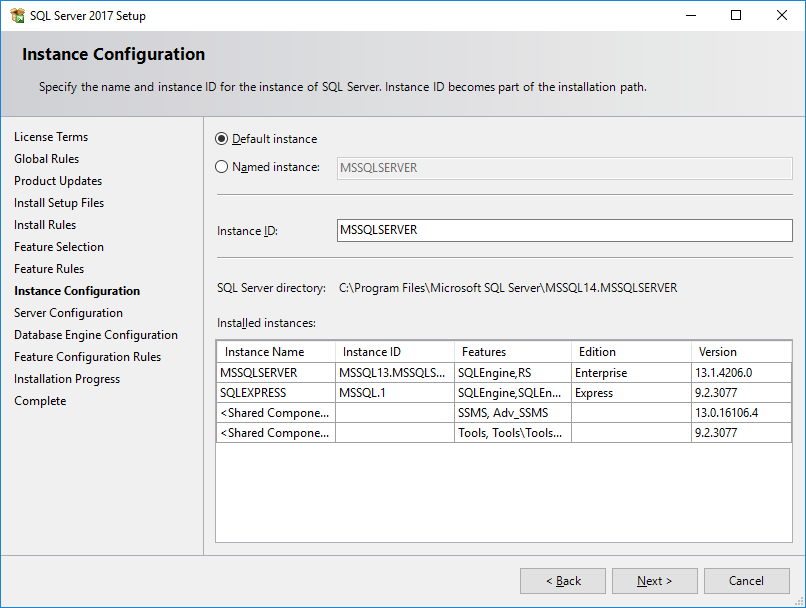
- On the 'Instance Configuration' page, select 'Default instance' (assuming that you don't
already have SQL server installed). Click Next.
If you want to give this install a specific name, you can select 'Named instance' and put
in a name. We recommend that the name be no more than 12 characters.
SQL Server Instance Configuration
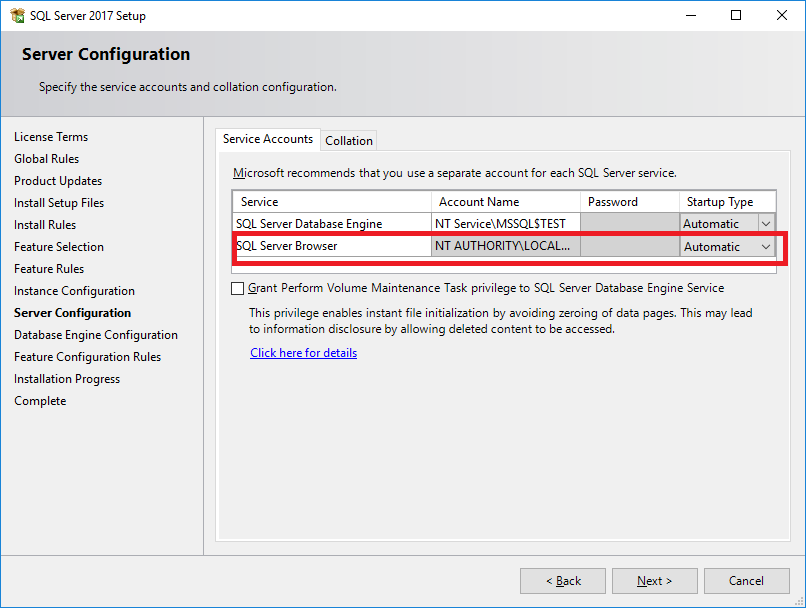
- On the 'Server Configuration' page, select 'Automatic' from the Startup Type drop down.
Click Next.
 The Account Name for the 'SQL Server Database Engine' should be a local service account. It
should NOT be a domain account. If you installed SQL Server on a domain controller, you will
have to manually change this or SQL server will not install properly. See the section below
on installing SQL Server on a Domain for more information.
The Account Name for the 'SQL Server Database Engine' should be a local service account. It
should NOT be a domain account. If you installed SQL Server on a domain controller, you will
have to manually change this or SQL server will not install properly. See the section below
on installing SQL Server on a Domain for more information.
SQL Server Instance Configuration
- On the 'Database Engine Configuration' page, select 'Mixed Mode' under the Authentication Mode
section, then enter a secure password.
- In the 'Specify SQL Server administrator' area, make sure that you have at least one user ID
in the list that can access SQL server without the sa password as a backup in case you forget
the "sa" password. This section should already have the ID of the person who is signed on and
installing SQL Server. Typically, you would want your domain administrator account listed.
Click Next through the remaining prompts.

SQL Server Instance Configuration
- If prompted, reboot the server.
- Rerun the SQL installer to Install the Management Tools.
- Proceed to the installation of Collect! via either How to Install Collect! or
How to Upgrade Collect!
Once the installation is complete, you may have some post-installation configuration to do if you
are planning to network Collect!. For that, please refer to the Help Topic How to Network Collect!
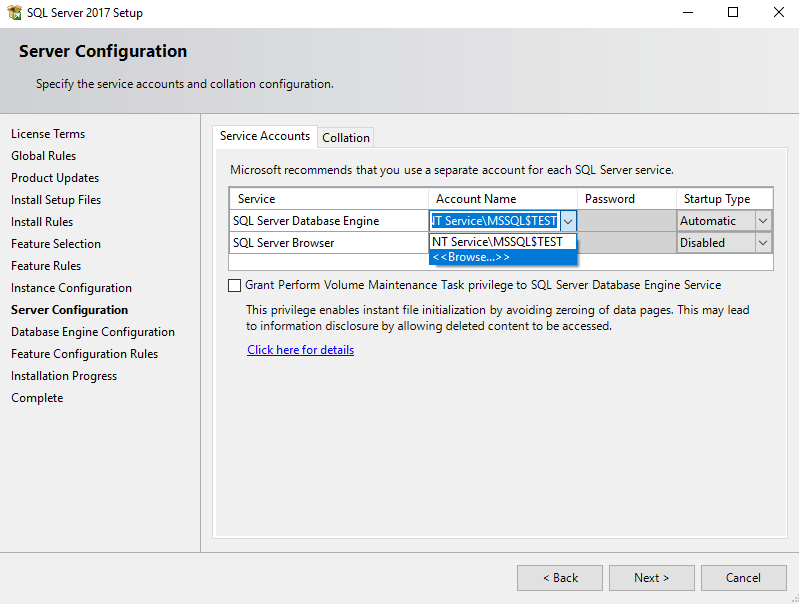
Installing SQL Server On A Domain Controller
You cannot use a domain account to run the database engine if you installed on a domain controller
or the installation won't finish properly. To correct this, on the 'Server Configuration screen, select
the drop down box next in the Account Name column for SQL Server Database Engine and choose 'Browse.'
SQL Server Configuration
Under 'Locations," you may have to select your server's name. In the 'Enter the object name to
select' box, type 'local' and then click 'Check Names'
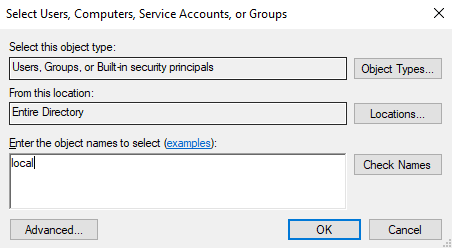
Select User
The box will either pre-fill with 'Local Service' or it will display a list to select from. Choose Local Service.

| 
Was this page helpful? Do you have any comments on this document? Can we make it better? If so how may we improve this page.
Please click this link to send us your comments: helpinfo@collect.org