Payment Processing Gateway
The Payment Processing Gateway window is where you
enter the details for your preferences and login
credentials to the gateway.
Each payment type (card or check) and each currency needs
to be setup as a separate record. This allows you to have
granular control on how different types and currencies
should be processed.
To access the setup screen, your menu path is
"System\Preferences\ Payment Processing Setup\Payment Gateways".

Payment Processing Gateway
Gateway
Select the Provider and Gateway that you are using.
Example: Repay(usaepay)
 Comtech Systems offers this as a white label service.
If you would like to use payment processing through us,
please contact support@collect.org.
Comtech Systems offers this as a white label service.
If you would like to use payment processing through us,
please contact support@collect.org.

Payment Type
Select from a list of supported payment instruments (card
or check) that you will be accepting.
If you are accepting both card and check, then
multiple gateway records need to be created
using the same login credentials.
Currency
Select from a list of supported currencies that you will
be accepting.
If you are accepting multiple currencies, then
multiple gateway records need to be created
using the same login credentials.
Default Gateway For Currency
If, for some reason, you should need to setup the same
currency for multiple gateways, then check this box to
indicate which gateway to use as the default for this
currency in the Client and Debtor/Consumer portals.
Gateway Configuration
Click this button to enter the login credentials provided
by your merchant provider.
As each merchant provider has different requirements
for connecting to their API, this screen is dynamic
and will display the applicable fields for the gateway
you selected.

Example Gateway Configuration
Vault
Select from a list of vault providers.
A vault is used to encrypt card data. This way PCI data is
not stored in Collect!.
At present, we only support Evervault. Comtech Systems
offers this as a white label service. If you would like
to use Evervault through us, please contact support@collect.org.
Vault Configuration
Click this button to enter the login credentials provided
by your vault provider.

Example Vault Configuration
Last Reconcile Date
This is the last date that this gateway was reconciled.
It will be blank until you run your first reconciliation.
If the date is blank, the system will only look
back 2 days.
 The Last Reconcile Date should NOT be manually
manipulated once you are actively using this gateway.
The Last Reconcile Date should NOT be manually
manipulated once you are actively using this gateway.
 WARNING: If the last reconcile date is more
than 7 days into the past, Collect!
will only reconcile the last 2 days.
WARNING: If the last reconcile date is more
than 7 days into the past, Collect!
will only reconcile the last 2 days.
Reconcile
Push this button to reconcile just this gateway.
Payment Transaction
Select the Transaction Type that you want to use for your
payments. This Transaction Type must already exist in your
list of Transaction Types.
Payment Fees
You are able to select the preference to allow or disallow
the charging of fees in general. You must also
select on a per Client basis in the Client Settings screen
which of your clients will allow the to be charged
to its debtors.
To charge fees, it is every site's individual
responsibility to ensure you are lawfully able to charge
these fees in your your region and as per your clients'
individual wishes in this regard.
Click the Advanced button in the lower right corner of the
client screen and you will see a screen as follows, and
the "Credit Card convenience fees" (for card) and the
"ACH convenience fees" (for check) switches are shown
on the left.
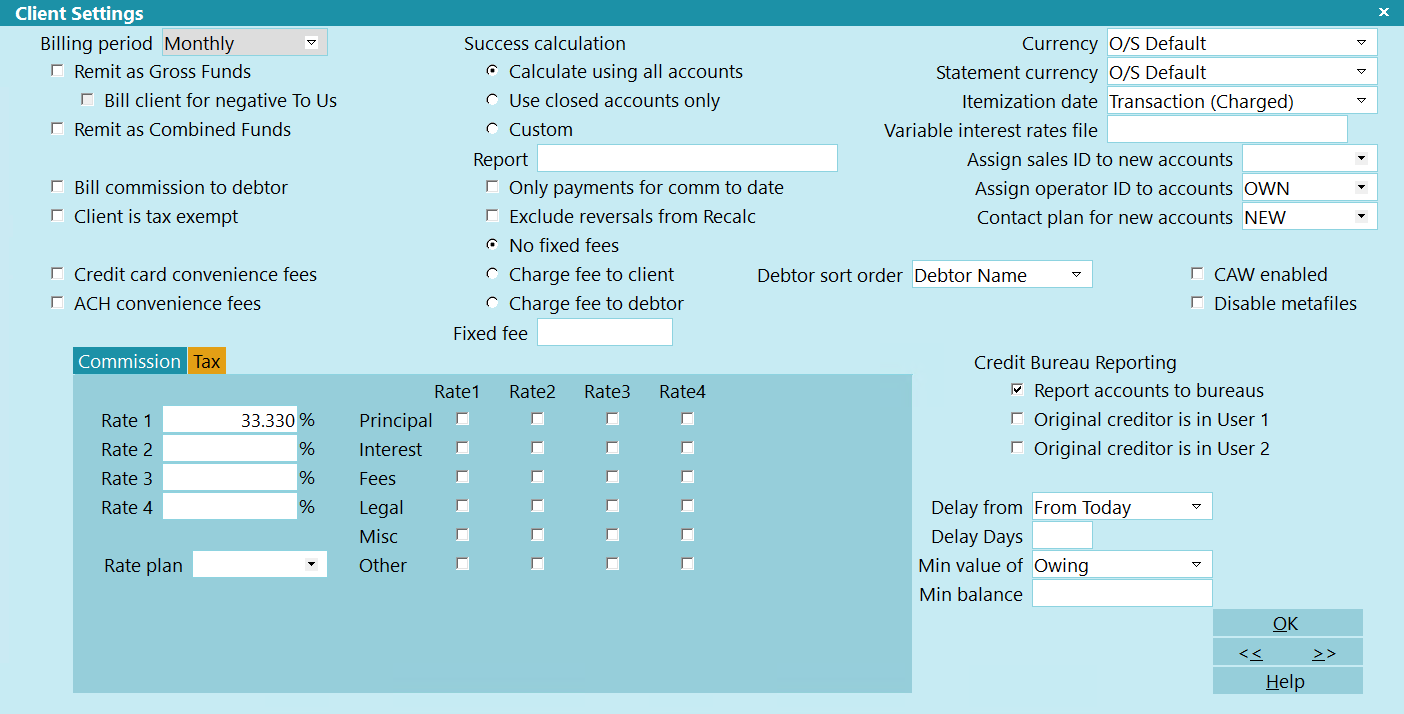
Client Settings Screen
If you have a large client base which practicality
would preclude manually updating this switch
for ALL clients (or a large tagged list), contact
Technical Services for assistance with a write back
to enable a volume of clients in mass for this
switch.
Enable Fees
Select the option that best applies to you:
- No: No fees will be charged for payments.
- Yes - Collect! Managed: A fee will
be added to payments based on rules defined in Collect!.
- Yes - Gateway Managed: A fee will
be added to payments based on rules defined by your
payment provider.
WARNING: Make sure the correct option is selected to
prevent incorrect fees from being added.
Fee Type
This option only appears for Collect! managed fees.
Select the option that best applies to you:
- Fixed Dollar: A flat dollar amount
to be added to each payment.
- Percentage: A percentage of the
payment amount to be added to each payment.
- Dynamic: Dynamic rules where
you can define fees by State.
Fee Amount
This option only appears for Collect! managed fees,
and Fee Type Fixed Dollar.
Enter the dollar amount for the fee.
Fee Percentage
This option only appears for Collect! managed fees,
and Fee Type Percentage.
Enter the percentage of payment amount for the fee.
Fee Plan
This option only appears for Collect! managed fees,
and Fee Type Dynamic.
Enter the Fee Plan to use to determine the amount for the fee.
Apply Recur Fee To
This option only appears for Collect! managed fees.
Depending on your jurisdiction, some locations only allow
fees on the first payment. Others allow fees on all payments.
Select the option that best applies to you:
- First Payment Only: A fee will only
be added to the first payment in a recurring payment
plan.
- All Payments: A fee will be added to
all payments in the payment plan.
Lump sums are not considered payment plans, so if a
lump sum is paid first, then a recurring plan with
"First Payment Only" selected, then 2 fees will be added. If
multiple payment plans are added with "First Payment Only"
selected, the a fee will be added for each individual
payment plan.
Fee Transaction
Select the Transaction Type that you want to use for your
fees. This Transaction Type must already exist in your
list of Transaction Types.
Fee Payment Transaction
This option only appears if "Single Payment
Transaction" below is unchecked.
Select the Transaction Type that you want to use for your
payment to fees. This Transaction Type must already exist in your
list of Transaction Types.
Create a dedicated payment Transaction Type and configure
it as Payment Breakdown, but only select Fees for the
breakdown types.
Declined Transaction
This option only appears if the Payment Type is card.
When payments are returned as Declined, you can
elect to use a dedicated Transaction Type.
If this field is blank, the "Payment Transaction" type
is used.
Select the Transaction Type that you want to use for your
card declines. This Transaction Type must already exist
in your list of Transaction Types.
You can configure the Transaction Type to be Internal
so it doesn't appear in your Payment Reports.
Declined Attempts
This option only appears if the Payment Type is card.
If this field is blank, then a declined transaction will not
be retried.
If this field is populated with a number, then the system
will try to process it again for the specified number of days.
Reversal Transaction
Select the Transaction Type that you want to use for your
payment reversals. This Transaction Type must already exist
in your list of Transaction Types.
If none is specified, then "Payment Transaction" is used.
Reversal Fee Transaction
Select the Transaction Type that you want to use for your
fees on reversed payments. This Transaction Type must already
exist in your list of Transaction Types.
If none is specified, then "Fee Transaction" is used.
Description
Enter a custom description to display in the Gateway list
on the Payment Processing Form.
Receipt Letter
Enter a letter report to be used to send a printed letter
to the Debtor.
The module will just create a Letter Contact on the
account. You will need to run your batch letters to
print the letter or submit to the Letter Service.
Receipt Email
Enter an email report to be used to send an email to the Debtor.
The module will just create a Letter Contact on the
account. You will need to run your batch letters to
email the letter.
Receipt Text
Enter an text report to be used to send a text to the Debtor.
The module will just create a Letter Contact on the
account. You will need to run your batch letters to
text the letter.
Use Active Grp Owing For Recur
When payments are submitted to the gateway, the payment
amount is compared to the Debtor's balance. If the owing
ever drops below the payment amount, then the payment
amount is adjusted to match the balance and any following
payments are deleted.
Click this ON with a check mark to enable the ability
to have Collect! use the Active Group Owing instead of
the Debtor's owing for this comparison. With this box ON,
a check box is enabled on the Payment Processing Form to
allow payment plans to be created on individual Debtors
or Grouped Debtors.
If this box is checked, and a payment plan is
posted to a Group, then when the Group Member's
balance reaches 0.00, the post-dated Transactions
reviews, and communication Contacts will remain
on the Closed Debtor. The payments will post to
the closed Debtor, reverse itself, then post to
the next group member. Your letter batch will
need to be configured to include Closed accounts
when printing.
Single Payment Transaction
Switch this ON with a check mark if you want to only post
one fee transaction for the fee amount. The payment will
reflect the full amount of the payment. For example, a
$100 payment with a $5 fee would have a payment of $105
and a fee of $5.
Switch this OFF if you want the system to post the fee
transaction, then a payment to fee. The payment transaction
will reflect the amount less the fee. For example, a
$100 payment with a $5 fee would have a payment of $100,
a fee of $5, and a payment to fee of $5.
Leave this off for best results. The single payment
is posted before the fee, so the payment breakdown
won't reflect it properly.
Disable EFT Confirmation Review
Click this ON with a check mark to stop Collect! from creating
the review contact that is dated 2 days before the payment is
due with the description of "Confirm EFT plan authorization."
Set No Autodelete For Contacts
Click this ON with a check mark to enable Collect! to check
the "Do not autodelete" and "Allow delete on close" boxes on
all contacts created for recurring payments.
If you have enabled "Use Active Grp Owing For Recur"
above, then check this box ON. When the group members
owing reaches 0.00, and the account is closed, this
box will preserve the Review, Promise, and Letter
Contacts. With this box OFF, the reviews and letters
will be deleted.
Decl/Rtn Pymts Cancels Recur
Click this ON with a check mark to set your preference that
a declined card is to cancel the payment plan on the account.
If you have a value set in "Declined Attempts," then this
process won't run until after the number of days specified
in that field.
Cancelling a plan will automatically mark your Promise Contact
as Stopped, change your Due Date in the Review Contact marking
the end of the original terms to be the same as the delete date
and also delete any remaining EFT Notification letters scheduled.
Create Review For Decl/Rtn
Click this ON with a check mark to have Collect! create a
review contact when a declined payment (for cards) or a
returned payment (for check) is posted to an account.
Run Plan On Recurring
Select a Contact Plan to run whenever a recurring plan is setup.
| 
Was this page helpful? Do you have any comments on this document? Can we make it better? If so how may we improve this page.
Please click this link to send us your comments: helpinfo@collect.org