How To Schedule A TCN Call Campaign
This topic gives detailed steps for using Collect!'s batch processing to schedule TCN call campaigns.
 TCN Campaign processing requires that you have set up an account with TCN and that you have
entered the login credentials as issued to you by TCN Broadcasting to access their service.
TCN Campaign processing requires that you have set up an account with TCN and that you have
entered the login credentials as issued to you by TCN Broadcasting to access their service.
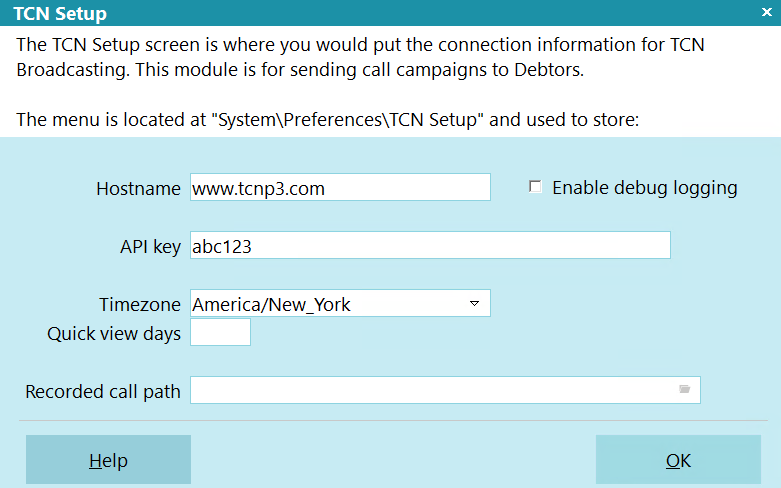
TCN Setup
The TCN Module is an add-on functionality. Contact Administration at 250-391-0466 option 3
for pricing options.
TCN Schedule Calls Form
Click Here to View this Form.
Click Here to Close this Form.
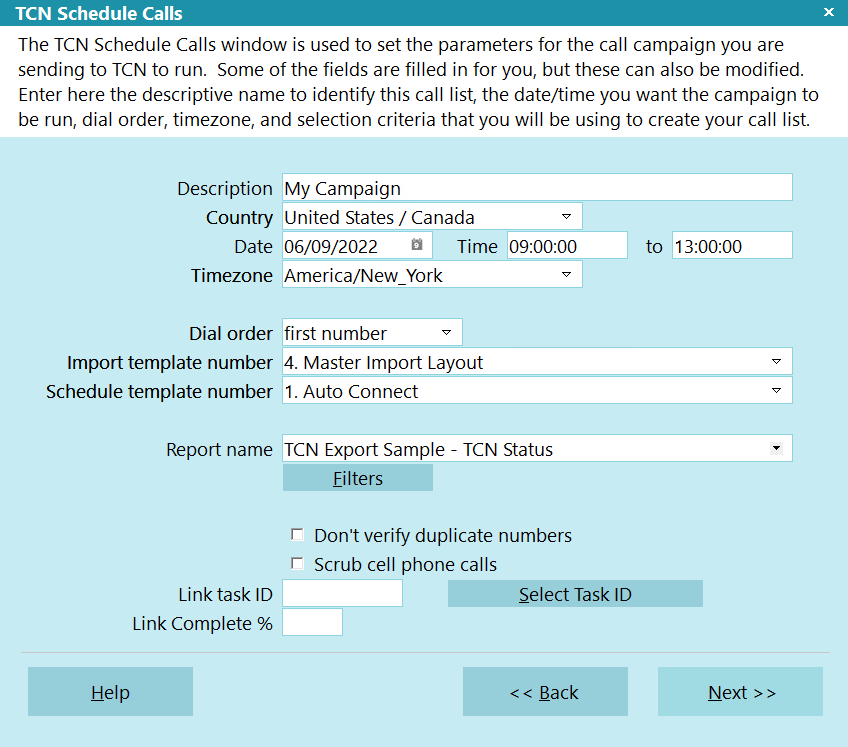
The TCN Schedule Calls window is used to set the parameters
for the call campaign you are sending to TCN to run. Some
of the fields are filled in for you, but these can also be
modified. Enter here the descriptive name to identify this
call list, the date/time you want the campaign to be run,
dial order, timezone, and selection criteria that you will
be using to create your call list. The name of the account
selection report you use in "Print\Reports and Letters" is what
you use to indicate the list criteria you are using.
Collect! ships with 3 reports that are set up already in the
TCN environment and will function without any further setup or
configuration.
TCN Schedule Calls
If you enter invalid data in any of the fields,
you will be prompted to correct the information.
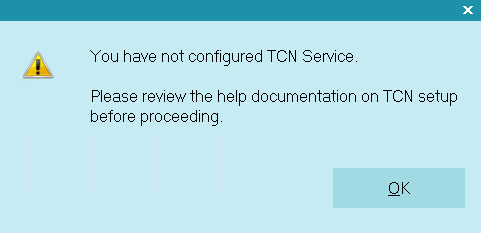
Invalid Information Entered
TCN Campaign processing requires that you have
established an account with TCN Broadcasting and
that you have entered your login credentials in
the TCN Setup screen in Collect!.
TCN Setup
Please refer to Help topic, How to Schedule a TCN Call Campaign,
for detailed steps.
Description
Enter a short unique description for this call campaign.
 Use a unique description for this particular call
campaign so that you can recognize it in the list
later on when you are ready to process the results.
Use a unique description for this particular call
campaign so that you can recognize it in the list
later on when you are ready to process the results.

Country
Select your country area from the pick list.
In most cases, you will not need to alter this,
unless you are campaigning on several continents.
Date
Enter the Date that you want the call campaign
to run. Default is the current Date. You can
change this as needed.
Time
Enter the Time that you want the call campaign
to begin. Default is the current Time. You can
change this as needed.
To
Enter the Time that you want the call campaign
to end. Default is End of Day or when the calls
are completed, whichever comes first. If you enter
an invalid time, you will be prompted to correct
your information.
Time Zone
Enter the Timezone you are using for your Start
and End Time. This field may be filled automatically
if you set a Timezone in the TCN Setup window located
in the menu path "System\Preferences\TCN Setup".
Dial Order
This setting is used when you are sending multiple
phone numbers for each account in your report. It
controls the order in which numbers are attempted.
A good default is "First number." The setting
"Natural order" dials the numbers in the order
in which they appear in the report template,
from left to right.
Be aware that when you select "First number,"
TCN will only dial the first number it finds,
even if you have used one of the report
templates that sends up to 4 phone numbers.
The setting "Custom" may be selected if you have
previously set up a custom dialing order with your
TCN representative.
Import Template Number
Select the import template from the pick list. The
options shown are the available templates set up for
you at the TCN site.
You can customize the Import Template that you use
for your call campaigns on the TCN side. You would
also need to create new extract report(s) in Collect!
that will write out records to match your settings
on the TCN website.
Schedule Template Number
Select the type of calling template you want to use
for this broadcast. The options for this setting are
from your individual site Broadcast setup on the TCN
website side of the process.
Report Name
Select the name of the Report that you will be using
to create your call campaign as it is identified in
your Print Menu.
It is important that the output format of the report
matches a default Import Template of the same name at
the TCN website. Their campaign upload process is
always looking to match the name of your call campaign
to a predefined template on their side.
Filters
Click this button to open a sub-form with a variety of
filters that allow you to run a semi-adhoc campaign.
The filters are placeholders. They do NOT invoke
any search criteria on the list to be submitted.
You need to edit the applicable report in the
Report Name field below to reference the fields
that you want to use as a filter. The form prefix
code for the report writer is @car (Client Analysis
Report).
You can put a control file on the Report Name field
below to hide the fields on the Client Analysis
Report form that don't apply to the TCN report
that is selected. Users would select the report
first, then click the filters button.
Don't Verify Duplicate Numbers
Select this option to tell TCN not to check this campaign for
duplicate phone numbers submitted in the last 24 hours. By Default,
TCN will filter out the duplicates to prevent the same number
from being called too frequently.
Scrub Cell Phone Calls
Select this option with a check mark if you want TCN to
scrub cell phones for the campaign you are scheduling.
This option requires that you have enabled cell
phone scrubbing with your TCN Broadcasting
representative.
See the Help topic, Scheduling a Call Campaign, for
more information.
Link Task ID
Enter the Task ID of the existing campaign that you want
this campaign to follow. If you do not know the Task ID,
click the Select Task ID button.
Select Task ID
Click this button to display a list of existing campaigns.
LINK COMPLETE %
Fill this in with a percentage value. TCN will start this
campaign once the campain in the Link Task ID field has
reached the completion percentage in this field.
Help
Click this button for help on the Schedule Calls
screen and links to related topics.
Back
Select this to return to the previous screen.
Next
Select this to create your call campaign and
upload it to the TCN website to be run.
Scheduling A Call Campaign
- Ensure that the TCN report that you want to use is written with the correct logic to extract
the accounts you want to dial and filters out anything you need to exclude.
- Navigate to Tools -> Batch Processing.
- Click the radio button beside "Process TCN Campaign", then click the Next button.
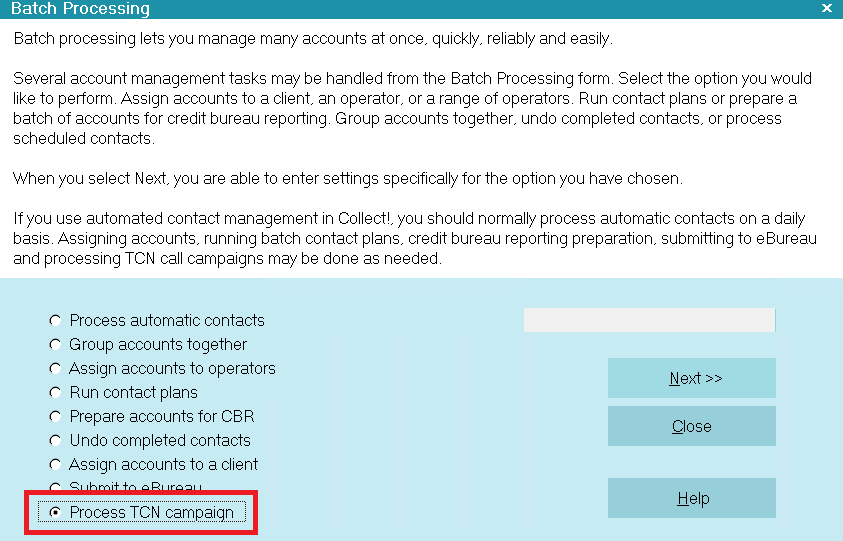
Process TCN Campaign
- Select the option "Schedule Calls" when the TCN Select Function popup appears.
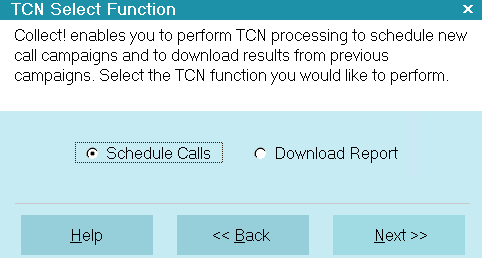
Select Schedule Calls
- Click the Next button to continue. The TCN Schedule Calls popup is displayed.
TCN Schedule Calls
- Fill in a Description.
- Select the Country for the calls.
- Select the Date and Time Range for your call campaign.
- Set your Timezone. This field fills with the default set up in the TCN Setup screen.
- Select the Dial order.
- First Number: This setting dials ONLY the first number even if you send
all 4 available phone fields.
- Natural Order: This setting dials Home, then POE#, then Cell, then
Other.
- Custom: This setting dials in the custom order you set up at the TCN site.
You cannot change this custom setting from within Collect!. It must be set at the
TCN site.
- Select the Import Template Number. The pick list will display the available templates
pre-configured for you to choose from already on the TCN website. Below are examples of Imports
that are available.
- Home#/ZIP - Home Phone Number
- Home#,POE#,Cell#,Other#/ZIP - All 4 Phone fields
- Home#,Poe#,Cell#,Other#/All Data - 4 Phone fields and additional account information such
as Owing, Charged and Worked.
- Collect!/TCN Import
- Select the Schedule Template Number. This field sets your messaging preferences for the call
campaign. The pick list fills automatically with the available choices. Your selection depends
on personal preference and any setup you have already in place at the TCN website. Many options
are available for customizing this when you set up your account with TCN.
- Select the Report from your list of Report Definitions. There are 3 defaults and they match
the Templates at the TCN website. Please be sure to pick the TCN report that matches what you
have selected for the Import Template Number.
If the report you selected has the option for dynamic filters, click the Filters button
to set the filters.
- Switch ON "Don't verify duplicate number" if you want to disable TCN's safety feature that
prevents the same number from being called twice in the same day.
- Switch ON "Scrub cell phone calls" with a check mark if you wish to enable this options for
the campaign you are scheduling.
You must have cell phone scrubbing activated in your TCN account as configured by your TCN
Broadcasting representative to enable this service.
- Click the "Select Task ID" button or fill in the Link Task ID field if you want this campaign
to automatically start after an existing campaign. If populated, then fill in the Link
Complete % field to indicate how far the other campaign needs to complete before starting this
campaign.
- Press the Next button to continue.
If you have entered invalid data in any of the fields, or leave any of them blank, you will
be prompted to fill in correct information.
Invalid Information Entered
- Click the Start button when the TCN Start Process screen appears.
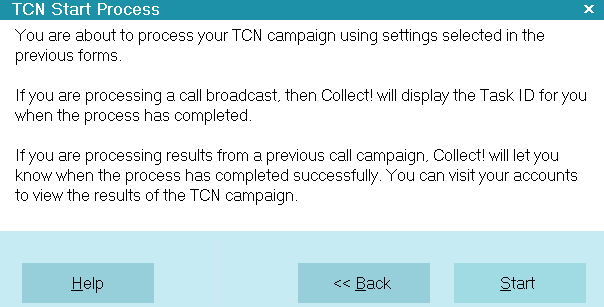
TCN Start Process
Collect! will upload all the account information automatically to the TCN website, with the run-time
parameters you indicated.
- When the process has completed successfully, Collect! returns the Task ID assigned to this
batch. You can use this when processing results later on. It will also be displayed for you
in the list of Tasks when you are execute the download to obtain your call results report.
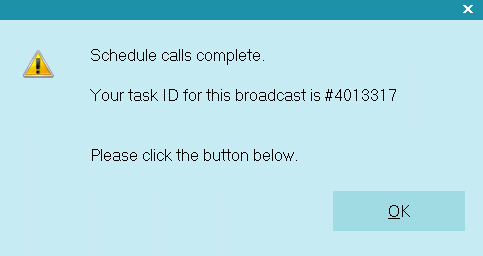
Schedule Calls Complete Message
When the data is submitted to TCN, a copy of the data is stored in the "Collect\Log
Files\Dialer Output" folder with a date/time stamp.
Please refer to Help topic, How to Process Results from TCN Call Campaigns for more details.
Selecting Accounts To Process
There are several ways that you can select accounts to dial in your call campaigns.
Option 1. Default TCN reports shipped with Collect!.
Collect! ships with a default TCN report that you can use to select your accounts to process. These
reports select on the basis of the account having a Phone Contact with a Description of Dialer.
Option 2. Customized TCN reports created for your needs.
You can create ( or have Comtech create ) customized TCN reports using criteria that you need. For
example, you can create a custom select process to include or exclude on defined criteria such as
status, balance (minimum or min/max range), list date range, new business only/aged business only,
small balance only, portfolio specific for collection teams etc. Provided that your data has the
populated fields to use as search/comparison points, then call campaigns can be created by work
plan strategy design.
Contact Controls
If you have created Contact Controls for Phone types, then your export report should reference the
@CCCALLOK command to prevent numbers from being sent to the dialer that should not be called.
Please refer to the Help topic How To Use The Report Writer Commands for more information.
Diagnostics
TCN processes are tracked in Collect!'s Application Log in the "Batch" section. The Log Viewer is
accessible via the menu path of \System\ Diagnostics\Application Log. Switch ON "Batch" to view TCN
log entries, such as Task IDs, dates, and TCN events.
Information which is logged via "Enable debug logging" will be logged in the "Debug" section
of the Application Log. Debug logging is enabled in the TCN Setup screen.
| 
Was this page helpful? Do you have any comments on this document? Can we make it better? If so how may we improve this page.
Please click this link to send us your comments: helpinfo@collect.org