ACH Payments Setup
The ACH Payments Setup window is where you enter the details
for your Billing Tree ACH payments preferences
and login credentials to the ACH Gateway.
To access the setup screen, your menu path is
"System\Preferences\Payment Processing Setup\ACH Payments Setup".
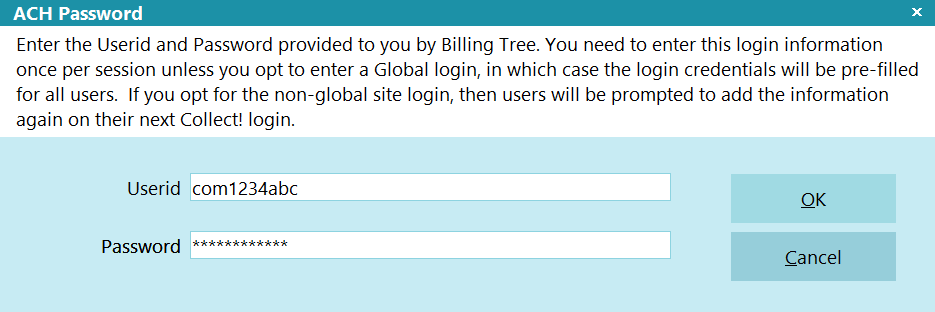
Billing Tree ACH Password
Per Session ACH Logins
You can set up different user accounts at Billing Tree if
you need to set different transaction limits for your collectors.
For example, if entry level collectors are not to be permitted to
set up an ACH payment amount higher than $500, then this can be
controlled at the Billing Tree login level. Advise your Billing
Tree Representative of your requirements in this regard when you
set up your account with so that you have enough logins to meet your
needs.
If you use multiple signons with the module, you will need to run a
batch Reconcile ACH History for EACH login, SEPARATELY, that your
company uses.

Set ACH Login Globally
You can enter your UserID and Password ACH Setup window located
in the menu path "System\Preferences\ Billing Tree Setup\ACH Setup".
It will be stored and used each time users sign into Collect!.
Excepting User Levels 1, 10 & 99, your other users levels will not
see the PIN prompt at all after the global login is created.
User Levels 1, 10 & 99 need only click OK to accept the auto-filled
default login credentials.
The information to be entered in the ACH Setup screen is described below.
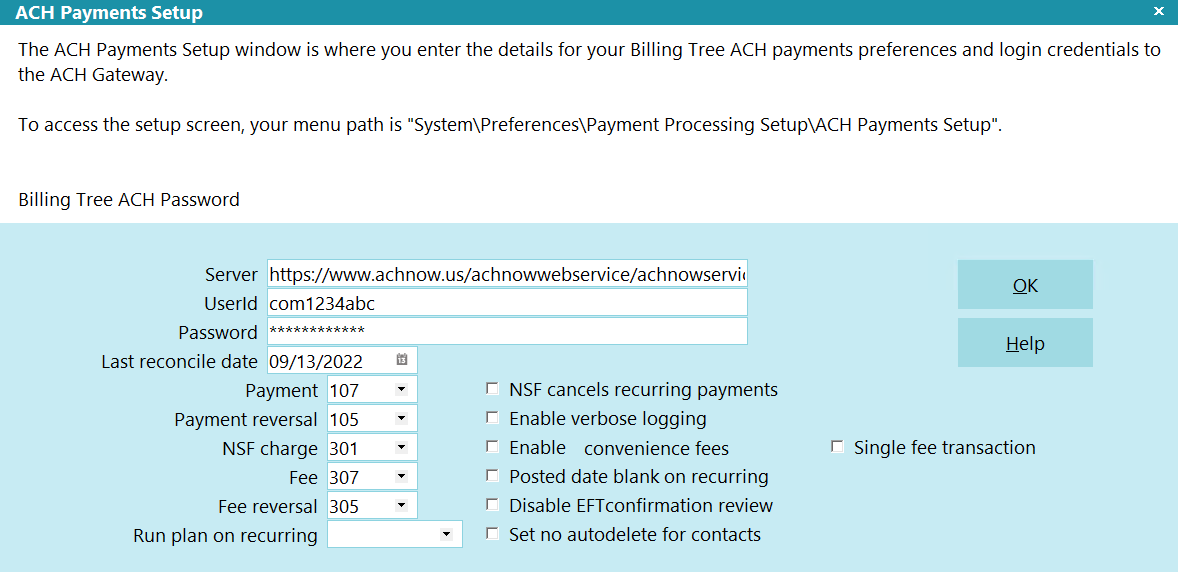
ACH Payments Setup
Server
This is where you enter the url (web address)
of the Billing Tree ACH Gateway.
https://www.achnow.us/achnowwebservice/achnowservice.asmx?WSDL
Userid
Enter your Billing Tree assigned UserID.
Password
Enter your Billing Tree assigned Password.
Last Reconcile Date
This is the last date that Reconcile ACH
History was run successfully. If you have never
run " Reconcile ACH History," enter the date
that you established your account with Billing
Tree. Future reconcile attempts will query
transactions between this date and the day
that they are run, inclusively.
Collect! updates this field automatically
when you complete your reconciles successfully.
Except for a new module initialization, there
is not an occasion you shouldn't have
enter/modify the date you see in this field.
New module initializations should enter the
date immediately BEFORE the actual date
you start to use the module/start entering
payments.
 WARNING: If the last reconcile date is more
than 7 days into the past, Collect!
will prompt you during the reconciliation
process to confirm that you want to proceed.
If you run the task via the Task Scheduler,
Collect! will not run the reconciliation
and will put an entry in the Application Log
that the task failed.
WARNING: If the last reconcile date is more
than 7 days into the past, Collect!
will prompt you during the reconciliation
process to confirm that you want to proceed.
If you run the task via the Task Scheduler,
Collect! will not run the reconciliation
and will put an entry in the Application Log
that the task failed.
Payment
Select the Transaction Type that you want
Collect! to use for your Billing Tree ACH
payments. This Transaction Type must already
exist in your list of Transaction Types and it
must be set up as a Financial Type "Payment".
You may wish to use the shipping default
transaction type 107.
Payment Reversal
Select the Transaction Type that you want
Collect! to use for transactions created to
offset previously posted payments when they
are returned as NSF. This Transaction Type
must already exist in your list of
Transaction Types and it must be a Financial
Type "Payment". You may wish to use the
shipping default transaction type 105.
NSF Charge
Select the Transaction Type that you want
Collect! to use for transactions created to
charge an NSF fee to the Debtor's account
when a payment reversal is posted. This
Transaction Type must already exist in
your list of Transaction Types and it should
be a Financial Type "Fee". You may wish
the shipping default transaction type 301.
Leave this field blank if you do not want
to charge an NSF fee for transactions
returned NSF from Billing Tree.
Convenience Fees
Collect! enables you to add a convenience
fee to the ACH transaction you are processing.
This is a default setting that may be
overridden on an individual basis.
To charge convenience fees, it is each site's
responsibility to ensure that they are
allowed to do this in your jurisdiction
and according to your agreement with
your Clients.
If your company is going to be charging convenience fees
to debtors for ACH payments, in addition to enabling the
feature in the ACH Setup window, you do need to enable an
indicator in each client Advanced Settings screen in order
to enable the fees for that specific client.
Click the Advanced button in the lower right corner of the
client screen and you will see a screen as follows, and
the "ACH convenience fees" switch is shown in the red box.
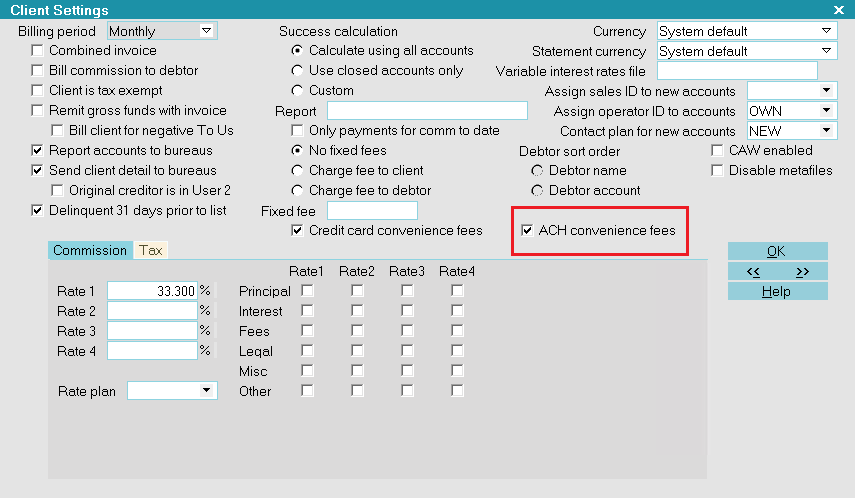
Client Settings screen
 If you have a large client base which practicality
would preclude manually updating this switch
for ALL clients (or a large tagged list), contact
Technical Services for assistance with a write back
to enable a volume of clients in mass for this
switch.
If you have a large client base which practicality
would preclude manually updating this switch
for ALL clients (or a large tagged list), contact
Technical Services for assistance with a write back
to enable a volume of clients in mass for this
switch.
Enable
Click to switch this ON with a check mark if
you want to allow the addition of a Convenience
Fee when processing ACH payments. You must also
select a Transaction Type to use for the fee.
If you switch this ON, you must also switch ON
the "ACH convenience fees" located in the
Advanced Client Settings screen in your
client setup screens. Contact our office if
you have a volume of clients to turn on for
assistance with a handy bulk write back report
to do them all at once.
Fee
Select the Transaction Type that you want
Collect! to use for your ACH Convenience Fee.
This Transaction Code must already exist in your
list of Transaction Types and it must be a
Financial Type "Fee" with the fee amount
entered. You may wish to use the shipping
default transaction type 307.
Fee Reversal
Select the Transaction Type that you want
Collect! to use to offset previously posted
fees when a payment reversal is posted.
This Transaction Type must already exist in
your list of Transaction types and it must be
a Financial Type "Fee" with the fee amount
entered. You may wish to use the shipping
default transaction type 305.
Run Plan On Recurring
Whenever a recurring plan is setup, this plan will run
automatically.
NSF Cancels Recurring Payments
Switch this ON with a check mark to tell
Collect! to remove any future dated
"Payment" type transactions from the
Debtor's account when any recurring ACH
payments are returned NSF.
If you have enabled EFT notification,
then any pending EFT notification letters
will also be deleted.
Enable Verbose Logging
Click to switch this ON with a check mark
to enable verbose message logging to the
Application Log for troubleshooting your
Billing Tree ACH payment processes.
It is recommended to enable logging
on a new install of the module so that any
system-to-system handshaking issues are
detailed in the Application Log and
available to the Comtech and Billing Tree
technicians. Both sides will be able to
more readily identify and solve any issues
which may arise if the Log information is
available.
Posted Date Blank On Recurring
This switch provides the preference option
to either have the interface (a) write the
date the arrangement was set up into the
the Posted Date OR (b) leave the Posted Date
blank for each transaction written into the
transaction tab for a Recurring ACH
arrangement.
If you leave the switch unchecked, it will
use the date the arrangement was set up.
If you use this preference, you should also
see Company Details, "Statement uses payment
date" preference switch to decision how your
system will select which transaction date range
to include on your client Remittance
Statements: (i) the Payment Date range or the
(ii) Posted Date range. If you do not check
this Company Detail switch ON when leaving this
ACH Setup switch OFF, then a consequence would
be inclusion of ACH payments that have not taken
place yet and showing up on a single month's
client Statement/ Invoice.
If you check this switch ON, then your
Recurring ACH arrangements will be written
to the Transaction Tab with the applicable
Payment Dates and Posted Dates will remain
blank until the payment is finalized/processed
via Reconcile ACH History. At that time, the
blank Posted Date field will be updated
to be the actual Posted Date. If you use
this preference, and all your transactions
of any type contain an actual Posted Date,
then you would also want to leave the
Company Detail switch for "Statement uses
payment date" switched OFF (unchecked).
Disable EFT Confirmation Review
Click this ON with a check mark to stop Collect!
from creating the review contact that is dated
2 days before the payment is due with the description
of "Confirm EFT plan authorization."
Set No Autodelete For Contacts
Click this ON with a check mark to enable Collect!
to check the 'Do not autodelete' box on all contacts
created for Billing Tree recurring payments.
Single Fee Transaction
Switch this ON with a check mark if you want
to only post one fee transaction for the fee
amount. The payment will reflect the full
amount of the payment.
Switch this OFF if you want the system to post
the fee transaction, the a payment to fee, then
the payment transaction separately with payment
amount less the fee.
OK
Select OK to close the ACH Payments Setup
screen.
Help
Click the HELP button to be auto-navigated
to our webpage, Help Documents, for more info
on ACH Payments and related topics.
| 
Was this page helpful? Do you have any comments on this document? Can we make it better? If so how may we improve this page.
Please click this link to send us your comments: helpinfo@collect.org