How To Setup Letter Service File Format - Ontario Format
This Help topic is intended to provide technical information
for implementing, using and supporting the Letter Service
functionality.
 If you are outputting in Ontario format, refer to
How To Setup Letter Service File Format -
If you are outputting in Ontario format, refer to
How To Setup Letter Service File Format -
Ontario Format.
The Letter Service module produces files in the "Ontario" file
format, by default.
These are flat ASCII files with the format defined below:
Header File
This file format specifies an overall header and a section for
each letter including a per debtor sub-header section
that describes which letter and which special options (i.e. NCOA,
K03 segment) are requested per letter. This section is for the
letter number, Debtor name, Contact and address. There is
another section for variable content in each letter, plus
support for variable length lists of data.

File Format Overview
Within Collect!, letters are stored with codes that represent
database information and other aspects to be printed. When a
letter is being sent to a letter service provider, Collect! only
outputs the data itself, plus a letter number to identify which
letter template the data is to be inserted into.
The process automatically performs analysis of the letters being
printed, and runs a 3 pass data output procedure. The first
pass creates the letter number and Debtor name and
information. The second pass outputs all other fixed variables,
and the optional third pass outputs any lists and variable
length data.
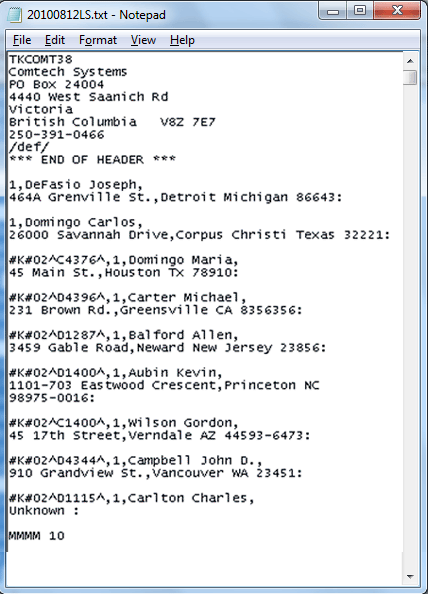
File Format:
Agency Name
Agency Address
/def/
*** End Of Header ***
123,
Name Line,
Name Line 2,
Name Line 3,
City ST ZIP:,
Insert 01,
Insert 02,
Insert 03,
Insert n
123,
Name LINE,
Name LINE 2,
Name LINE 3,
City ST ZIP:,
Insert 01,
Insert 02,
Insert 03,
Insert n
{List line 1
List line 2
List line 3
}
MMMM X - end
The first field is the letter number. This is set in the Report
"Options" window and these letter number IDs are the numbers
agreed on between the agency and the letter service provider.
Report "Options" is located by \ Print\ Customize Printing\ Edit
Report Templates, then selecting the letter you wish to edit
by highlighting that entry in your Print Menu, and selecting
it to open by hitting ENTER or clicking on it. The "Options"
window opens when you click on that button in the lower left
corner of the screen. Refer to the Help topic SETUP - LETTER
SERVICE for more details. If you have not set the letter number
in the Report "Options" window, it will output as zero. This
will mean there will be no way for the letter service company
to distinguish between your different letter types.
You are responsible for assigning a letter number for each
letter being printed.
The next pass outputs the Debtor name, and address.
The last pass is any list data that may optionally be included.
List data is output with spaces for formatting exactly as it
should be output.
Sample Data File
Your Letter Service provider will advise you in what format
they wish you to submit your letter templates for set up.
Most typically, you will be asked to provide them with a
pdf or Word sample evidencing both what a completely data
populated letter looks like (pdf) and the text content
showing where the data insert points in the letter template
are exactly situated.
Normal course is that the field separator designated in a
letter service data file output is a comma. If your service
provider requires any other character for this function, you
can accommodate by specifying a different separator in the
Report and Printer Setup screen located via
\System\ Preferences\ Reports and Printing, then input the
requested separator character in place of the comma you
will see in the field beside the option "Letter Service
Separator".
See Also
- Letter Service Topics
- NCOA Topics
|
Was this page helpful? Do you have any comments on this document? Can we make it better? If so how may we improve this page.
Please click this link to send us your comments: helpinfo@collect.org