Operator Detail
The Operator Detail section of the Operator form enables you
to select many additional personal operator level settings.
These are explained below.
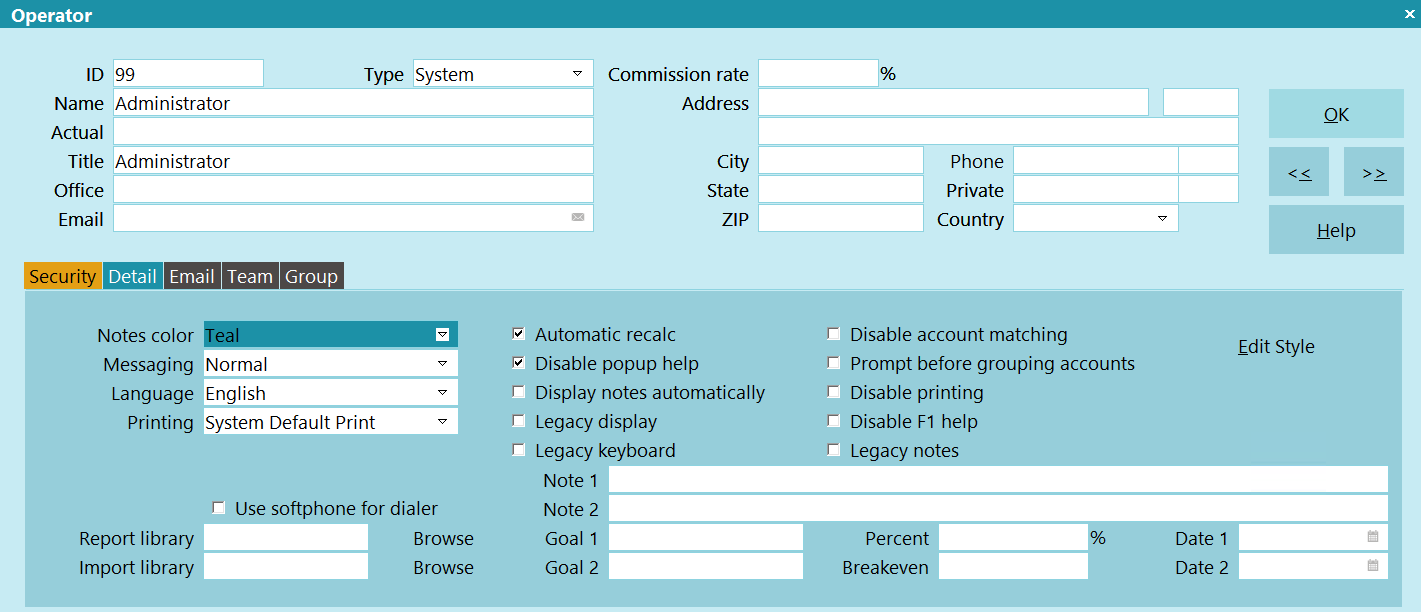
Operator Detail
Notes Color
This setting determines how notes are displayed
on the Debtor form. You may select a color from
the pick list provided, or add your own colors to the
pick list.
You may use different colors for different operators.
These colors show up when you are viewing the
Debtor form, but they are not displayed when you
are editing the notes.
These are RGB values, as in standard HTML color
usage, and are in hexadecimal form.
Examples:
White #FFFFFF
Blue #FF0000
Red #0000FF
Green #008800
Amber #0099FF
Purple #FF00FF
Please refer to an online Color Chart for a quick reference
to additional colors that you may use and to
Using Color In Collect! for color topics.

Messaging
These settings determine how Collect! handles messages
intended for the user. NORMAL sees the most messages.
This is very useful to prevent user error! EXPERT sees
very few messages, so it must be used with caution or
you may end up performing actions by mistake without
realizing it, like deleting records!
The Messaging pick list choices are explained below.
NORMAL
Select this to display all error messages and prompts
to the user. This field is ignored for Sales Team definitions.
 This setting alerts the user before
records are deleted. It will then
provide a second prompt requiring
the user to type in the word DELETE.
It is case sensitive. It is useful
to leave it enabled even if you do not
consider the user to be a "novice."
This setting alerts the user before
records are deleted. It will then
provide a second prompt requiring
the user to type in the word DELETE.
It is case sensitive. It is useful
to leave it enabled even if you do not
consider the user to be a "novice."
ADVANCED
Select this if you consider this user to be experienced.
Most prompts and messages are displayed. This field is
ignored for Sales Team definitions.
This setting alerts the user before
records are deleted. It may be useful
to leave it enabled for your more
experienced users as well.
EXPERT
Select this mode to inhibits messages and prompts.
No prompts are displayed when deleting debtors.
Be careful assigning this capability to anyone since
they can quickly delete many records! This field is
ignored for Sales Team definitions.
 WARNING: This setting does not alert the
user before records are deleted!!!
Use with caution.
WARNING: This setting does not alert the
user before records are deleted!!!
Use with caution.
*** Even an experienced group like the Comtech
Support team uses the NORMAL level setting! ***
Printing
These settings determine the default printing mode for
the operator. This can be changed when a report is
being printed. However, it is useful to set here when you
are pretty sure of the mode the operator will be using for
most letters and reports.
The Printing pick list choices are explained below.
SYSTEM DEFAULT PRINT
This setting uses the default system-wide print option
as set in the Report and Printer Setup form.
To access the Report and Printer Setup
form, select System from the top menu
bar and then select Preferences from the
list of choices that appears.
The System Setup menu will be displayed.
Select Reports and Printing from this menu.
PRINT DIRECT TO PRINTER
This setting overrides the system-wide default print
setting and applies to the currently displayed
Operator ID. Printing occurs directly to the printer.
This setting is for backward compatibility with earlier
versions of Collect!.
PRINT VIA DEVICE CONTEXT
This setting overrides the system-wide default print
setting for the currently displayed Operator ID and
uses Windows features. It is fast and works very
well with most printers. Use this setting to print
documents with images and graphics.
Older Dot Matrix printers may require that you
choose Print Direct To Printer instead.
PRINT VIA BROWSER
This setting overrides the system-wide default print
setting and applies to the currently displayed
Operator ID. It sends printing through your browser in
HTML format.
This setting must be selected when you
want to use a Style Sheet for this Operator.
Use Softphone For Dialer
Switch this ON if you want Collect! to use softphone
for all this Operator's auto dialed calls. You must
put the softphone protocol prefix in the "Note 2"
field.
Your O/S must be configured already to
handle the softphone communication
protocol you specify.
Please refer to Help topic, How to Setup the Auto Dialer
for additional information.
Automatic Recalc
Switch this ON to force Collect! to fully recalculate
the debtor when you open a debtor account. This
will ensure that, when you are viewing the account
form, all dollar amounts are current and up to date.
Perhaps this operator does not need to see updated
financial information or perhaps your use of Collect!
does not require recalculation whenever you view an
account. In this case, you may choose to leave this
switched OFF. If you have many, many operators,
leaving this switch OFF will optimize your network
performance.
Please refer to How To Setup Operators for more
details.
Disable Popup Help
To stop help from popping up automatically put
a check mark in this field.
Re-enable popup help at anytime by pulling down
the Help menu and choosing Enable popup help.
Display Notes Automatically
Switch this ON if you want the Notes tab to
always be selected when moving onto a Debtor form.
When this switch is OFF, the last highlighted
tab is displayed when moving to another debtor.
Disable Account Matching
Switch this ON to disable account matching
for this particular operator. This will
override the global account matching settings.
This lets you use account matching on your system,
yet allows certain operators to be able
to navigate debtors without the system
performing the account matching functions.
Typically, system administrators and junior
collectors would have this switch turned ON,
while data entry operators would have this
switch turned OFF. Turning this switch ON
disables account matching only for the
designated operator.
Prompt Before Grouping Accounts
Switch this ON if you want the system to
prompt before grouping accounts. When entering
or modifying fields on the Debtor form, this
prompt lets the user choose between grouping
or not grouping the account to other matching
accounts that Collect! finds in your system.
Disable Printing
Switch this ON with a check mark to stop an operator
from printing in Collect!. This will stop an Operator from
printing in the following ways.
- Right click and "Print"
- The "Print" icon on the toolbar
- Print menu, Quick Print
- Print menu, Reports and Letters
- The PRINT buttons on records such as the Debtor
Whenever the Operator attempts to print in these ways,
they will not be allowed to continue to Print Report. A
message will inform them that their printing has been
disabled. This is also written to the Application Log.
 This switch can be used with Access Rights if
you want to enable this operator to perform
some printing functions while eliminating the
freedom to print whatever they want. For
instance, you can grant access to items in
the Print menu and the operator will be able
to perform them. Also, you can include Letter
events in contact plans that the operator is
entitled to run.
This switch can be used with Access Rights if
you want to enable this operator to perform
some printing functions while eliminating the
freedom to print whatever they want. For
instance, you can grant access to items in
the Print menu and the operator will be able
to perform them. Also, you can include Letter
events in contact plans that the operator is
entitled to run.
This is very useful to restrict access to printing functions in
Collect! while not hampering the operator from performing
their normal functions that require printing.
Disable F1 Help
Switch this ON to prevent this operator from
accessing Collect!'s HTML help via the Internet
browser. Local popup help is still available for
fields and menu items.
Legacy Notes
Switch this ON to use background highlighting in the notes.
The color for the highlighting is based on the option set
in the 'Notes Color' field on the Operator Detail tab for
each operator.
If this is not switched on, Collect! will use the value
set on the Screens and Messages form.
Goal 1
User-defined field.
In the Operator Analysis Report, this field may be
use to track the goal of Agency Commission an
Operator must reach before qualifying for the
second commission rate stored in the Percent field.
Goal 2
User-defined field.
In the Operator Analysis Report, this field may be
use to track the cap that an Operator can have on
the Operator Commission amount to pay out.
Percent
User-defined field.
In the Operator Analysis Report, this field may be
use to track the second commission rate an Operator
can have after qualifying for the goal stored in
the Goal 1 field.
Breakeven
User-defined field.
In the Operator Analysis Report, this field may be
use to track the minimum amount of Agency Commission an
Operator must reach before qualifying for the
first commission rate stored in the Commission rate
field. With this filled in, the calculations would
be based on the Agency Commission amount above this
value. For example, if the Breakeven was $5,000 and
the Operator brought in $20,000 of Agency Commission,
the commission calculation would be based on $15,000.
Date 1
User-defined field.
Date 2
User-defined field.
Report Library
This field displays an alternate report library for this operator.
When the operator signs in, this report library will load
automatically. Select the BROWSE button to view the
available registered devices that you may select. The current
database and Web Host report libraries show up in this list
by default. Any additional report libraries created with the
New Report Library function will also be displayed.
Import Library
This option enables you to load an alternate import library
for this operator. When the operator signs in, this import
library will load automatically. Select the BROWSE button
to view the available registered devices that you may select.
The current database and Web Host import libraries show
up in this list by default. Any additional import libraries
created with the New Import Library function will also
be displayed.
Browse
Select the BROWSE button to view a list of registered
devices that you may select. The current database and
Web Host libraries show up in this list by default. Any
additional libraries created with the "new library" functions
will also be displayed.
Select BROWSE next to "Report library" to
select an alternate report library to load for
this operator.
Select BROWSE next to "Import library" to
select an alternate import library to load for
this operator.
Note 1
User-defined field.
When the Operator Type is Web Host, this field contains
the port Web Host listens on for HTTP requests, e.g. 80.
Not filling this in defaults to port 80 for the /S Web Host
argument.
Note 2
User-defined field.
When the Operator Type is Web Host, this field contains
the port Web Host uses for SSL (HTTPS requests), e.g. 443.
Leaving this blank causes Collect! to default to port 443
for the /y Web Host argument.
When you have switched ON "Use softphone for dialer,"
Collect! will look in this field for the protocol prefix for
the softphone you want to use. For example, "sip:" All
this Operator's auto dialed calls will use this softphone.
When you are using UDP protocol for your dialing
system, the UDP redirect string is entered into this
field. Please refer to Help topic, How to Setup the Auto Dialer
for more information.
If using softphone, your O/S must be
configured already to handle the softphone
protocol you specify.
Edit Style
Select this button to edit the personal Style Sheet for
the currently displayed Operator ID. To use Style Sheets,
select "Print via Browser" from the pick list attached
to the field labeled "Printing." Please refer to
How To Edit Style Sheets for Browser Reports for more
information.
Group Work In Progress
As an alternative or amendment to the above, users like managers or team leaders can sign in and load a work in progress
that merges all the contacts from the group into a single To Do List.
Here is an example of an operator setup to see the WIP for 2 other users:
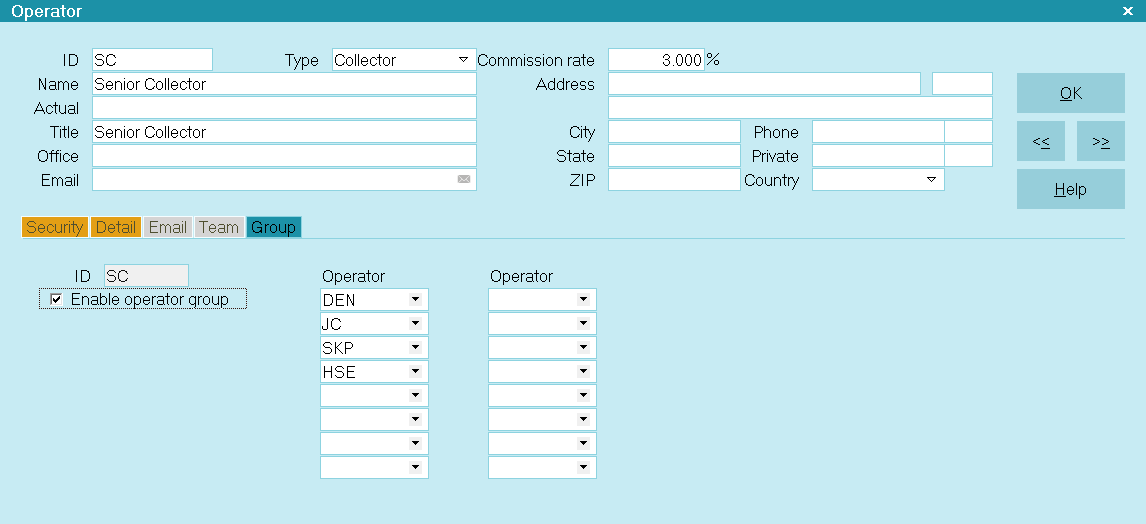
Operator Group
On the WIP Options form, you can then select LOAD CONTACTS FOR GROUP and click OK.
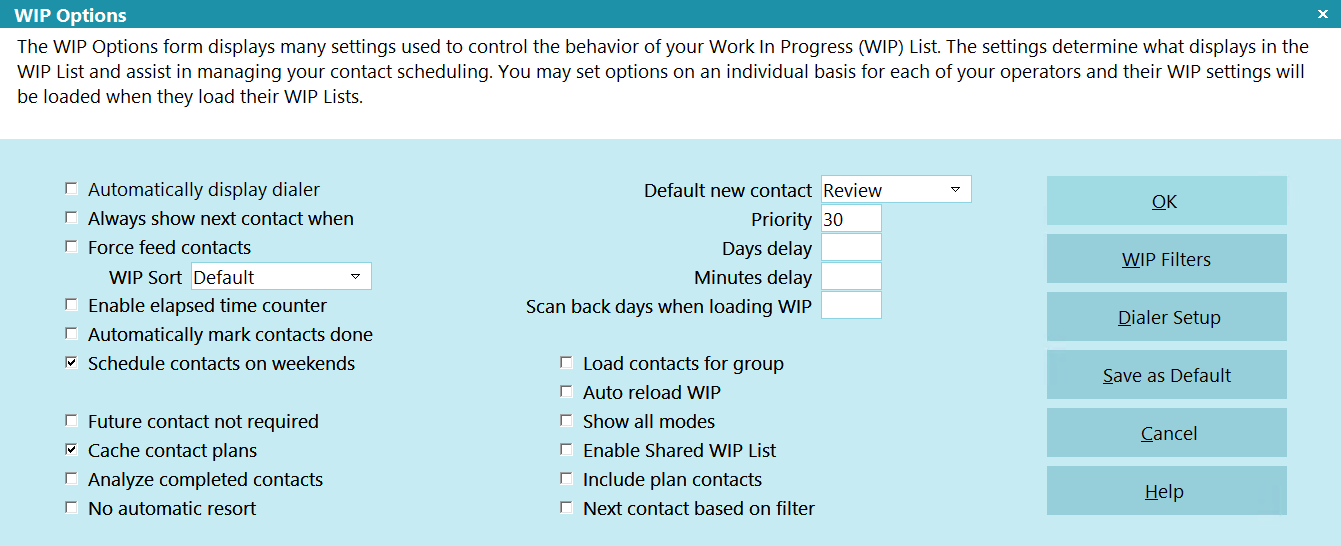
WIP Options
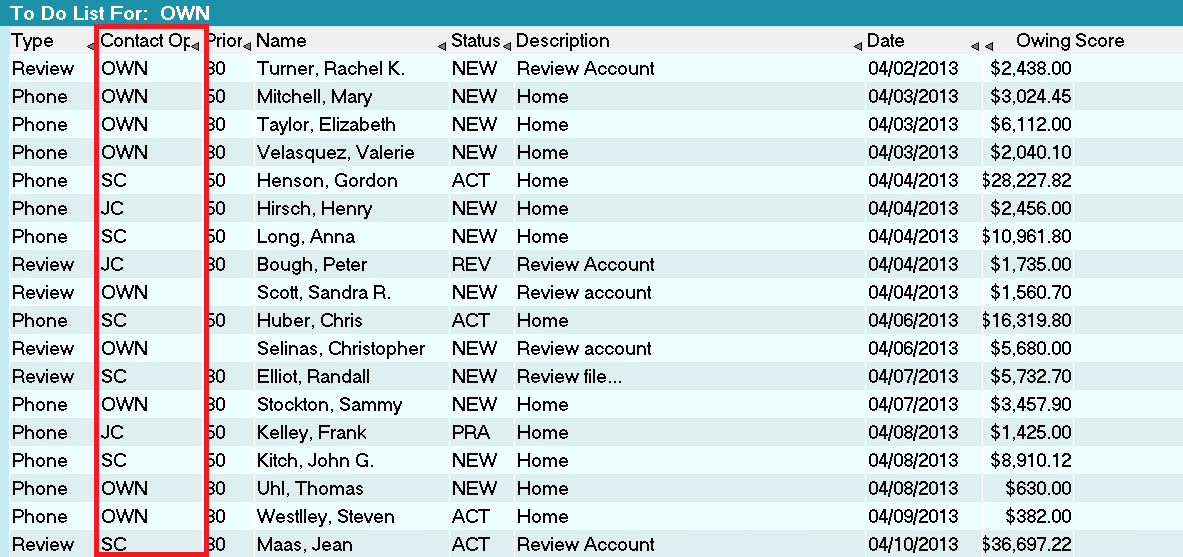
To Do List Displaying All Contacts for Operator Group
| 
Was this page helpful? Do you have any comments on this document? Can we make it better? If so how may we improve this page.
Please click this link to send us your comments: helpinfo@collect.org