Collect! includes many primary, detail and control screens throughout the system. Collectors use their Work Queue Screen as the hub to access all the screens they need to move through their work effectively. Owners and managers use the setup screens to set global controls and automations.
Apply your branding to your system
Field aliases can vary by collector group
Fields can have configurations and functions added
Many screens include user-defined fields
Key Main Application Screens
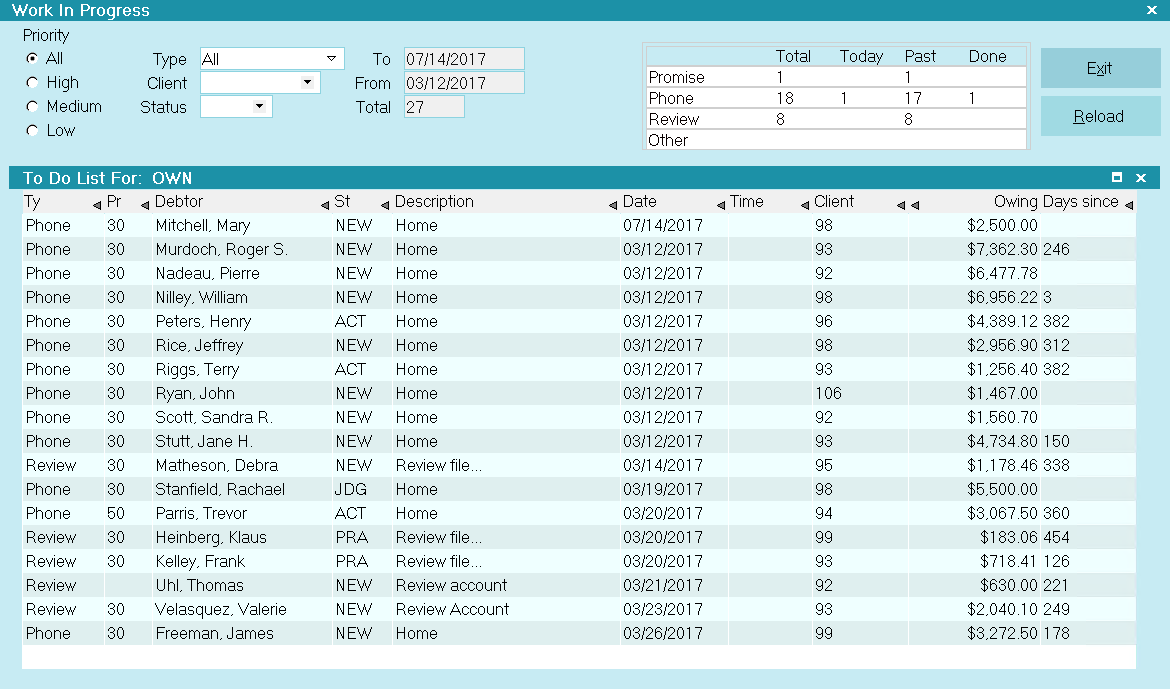
Primary Collector Work Queue Screen
Provide individual flexible hubs for collector activity with instant access to current tasks and the information they need to move quickly through tasks. The list can be configured globally or individually to optimize efficiency and includes a running total of completed tasks for the day. Collector Work Queues are a component of Collect!’s workflow automations.
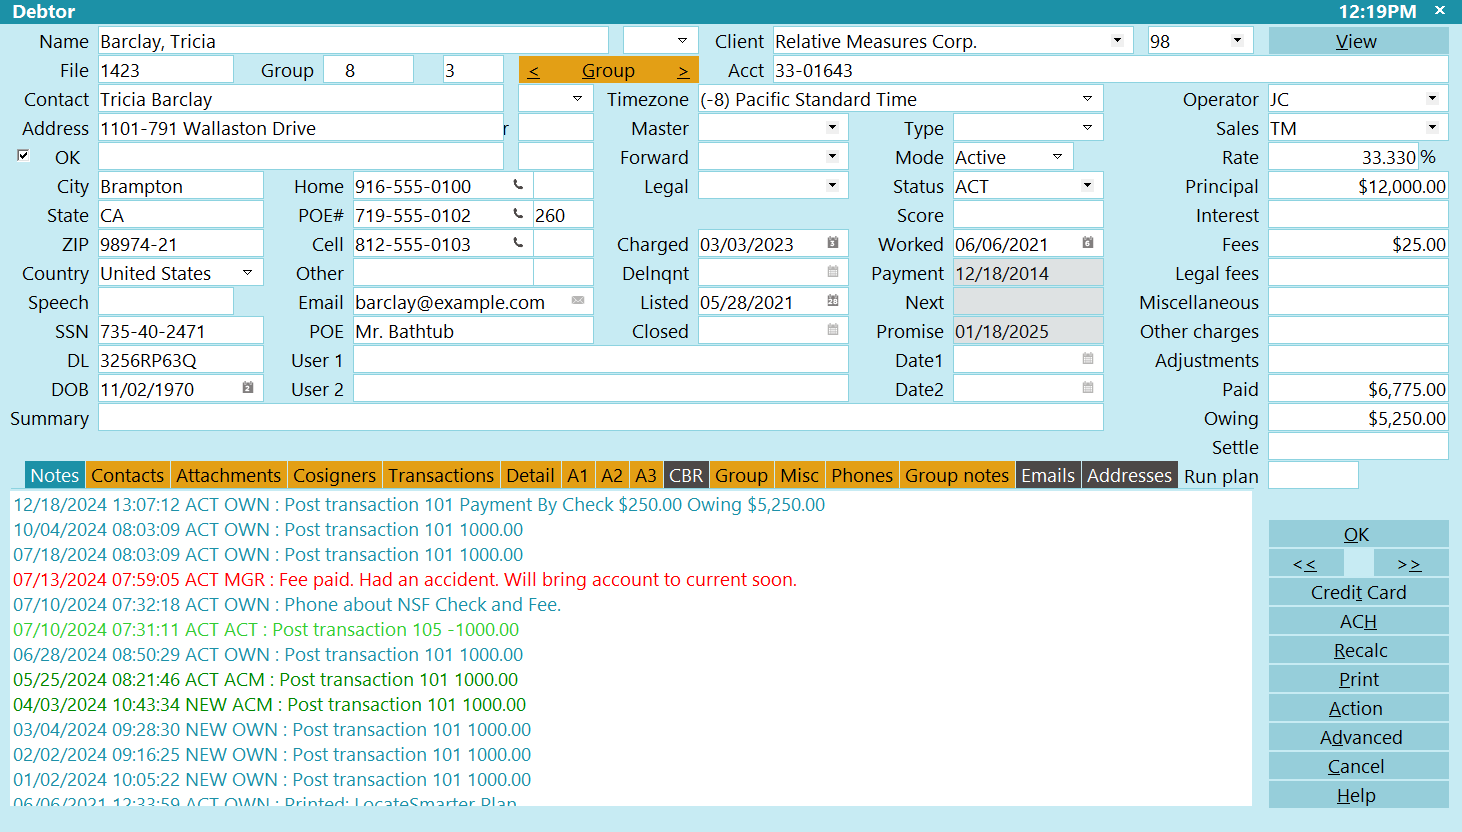
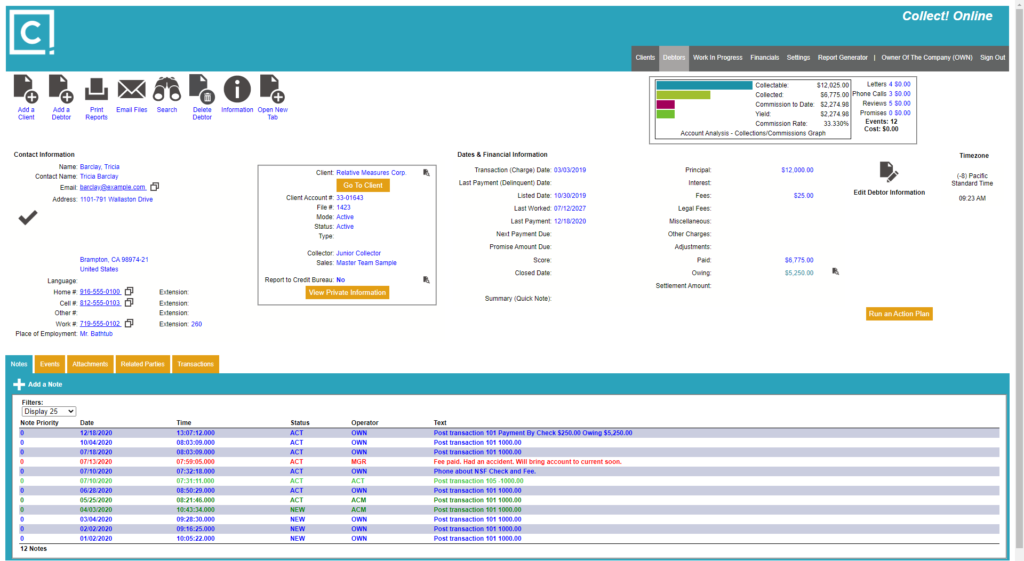
Primary Account Screen
Access detailed account information, opt-in/out status, compliance details, and financial summaries on the main Debtor Account Screen and 16 detail tabs. This screen includes user defined detail and date tabs. Click the Transactions Tab to access past transactions and enter new transactions as shown just below.
Account Transaction Screen
View past transaction details and enter new transactions on a dedicated Transaction Screen accessible from the Debtor Account Screen. Collect! automations connect posted payments with existing promises or payment plans, triggering action plans depending on how the posted payment met repayment conditions.
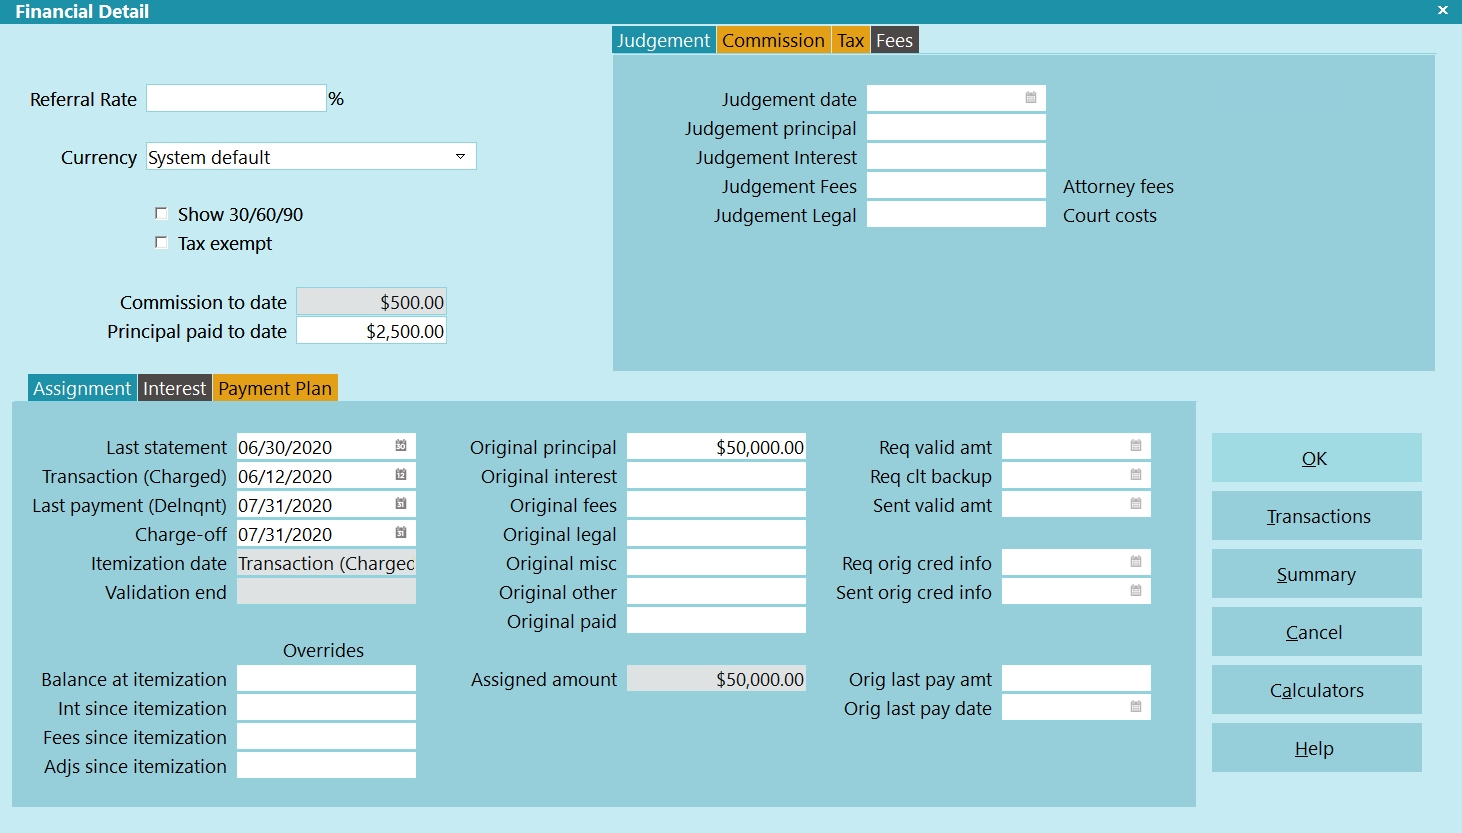
Account Financial Detail Screen
Display all financial settings for the account including original principal, judgement details, commission, fees, and interest settings. Separate tabs provide sub-screens for assignment information required for compliance, interest, and payment plan setup.
Primary Client Screen
Set details for prospective and active clients, create unlimited client levels, and quickly view account and financial summaries on the Primary Client Screen. This screen includes multiple user defined fields and 10 detail tabs. Click Advanced to access the Client Financial Detail Screen shown just below.
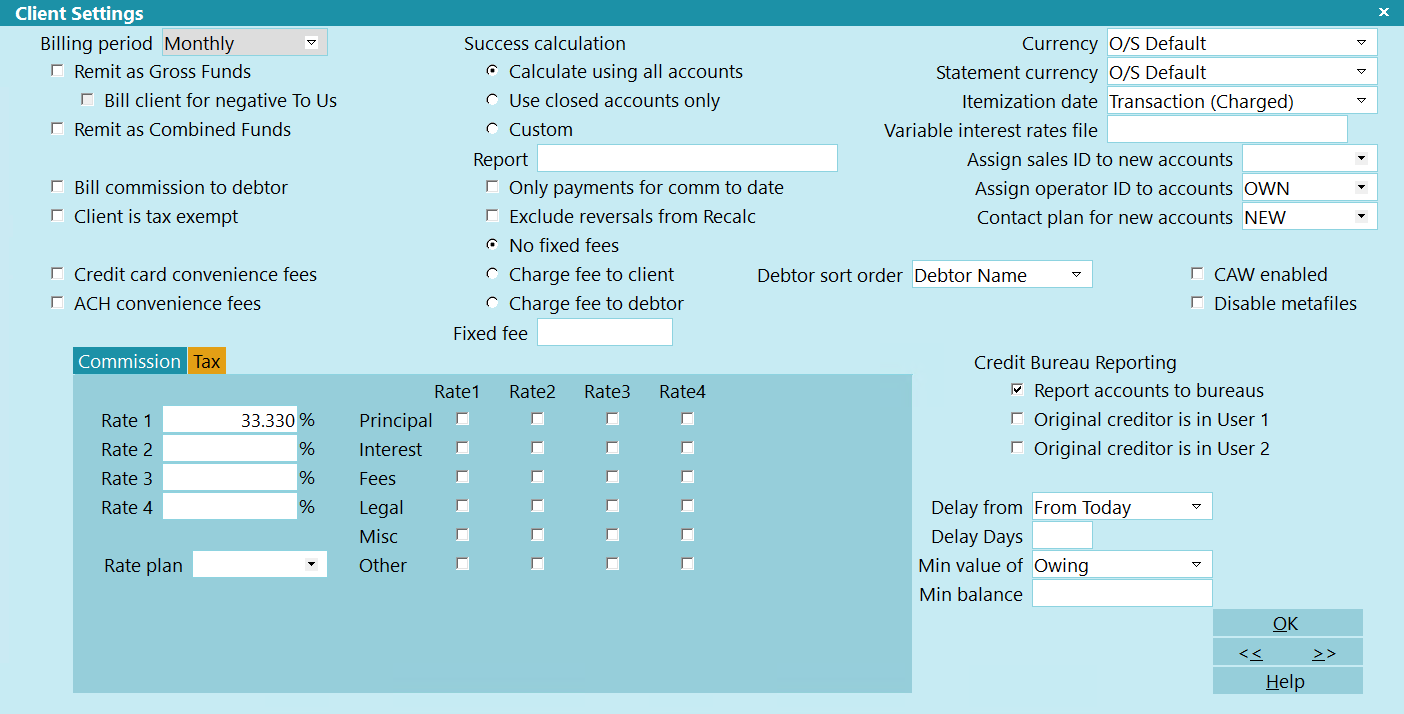
Client Financial Detail Screen
Enter and manage your clients’ financial agreements quickly and easily. The Client Settings Form lets you set up detailed accounting and collection settings for each client to suit their agreement and your business practices.
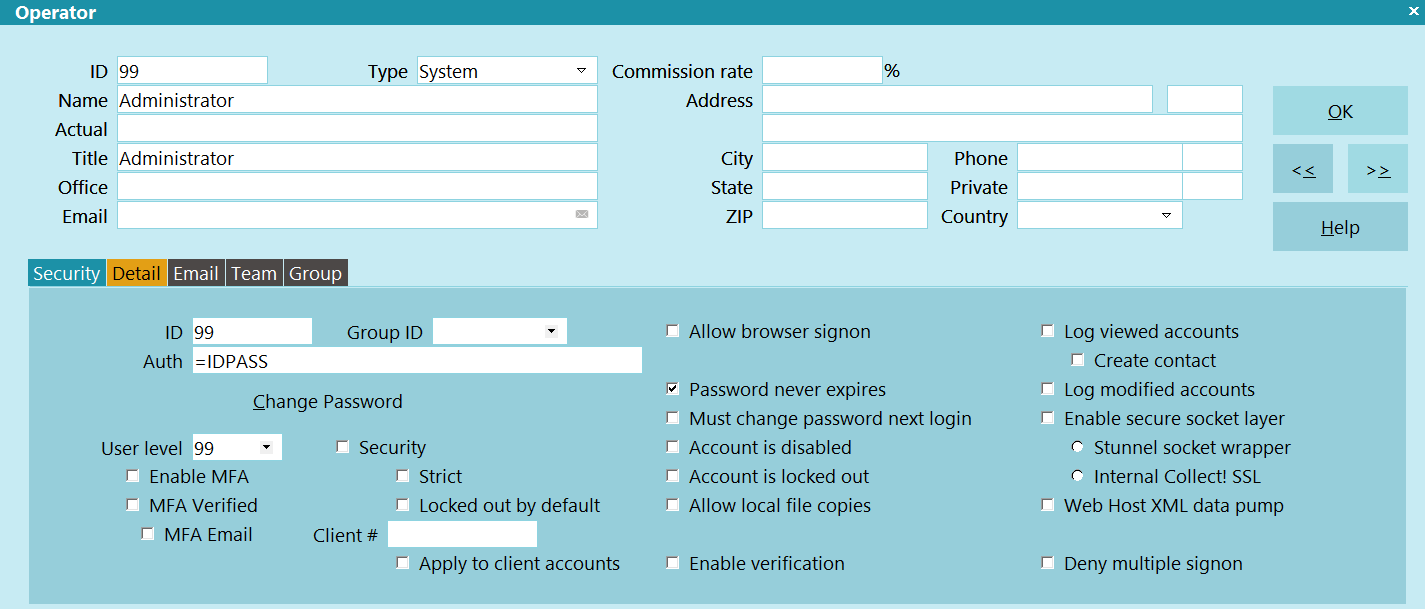
Operator Setup Screen
Use Collect!’s robust system of access controls to manage operator access to data, menus, and screens. All fields, forms, and menus have ‘Read/Write’, ‘Read-Only’ and ‘No-Access’ attributes.
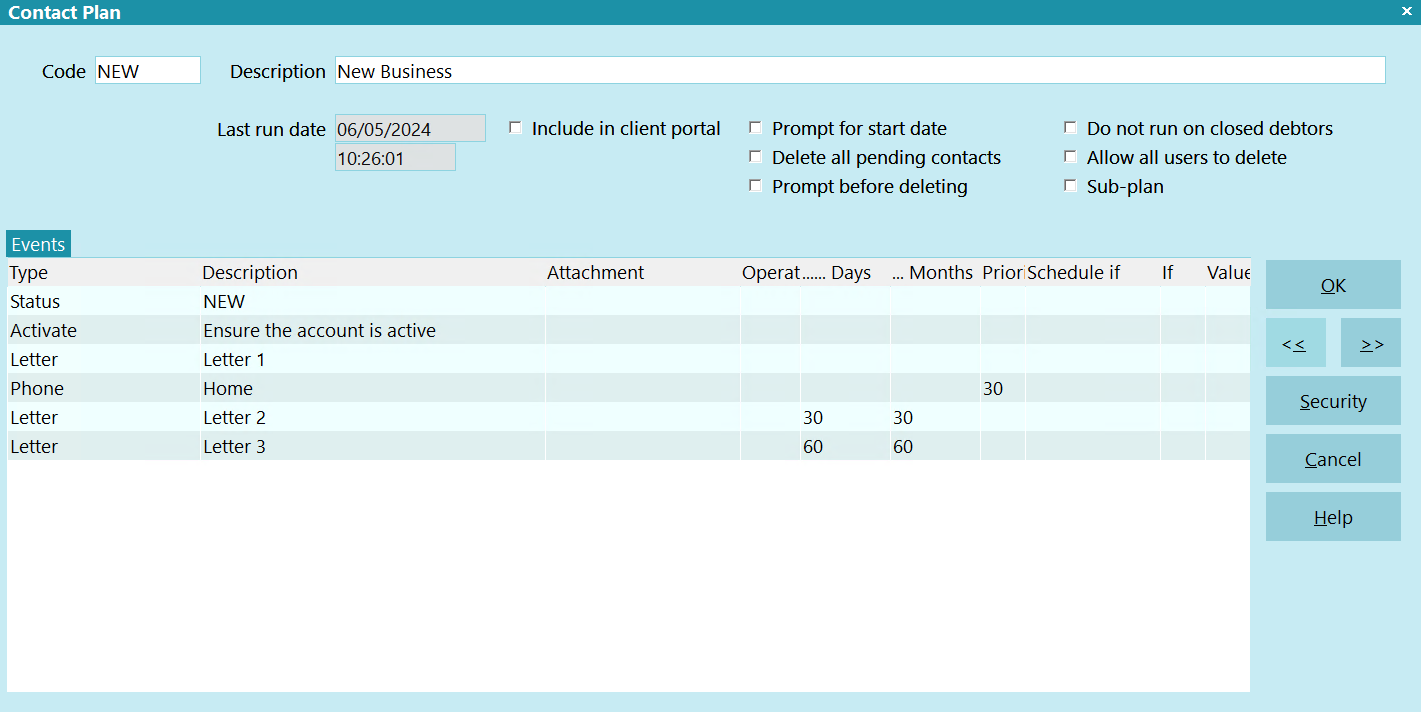
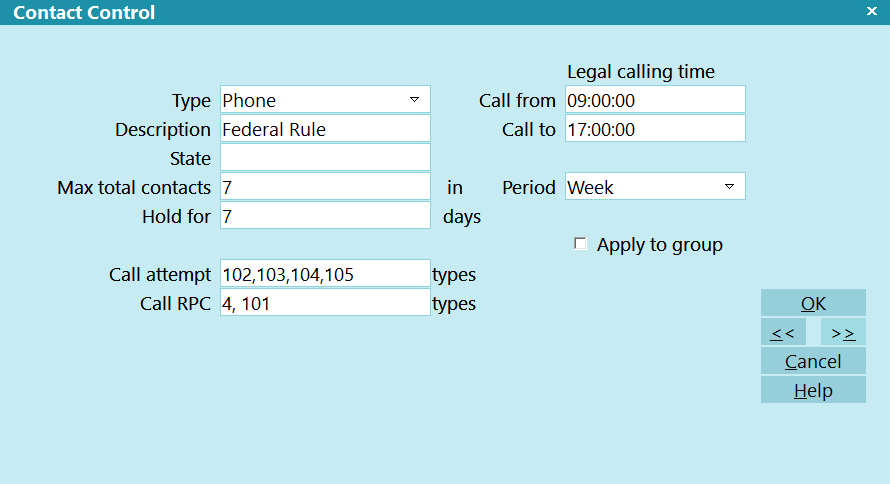
Contact Automation Screen
Managers use the Contact Automation Screen to create plans that schedule series of actions, or contact events, using conditional and if/then logic to save collector time and ensure consistent collection processes. Some Contact Events are managed automatically by the system, do not show up in collector work queues, and are logged and searchable in the system. Contact automations are an important part of Collect!’s workflow automations.
Collect! contains a set of default Contact Plans, such as the default New Business Contact Plan shown on the screen. Managers can edit existing plans to better suit their workflow and create new plans.
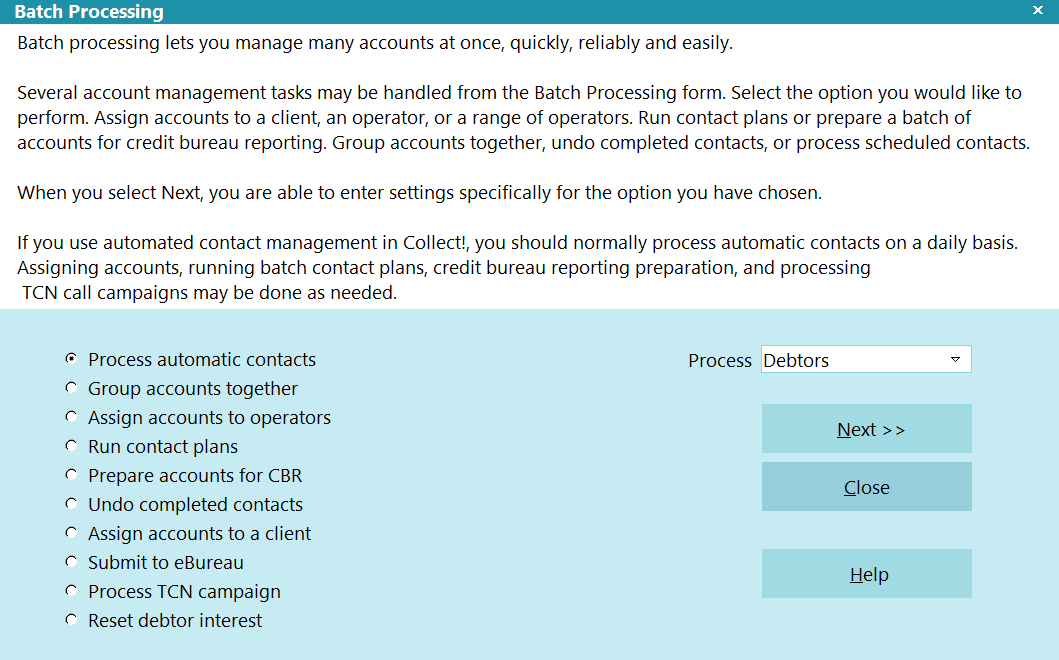
Batch Processing Screen
The Batch Processing Screen lets managers complete many batch processes to selected accounts quickly and easily with the click of a button. Some functions will be used daily, and some only as needed.
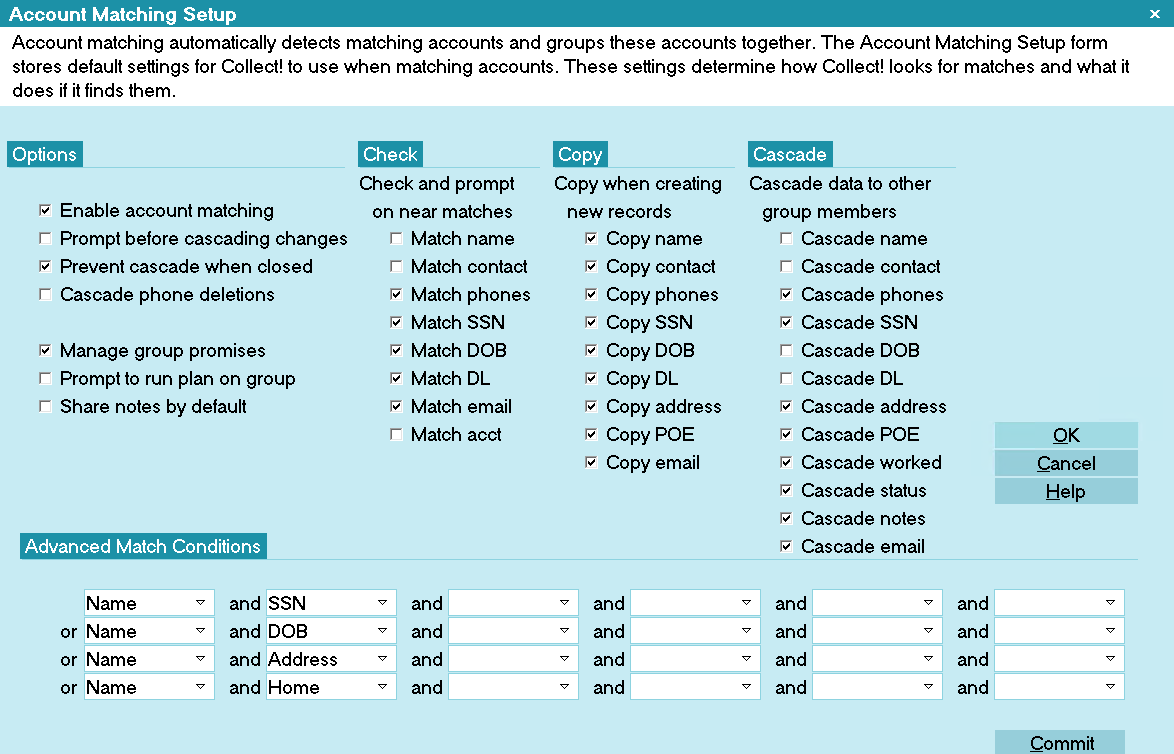
Account Matching Setup Screen
Automatically link accounts based on criteria you select and quickly cascade changes in debtor information to other group members with advanced matching and grouping options.
Compliance Functionalities
Set global controls, use designated forms and fields for passive and interactive data, use contact analytics and designated compliance screens, audit your workflow activities, and audit letter templates for prescribed text chunks.
Key Screens Outside Main Application
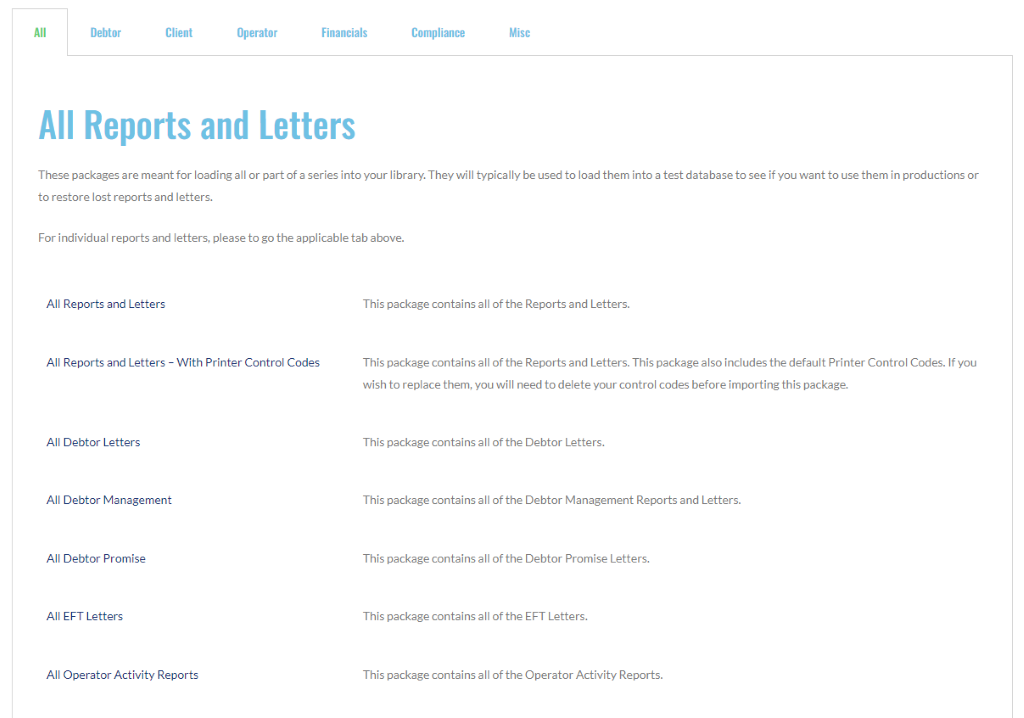
Member Center Reports and Letters Selection Screen
Select from over 100 stock reports that you can use ‘as is’ and letter templates you can individualize for your company in the Collect! Member Center. Also access partner integration tools, dropdowns, contact plans, control files, scenario packages, writeback reports, and more.
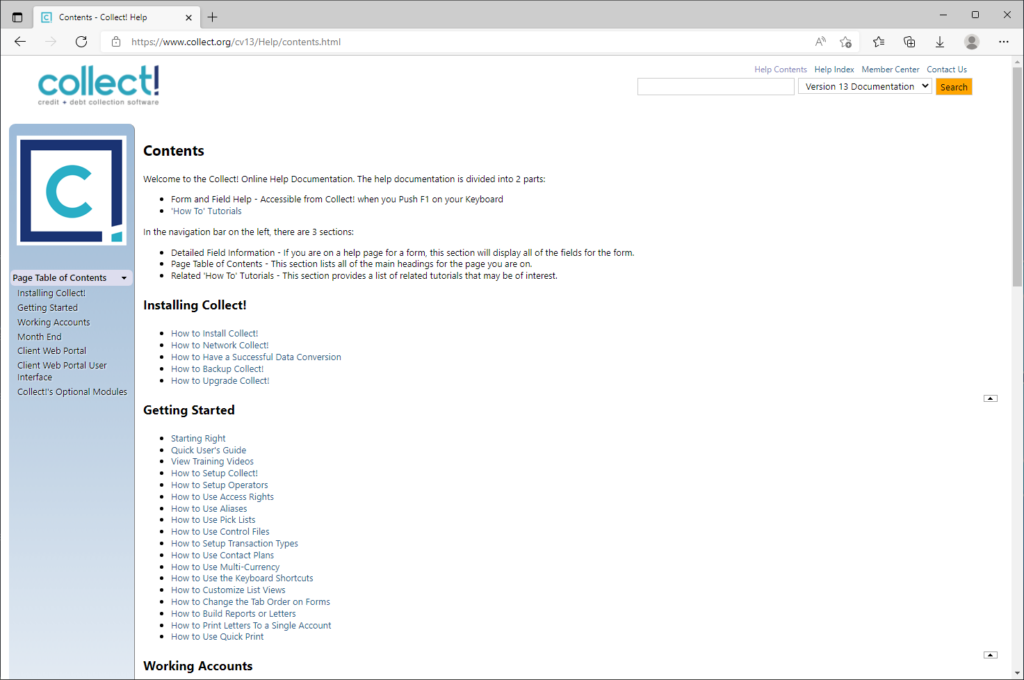
Help Documentation Screen
The Help Contents provides quick access to common How To guides.
Use the Help index and search box to explore Collect! topics from A to Z.
If you cannot find the answer you need, our support department will help.
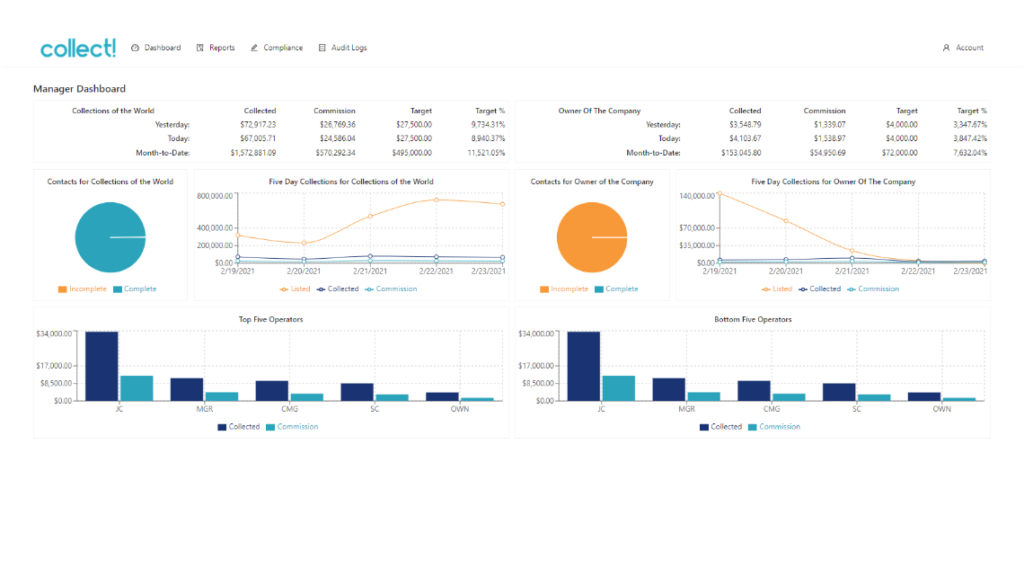
Dashboard Management Reports Screen
Maintain a real-time overview of collections. View reports remotely, give your clients real time access to their data, and allow collectors and sales staff to view their progress using any standard web browser.
The Dashboard includes an Operator Activity Screen suitable for display on a collection floor.
Client Access Account Screen
Give your clients real-time remote web access to their data, view your accounts remotely, and enable staff to work remotely using any standard desktop or mobile device. Customize the look and functionality of this practical remote interface with your Collect! database.
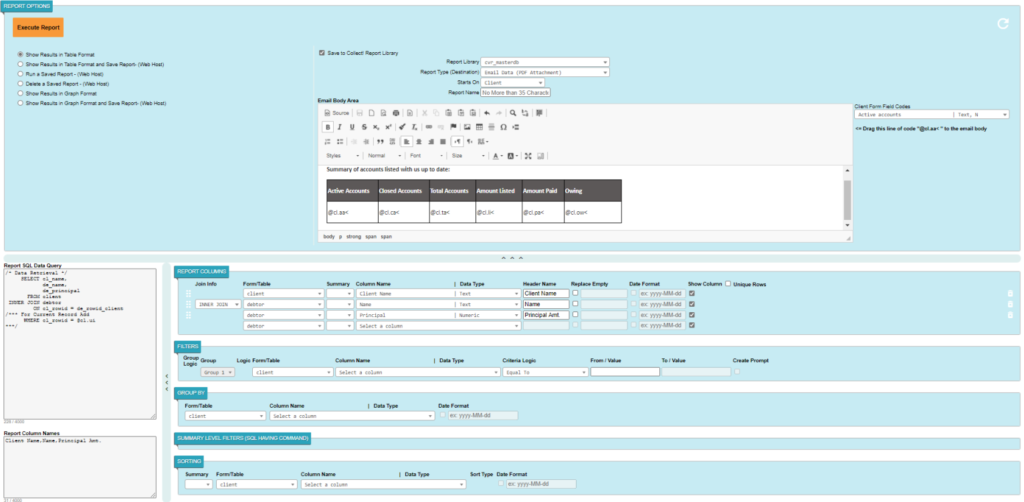
Report Utility Screen
Select, filter, group, and order data on the fly. Report options are easy to understand and stated in plain English. Output your data in a range of table or graph formats, including files, printer, HTML, and email. Group report outputs on one page for comparison or ad hoc dashboard. Save reports in your report library for repeated use.