How To Customize List Views
By default, when viewing a list, you will see that Collect! displays only a few of the many fields available on any given form.
You can customize this list view to hide or show the fields that you need in any order you want. Lists of Clients, Debtors,
Transactions, Attachments, Statements and Contacts may all be customized to suit your needs.This is useful for customizing the
way you display list information to your operators. It is also very effective for producing quick reports to output whatever
information you need.
This List View flexibility makes Quick Print an excellent choice for printing ad hoc in-house reports, or for sending
particular account information to your clients, quickly and easily, as needed. Quick Print will output results according to
your custom settings.
This topic will step through moving, inserting and removing fields in the List View. They may be applied to any list that you
are viewing in Collect!.
 When you modify a List View, an LPR file is saved to the Operator's CONFIG folder. The view will apply only to
the Operator you sign in as before going through the following steps.
When you modify a List View, an LPR file is saved to the Operator's CONFIG folder. The view will apply only to
the Operator you sign in as before going through the following steps.
If you want to make the same List View available to all Operators, you should sign in as User Level 99 before going through the
steps. Then Collect! will save the modifications to a COLLECT.LPR that everyone can see.
Getting Started
1. Select Browse from the top menu bar and then select ALL DEBTORS. This will display the Debtor List. We will use it in our
examples.
2. Right click on the column headings in the Debtor List to display the customizing menu choices.
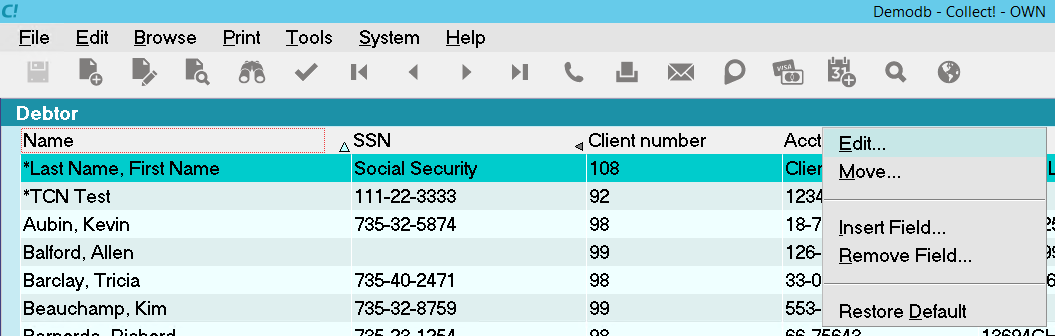
Choices for Customizing the List View

List View Choices
As shown in the screen shot above, the choices for customizing the List View are the following.
- Edit
- Move
- Insert Field
- Remove Field
- Restore Default
We will cover each of these choices.
Edit
Select the EDIT choice to create your own customized List View by selecting all the fields you want to display. The other
choices, such as, Move, Insert and Remove, enable you to work with one field at a time. The EDIT choice allows you to select
all the fields you want to display with only one operation.
1. Select EDIT from the List View choices. You will see the following prompt.
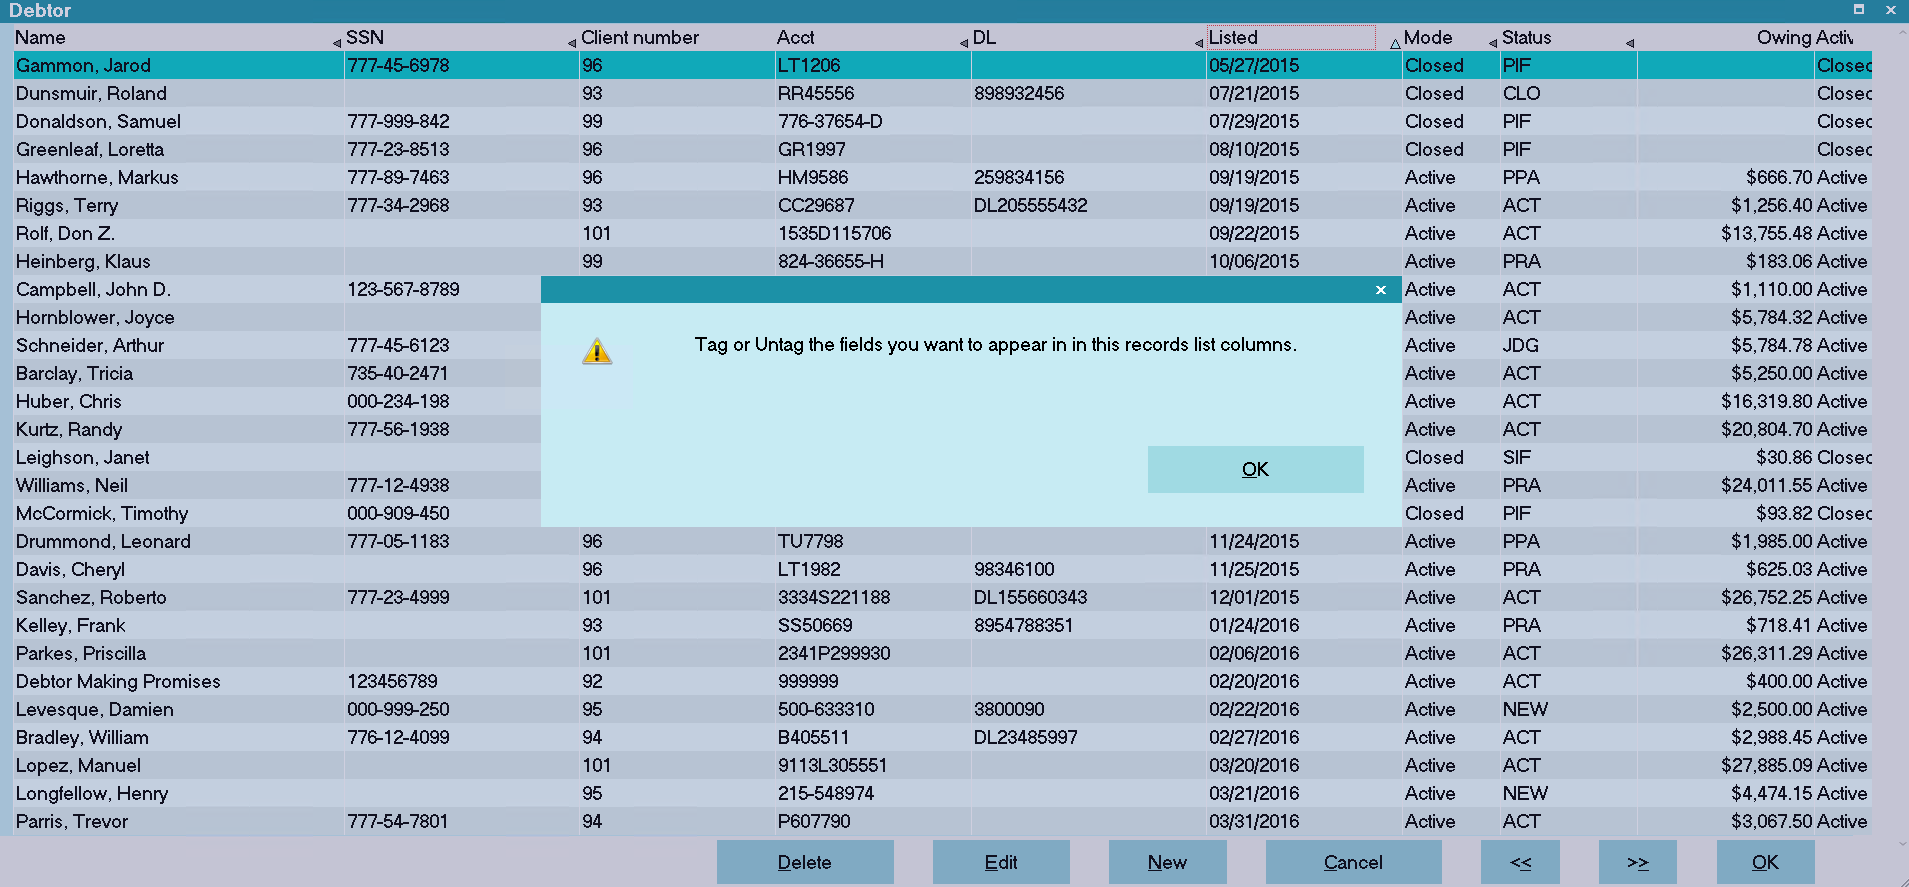
Prompt to Tag Items for List View
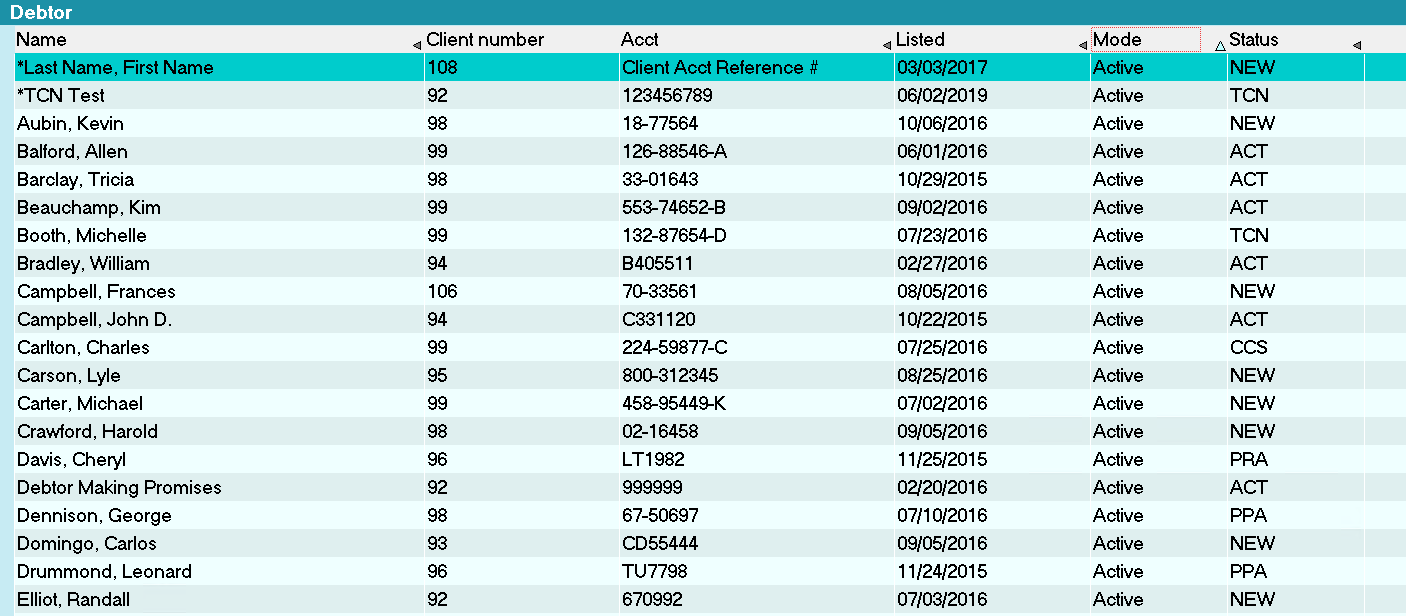
2. Select OK to view the list of fields that you can use for your list. This will show all the fields on the underlying form.
In our example, these are all the fields on the Debtor form.
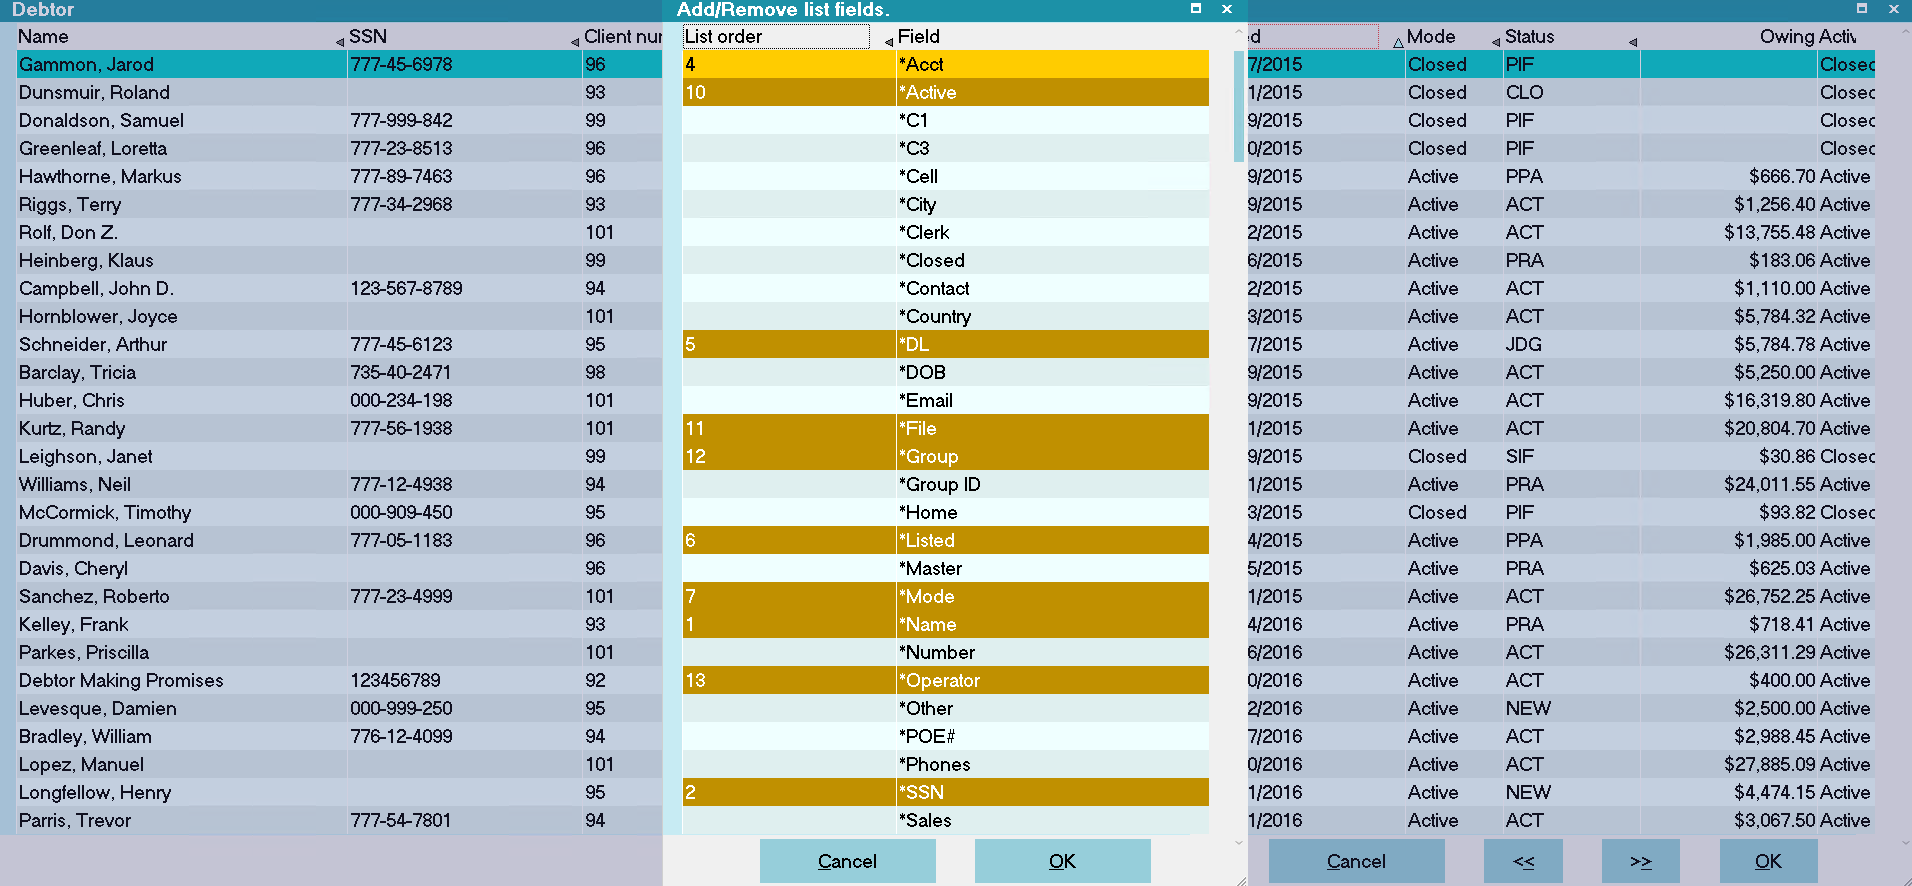
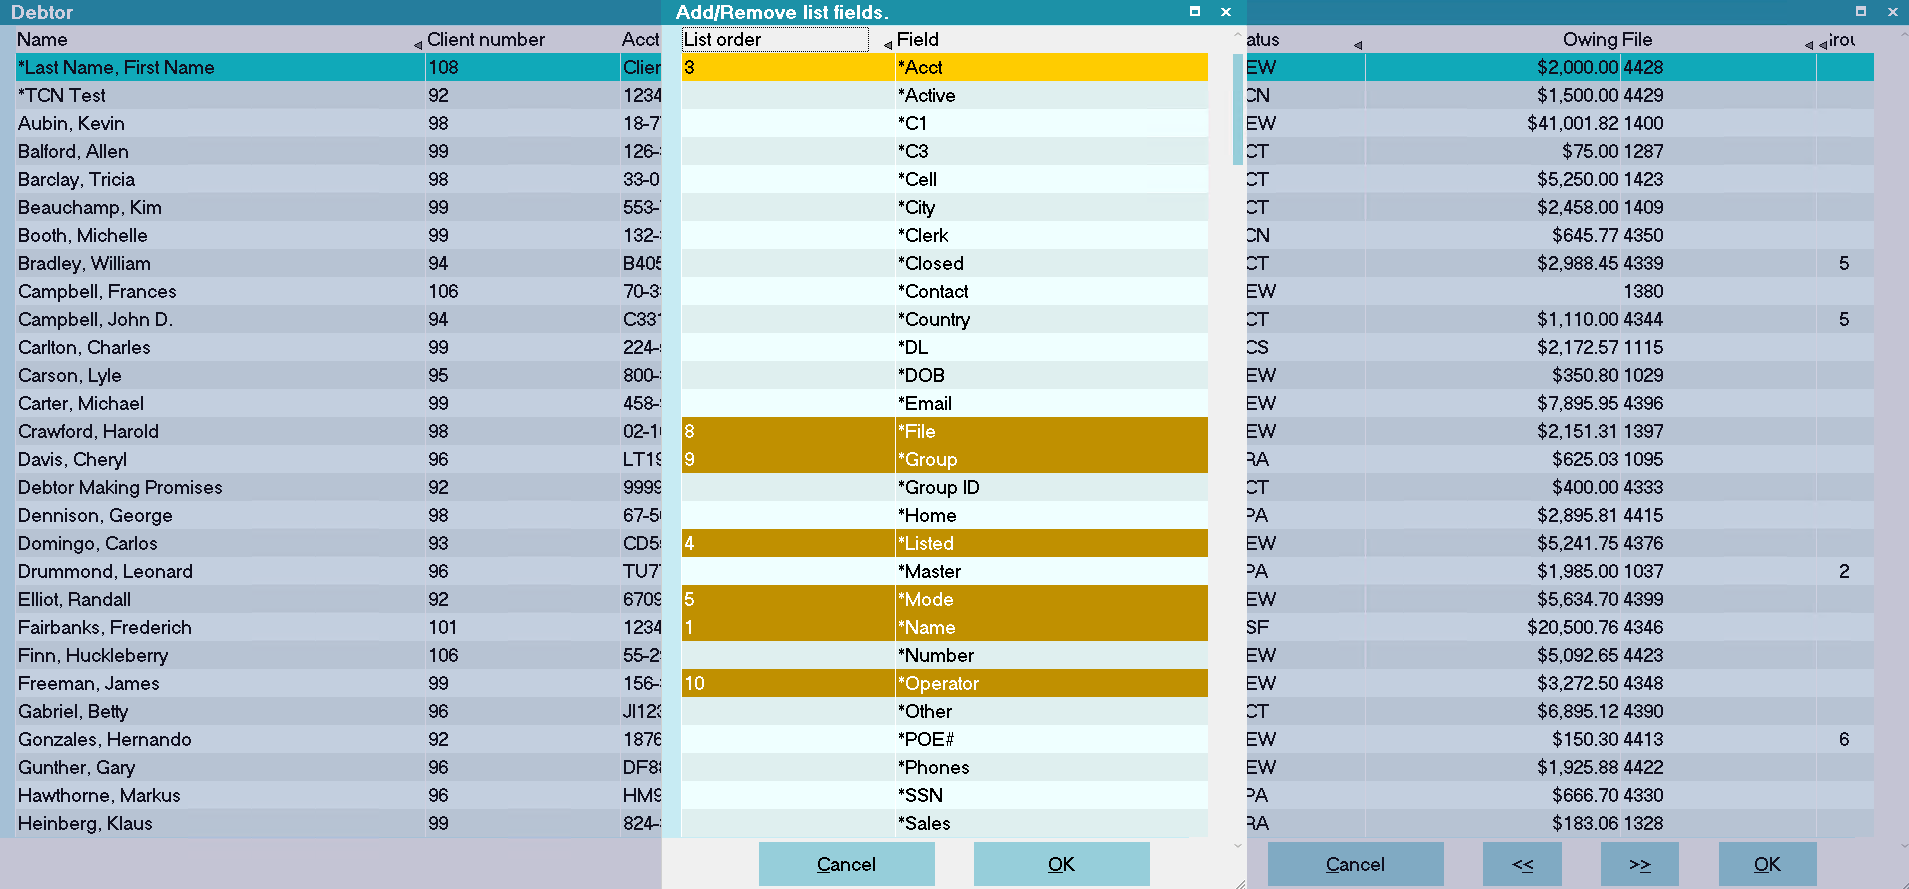
List of Fields in Underlying List
 Fields that are displayed in the list by default are already selected in this list and they show up ORANGE. The
selected item that you are actually on always shows up as ORANGE.
Fields that are displayed in the list by default are already selected in this list and they show up ORANGE. The
selected item that you are actually on always shows up as ORANGE.
3. Use the Down Arrow and the Spacebar on your keyboard to select the fields you want to display in your list.
4. You must also deselect the fields that you don't want to display. Fields in the default list view will show up as selected
in this list. Use the Down Arrow and the Spacebar on your keyboard to deselect the fields that you want to hide.
Selected Items in Editing List
5. Use the Page Up key on your keyboard when you are finished and ensure that you have landed on one of the selected fields.
The field should turn ORANGE. Then press OK.
Press OK to Set Your New List View
You will see your new List View immediately.
New Customized List View
6. If you wish to make further changes, you can right click the column headings and select EDIT again.
Move
The MOVE selection allows you to move one or more fields in the list to a different location in the List View. This choice does
not insert or remove fields. It simply changes the way the columns are displayed.
1. Right click on the column heading for the field that you want to move. We will reposition the File field.
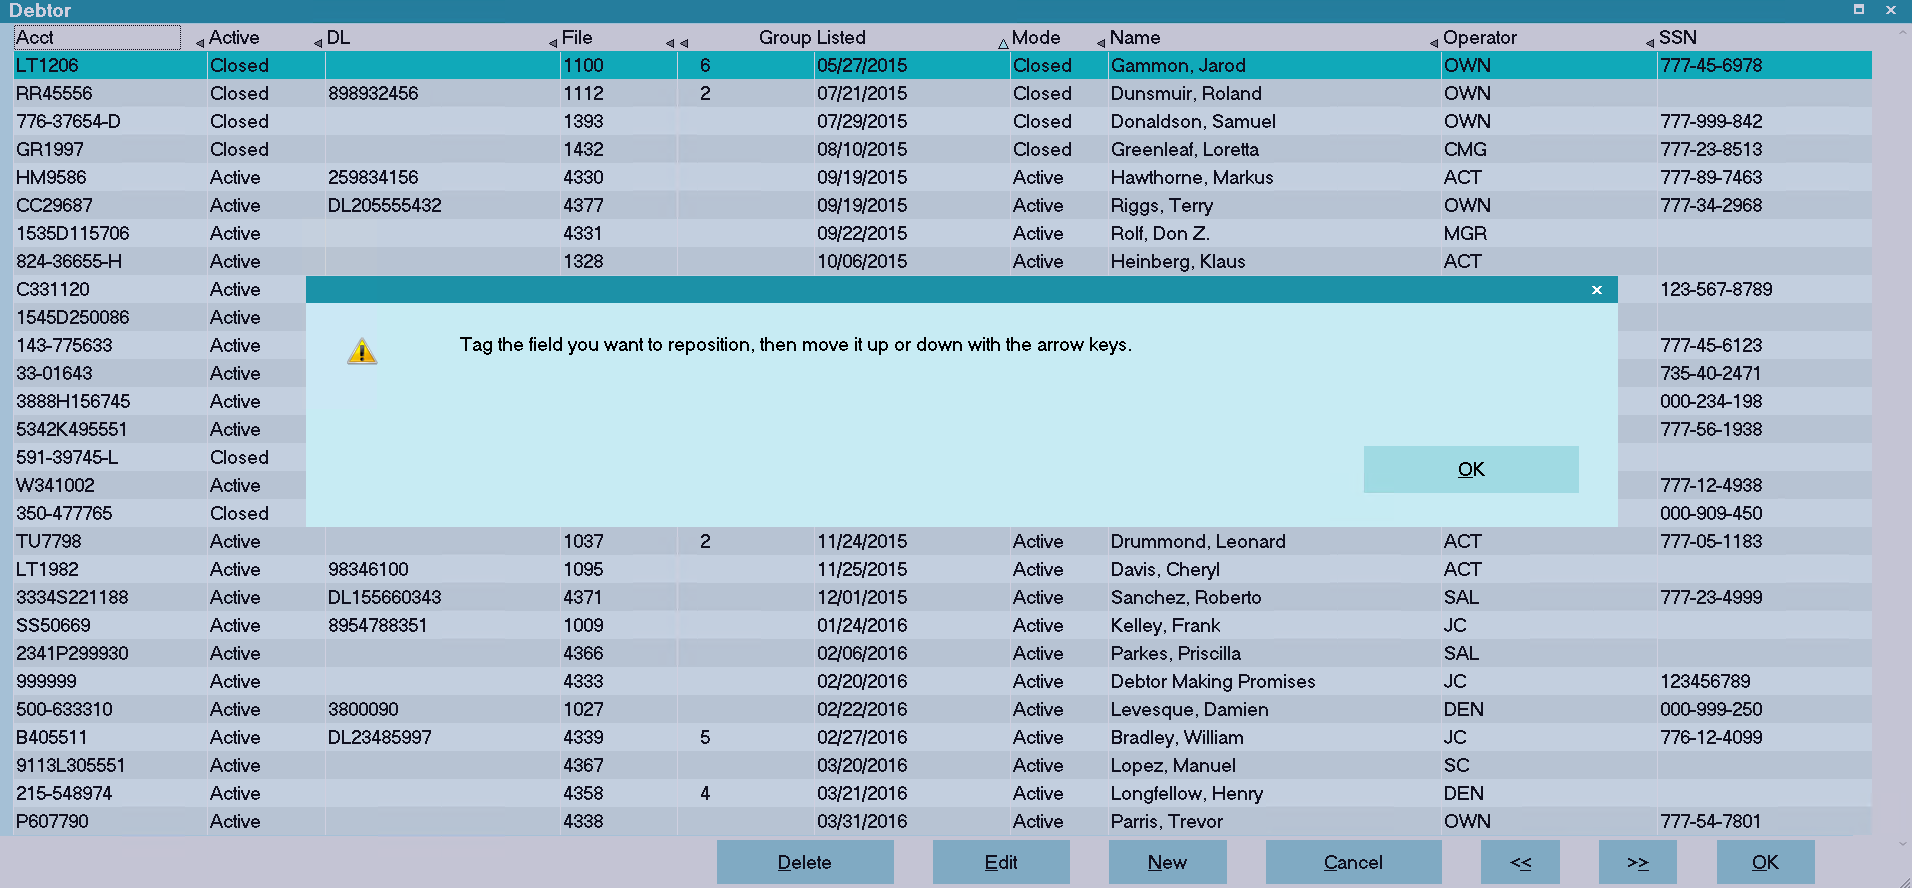
Prompt to Move Field in List View
2. Select OK when the prompt is displayed. You will see the list of fields that are displayed in the underlying list. The field
you want to reposition will be highlighted.

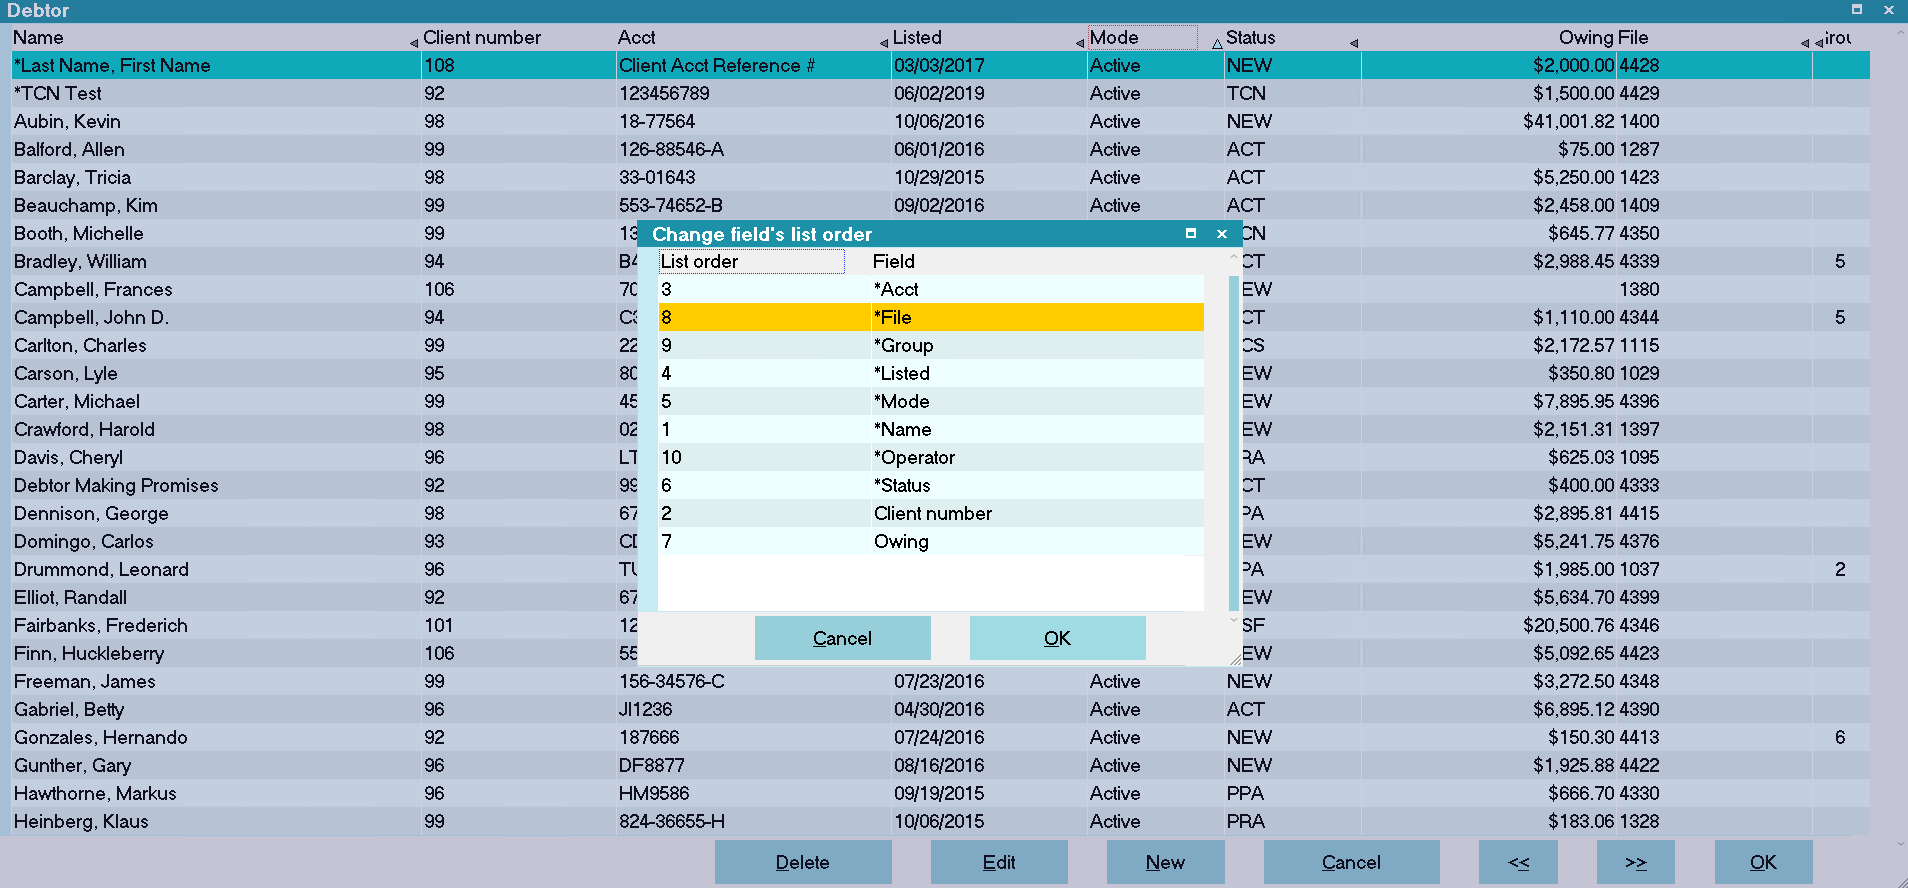
Change Field's List Order
3. Press the Spacebar to select the item. It will turn ORANGE. Use the Down or Up Arrow to move the item. You will actually
see the item moving in the list.
If you want to move more than one field, you can deselect the field you just moved, by pressing the Spacebar, then
select another field and reposition it.
When the fields are in the right order, select OK.
New Field Order Selected
You will see your new List View immediately.
New Field Order in Customized List View
4. If you have already pressed OK and you want to reposition another field, then you can Right click on the heading of the
next column you want to reposition and select MOVE again.
Insert Field
You can select a single field to insert using the INSERT FIELD option.
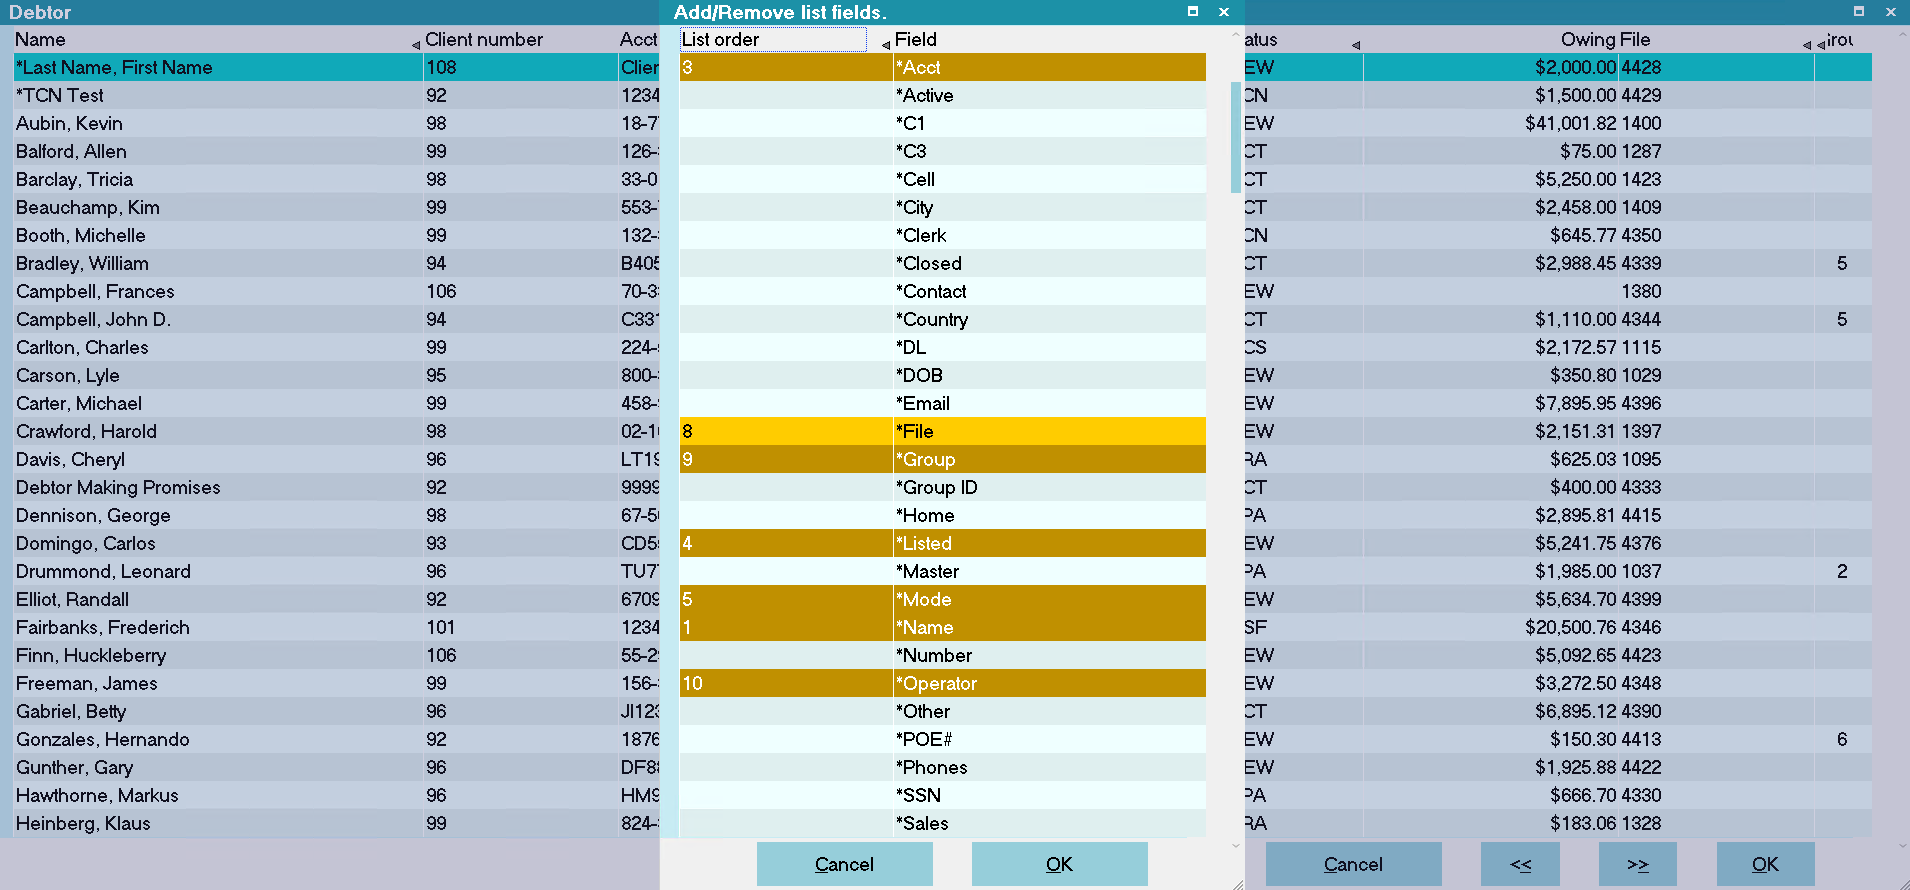
1. Right click on the column heading where you want to insert the new field. Select INSERT FIELD. This will display a list of
all available fields that you can select. These are any fields in the underlying form that are not already displayed in the
current List View.
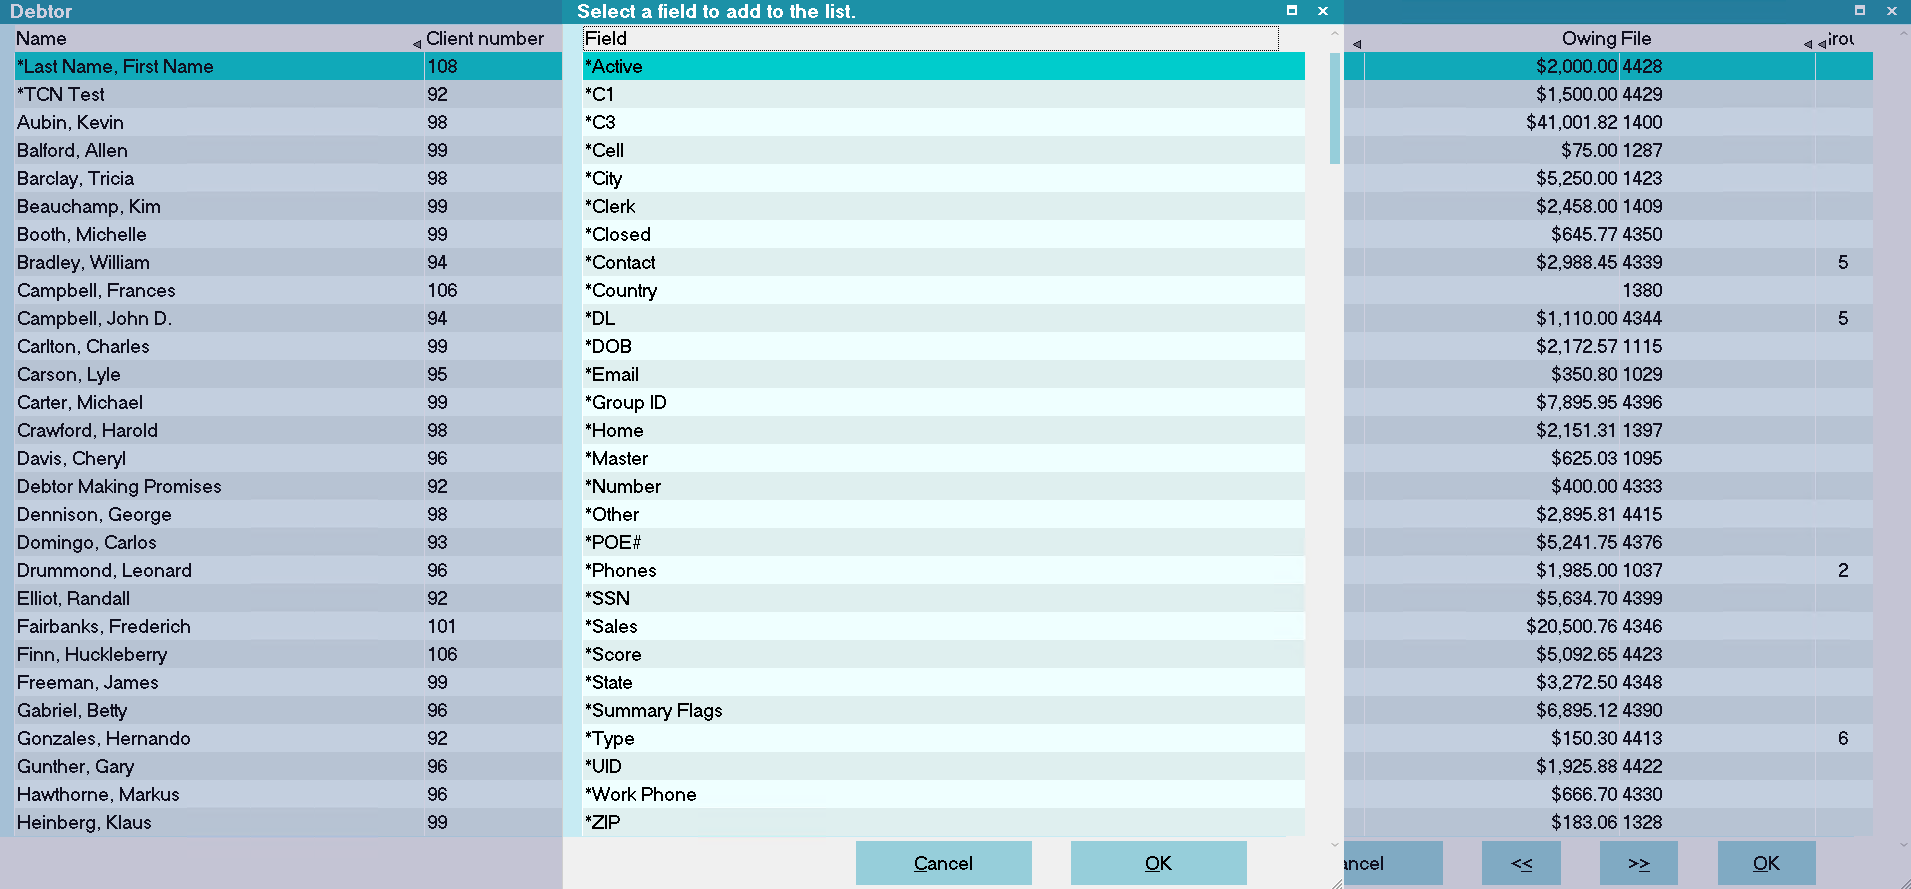
Select Field to Add to List View
2. Use your Up or Down Arrow to locate the field that you want to insert into the List View.
3. Press ENTER when the field is highlighted, or select the field with your mouse.
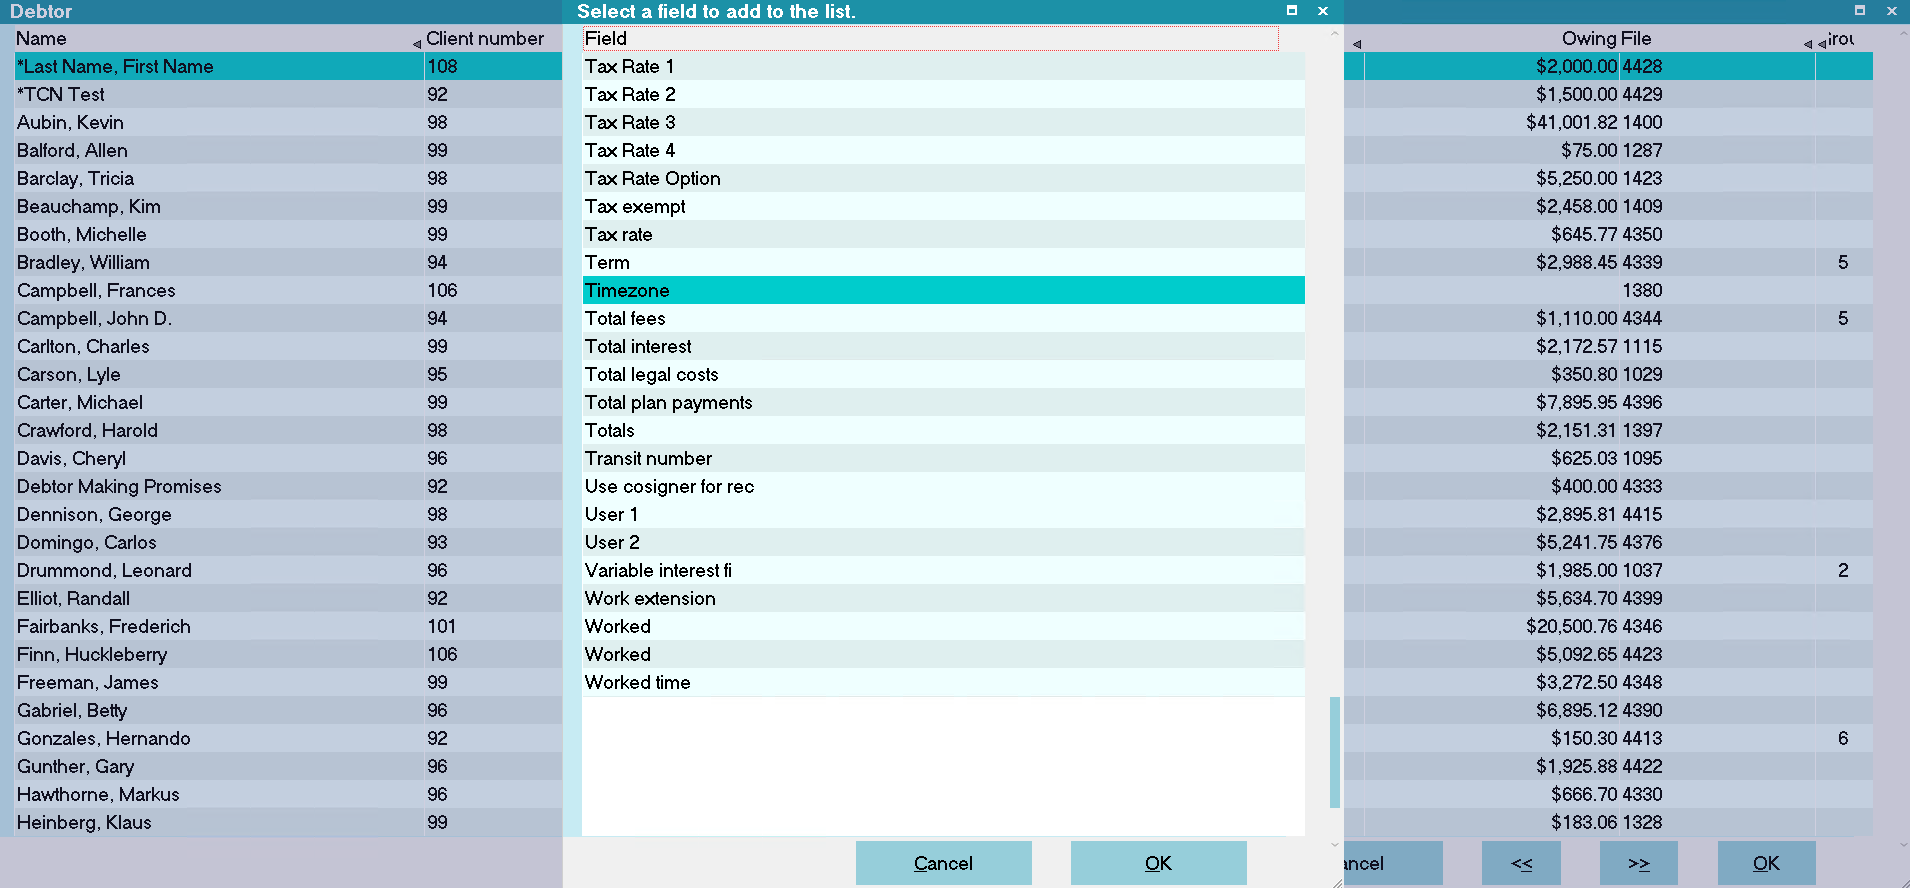
Select Field to Insert in List View
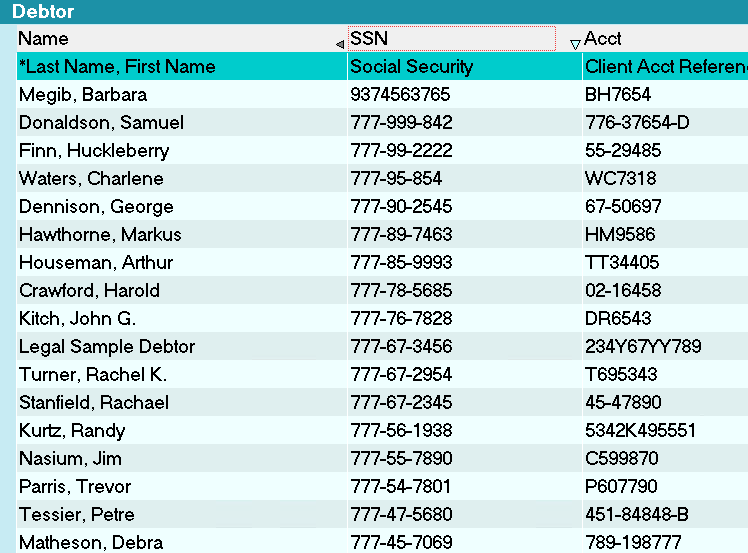
The List View will show your new choice immediately.
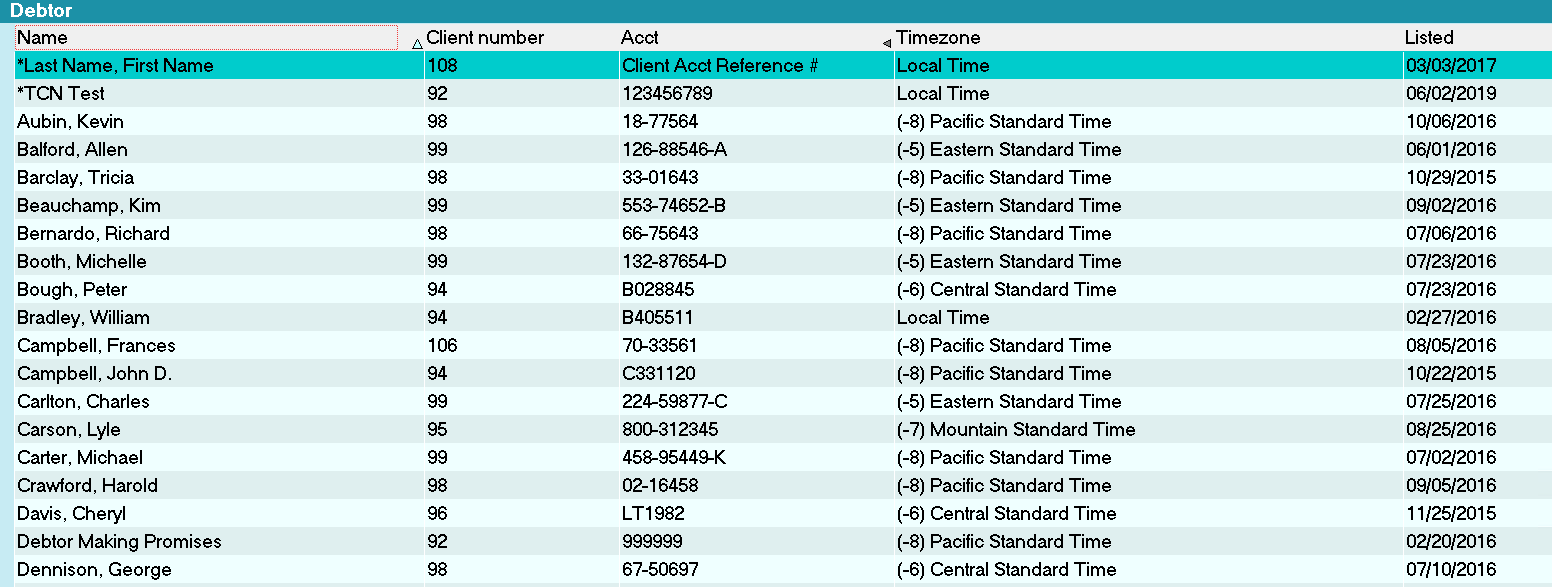
New Fields Inserted in List View
4. If you wish to add additional fields, you can Right click on the column headings and select INSERT FIELD again. Also you can
select REMOVE FIELD if you want to remove columns.
Remove Field
It is very easy to remove fields from the List View. Simply select the column heading for the field you want to remove
and then select REMOVE. The field disappears from the List View immediately.
Restore Default
If you would like to restore the List View to its default configuration and order, Right click the column headings and select
RESTORE DEFAULT. Press OK when prompted and the List View will immediately revert to its original order with the fields
Collect! displays by default.
List Views For Operators
When you modify a list view, an LPR file is saved to the Operator's CONFIG folder. The view will apply only to this Operator.
If you want to make the same list view available to all Operators, you should sign in as User Level 99 before going
through the steps outlined above.. Then Collect! will save the modifications to a COLLECT.LPR that everyone can see.
You can sign into Collect! as any operator and modify the list view further for that particular operator. If you want
to use the COLLECT.LPR instead, just remove or rename the LPR file in the operator's CONFIG folder.
Insert Menu Access Rights
If you want to disable the Insert Menu options for any one of your User Levels, you can set the access rights from the Access
Rights list. The Insert Menu has options numbered 335000 to 335005 in the list of Access Rights.
Summary
Customizing List Views in Collect! enables you to display information for your operators in ways that are most useful to you.
You can apply these steps to any list in Collect!. Lists of Clients, Debtors, Transactions, Attachments, Statements and
Contacts may all be customized to suit your needs. One particularly handy use for this customization is quick printing of
ad hoc reports for your own use or to send your clients a quick update. You can display results from underlying forms any way
that you want. As long as the fields exist in the underlying form, you can display them in your lists, or remove them, or
rearrange their order.
Customizing the List View in no way affects the underlying data or forms. It simply relates to the way the columns are
displayed when you view lists in Collect!.
| 
Was this page helpful? Do you have any comments on this document? Can we make it better? If so how may we improve this page.
Please click this link to send us your comments: helpinfo@collect.org