Post-Dated Payments - Quick Tour
This is a quick tour of the steps involved when you want
to enter a post-dated payment in Collect!.
We will cover:
- Single Post-Dated Payment
- Multiple Post-Dated Payments
- Post-Dated Payment Received
Single Post-Dated Payment
Let's say you have received authorization for a single
direct debit of $50 from a debtor's bank account. You are
authorized to print a post-dated check for this amount in
two weeks. How do you enter this information in
Collect! and keep track?
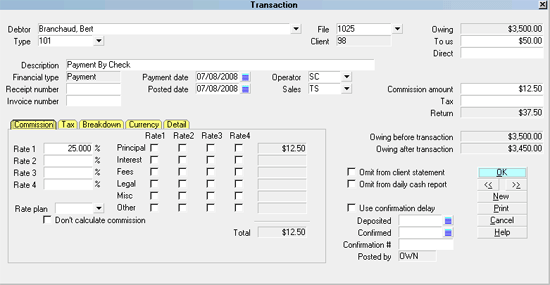
You enter a Post-Dated Payment for the account using a
Payment Transaction as shown below.

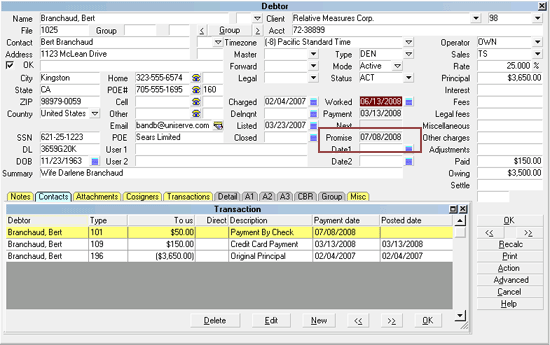
Post-Dated Payment Transaction
1. Enter the date of the payment in the Payment Date field.
2. Enter the promised dollar amount into the To Us field.
3. Make sure you leave the Posted Date BLANK. This
makes it a promised payment.
Now, the Debtor screen will show that there is a Promised Payment
active on this account.
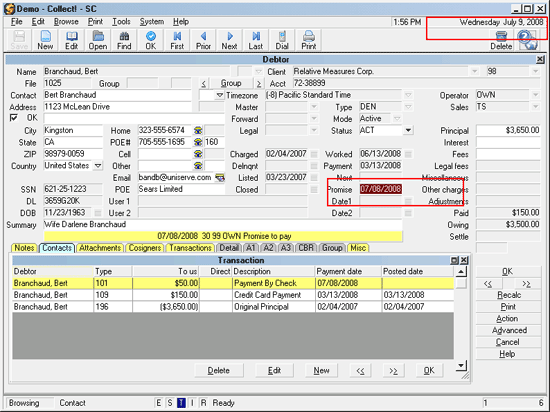
Debtor Screen with Promise Date
 Press the RECALC button on the Debtor to refresh
the screen.
Press the RECALC button on the Debtor to refresh
the screen.
If the Promise Date passes without payment, the Debtor screen
will show the Promise field as Delinquent - red.
Debtor Screen with Promise Date Delinquent

Multiple Post-Dated Payments
Let's say you have received authorization for three direct monthly
debits of $50 from a debtor's bank account. You are
authorized to print a post-dated check for this amount each
month. How do you enter this information in Collect! and
keep track month by month?
You enter a Post-Dated Payment for the account for EACH
post-dated payment using a Payment Transaction.
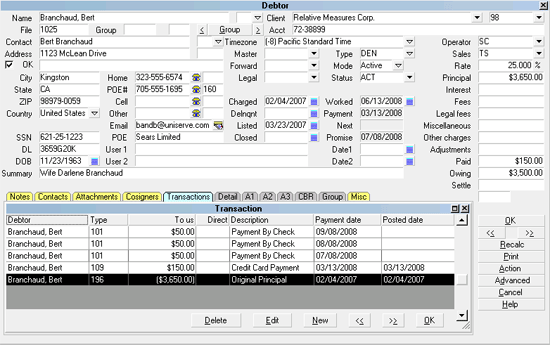
Several Post-Dated Payment Transactions
1. Enter the date of each payment in the Payment
Date field.
2. Enter the promised dollar amount into the To
Us field.
3. Make sure you leave each Posted Date
BLANK. This makes them promised payments.
The Debtor screen shows the date that the first post-dated
payment is due.
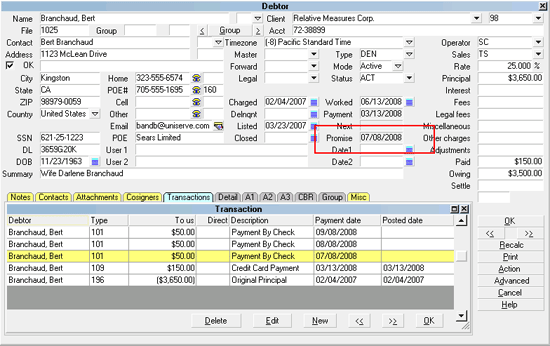
Debtor Screen with Promise Date
Press the RECALC button on the Debtor to refresh
the screen.
Post-Dated Payment Received
When a payment is received, simply locate the transaction
for the appropriate date and fill in the Posted Date.
Post-Dated Payment Posted Date
The payment will be calculated into the financials for this
account. If you want to print post-dated checks, the payment
will be picked up by the check report.
Other management tasks may be performed as required,
using a report or a contact plan.
Summary
How do you keep track of a post-dated payments? By creating
a post-dated transaction.
- Enter the date the payment is promised in the Payment Date
field.
- Enter the amount of the payment in the To Us field.
- If there are multiple payments, enter a post-dated
transaction for each promised payment.
When a payment is received, locate the appropriate transaction
and fill in the Posted Date.
See Also
- Post-Dated Payment Topics
|
Was this page helpful? Do you have any comments on this document? Can we make it better? If so how may we improve this page.
Please click this link to send us your comments: helpinfo@collect.org