Assign Accounts To A Client
Collect!'s batch processing function enables you to assign
a batch of accounts to a client. This is very useful if you
have accounts with no client selected, accounts that have
just been imported, or accounts that you wish to move
from one client to another in your system.
Batch assigning accounts to clients uses the Client
Number to match. It is assumed that the Client Number
is unique.
 As this is a rather demanding process,
temporarily locking clients and debtors during
reassignment, it is recommend that you do it on the server.
As this is a rather demanding process,
temporarily locking clients and debtors during
reassignment, it is recommend that you do it on the server.
To assign or reassign accounts to a client:
- When no one else is using Collect!, exit the program,
sign in and stop at the Main Menu.
- Select Tools from the top menu bar and then select
Batch Processing from the drop-down choices. This will
display the Batch Processing form.
- Using your mouse or the spacebar, select the radio
button labeled Assign accounts to a client.
Select the NEXT button. This will display the
Select Accounts To Process form.
The Select Accounts To Process form gives you
several options for selecting the accounts you want to
assign to the client. Please press F1 for help on this
form.
- After you have selected your accounts, select the NEXT
button. This will display the Select Client to Assign form.
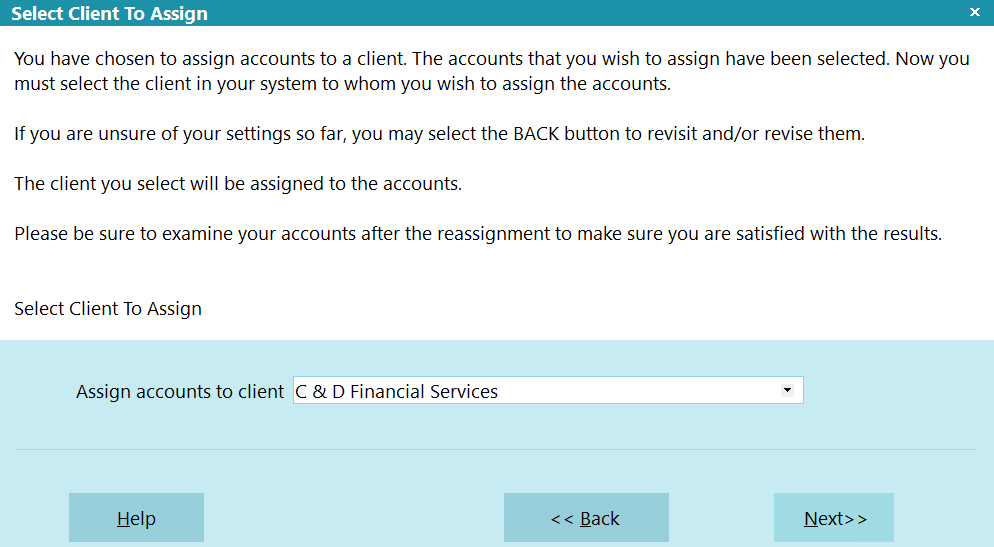
Select Client To Assign
- Select the down arrow beside the 'Assign accounts to
client' field to open the list of clients. Locate the client that
you want to assign accounts to and select it so that the
correct client number appears in the field. Select the
NEXT button. The Assign Account Client form will appear.
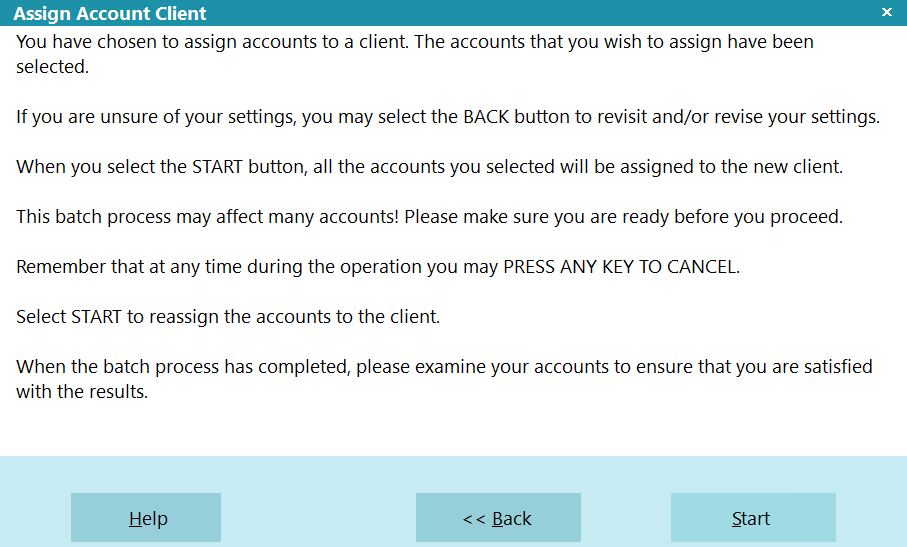
Assign Account Client
- If you are ready to run the batch process, select the
START button. Otherwise, you may use the BACK button
to revisit and/or revise your settings before making any
changes to the database.
When you select the START button, Collect! will quickly
perform the account assignment.
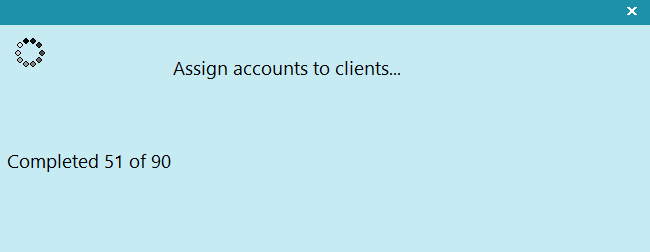
Running Assign Account Client Batch
- When the task is completed, Collect! will inform you
of success, indicating the number of accounts that were
assigned and the elapsed time.
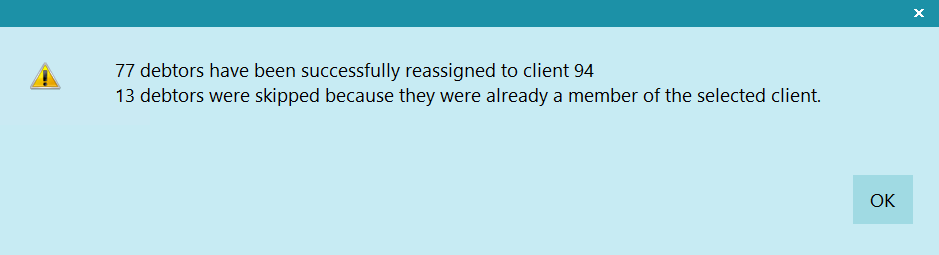
Account Client Assignment Completed
- Select OK to close the message
window and then select Close to
close the Batch Processing window. Examine your
accounts to make sure that the client assignment
results are as you expected.
Tips For Selecting Accounts
You can also open a Client and tag Debtors that way. However,
you have to close the Client form before proceeding with the
batch process.
After you have tagged your accounts, close the Client form
and select Browse -> all Debtors from the top menu bar. Then
select Edit -> View Tags. Verify that you are looking at the
accounts you want to re-assign.
Begin your batch process with "Tag individual records"
chosen. You can just press NEXT at this point and Collect!
will process your tagged accounts.
 Please do not leave the Client form open when
you start your batch process or you may not get the results
you are trying to obtain.
Please do not leave the Client form open when
you start your batch process or you may not get the results
you are trying to obtain.

| 
Was this page helpful? Do you have any comments on this document? Can we make it better? If so how may we improve this page.
Please click this link to send us your comments: helpinfo@collect.org