Language File
Collect! has two options in the System, Layout and Languages
menu that provide for aliasing many fields in your database at
once. The two options are Read Language File and Write
Language File. These are two steps that you need to follow to
change the field labels in your database.
This feature is useful for:
- International use where your operators do not primarily use
English, shipped by default in Collect!.
- Business use where the default labels do not reflect the
use of Collect! for your type of operation. For instance, you
may want to use medical or insurance "jargon" for many of
the fields to make it easier for data entry and other users.
Write Language File and Read Language File enable you
to customize the Collect! user interface for any language
or any type of business. Once the language file is read, the
changes are committed to Collect! permanently and the
file is not read again during your normal use of the Collect!
program.
Writing Language File
 You may have received a language CSV file already from
Collect! Member Services or another Collect! user. In that case,
you do not need to write a file. You only need to read it as
described in the "Reading Language File" section.
You may have received a language CSV file already from
Collect! Member Services or another Collect! user. In that case,
you do not need to write a file. You only need to read it as
described in the "Reading Language File" section.
If you are creating your own language file, the first step is to
write a file to use for editing.
To write a language file:
1. Sign into Collect! with User Level 99.
2. Select System from the top menu bar and then select Rights,
Access Rights from the drop-down choices. This will display the
list of all the fields in Collect!.
 Duplicates or blanks in the list of Access Rights
may result in errors when the language file is written. Please
ensure that there are no blanks or duplicates in your list.
Duplicates or blanks in the list of Access Rights
may result in errors when the language file is written. Please
ensure that there are no blanks or duplicates in your list.
3. In preparation for writing a clean and accurate file, please
select the REBUILD button and select YES to rebuild your
access rights. This should ensure that you are writing an
accurate language file.
4. When the Rebuild is finished, close the list of Access Rights.
5. Select System from the top menu bar and then select
Layout and Languages from the drop-down choices.
6. Select Write Language File from the side menu options.
Collect! will generate a CSV file named language.csv
in the Collect\bin folder.

Collect! creates a Language CSV
7. You can open the file right away or locate it later to edit
it as needed. The example shows a few aliases entered,
but when you first open this file, the Transactions column
may be completely empty.
View sample Language File
Sample Language File with a few Aliases Entered
If you have fields already aliased, their values
will show up in the Translations column when you open
the language CSV for the first time.

Editing Language File
To edit the language file, you must open it in a spreadsheet
program. Refer to the column headings to see where you
need to enter your aliases for each field.
Enter your aliases in the Translation
column. You only need to enter values in the fields you
want to change. Collect! will use its own default labels
for any field you do not alias.
It is a good idea to try to keep your entries as
short as possible.
Make sure you save the language.csv as a
CSV file when you are finished editing it.
Reading Language File
After you have aliased all the fields and forms you are
interested in, you can read this information back into
Collect! to update all the labels for the forms and fields.
 WARNING: This will change all the aliases in the system,
PERMANENTLY. This should only
be used if you want to translate Collect! for
your whole office. If you want to only alias
Collect! for particular operators, please refer
to the help topic How to Customize an Operator's Language
for more information.
WARNING: This will change all the aliases in the system,
PERMANENTLY. This should only
be used if you want to translate Collect! for
your whole office. If you want to only alias
Collect! for particular operators, please refer
to the help topic How to Customize an Operator's Language
for more information.
To read a language file:
1. Ensure that your edited language.csv
resides in the Collect\bin folder before proceeding.
2. Sign into Collect! with User Level 99.
3. Select System from the top menu bar and then select
Layout and Languages from the drop-down choices.
4. Select Read Language File from the side menu options.
Collect! will read the language.csv
in the Collect\bin folder.
5. When finished, Collect! instructs you to restart.

Collect! has loaded the Language File
After Collect! restarts, you should shut down
completely and sign in at a User Level other than 99
so that you can see your changes.
User Level 99 cannot see aliases!
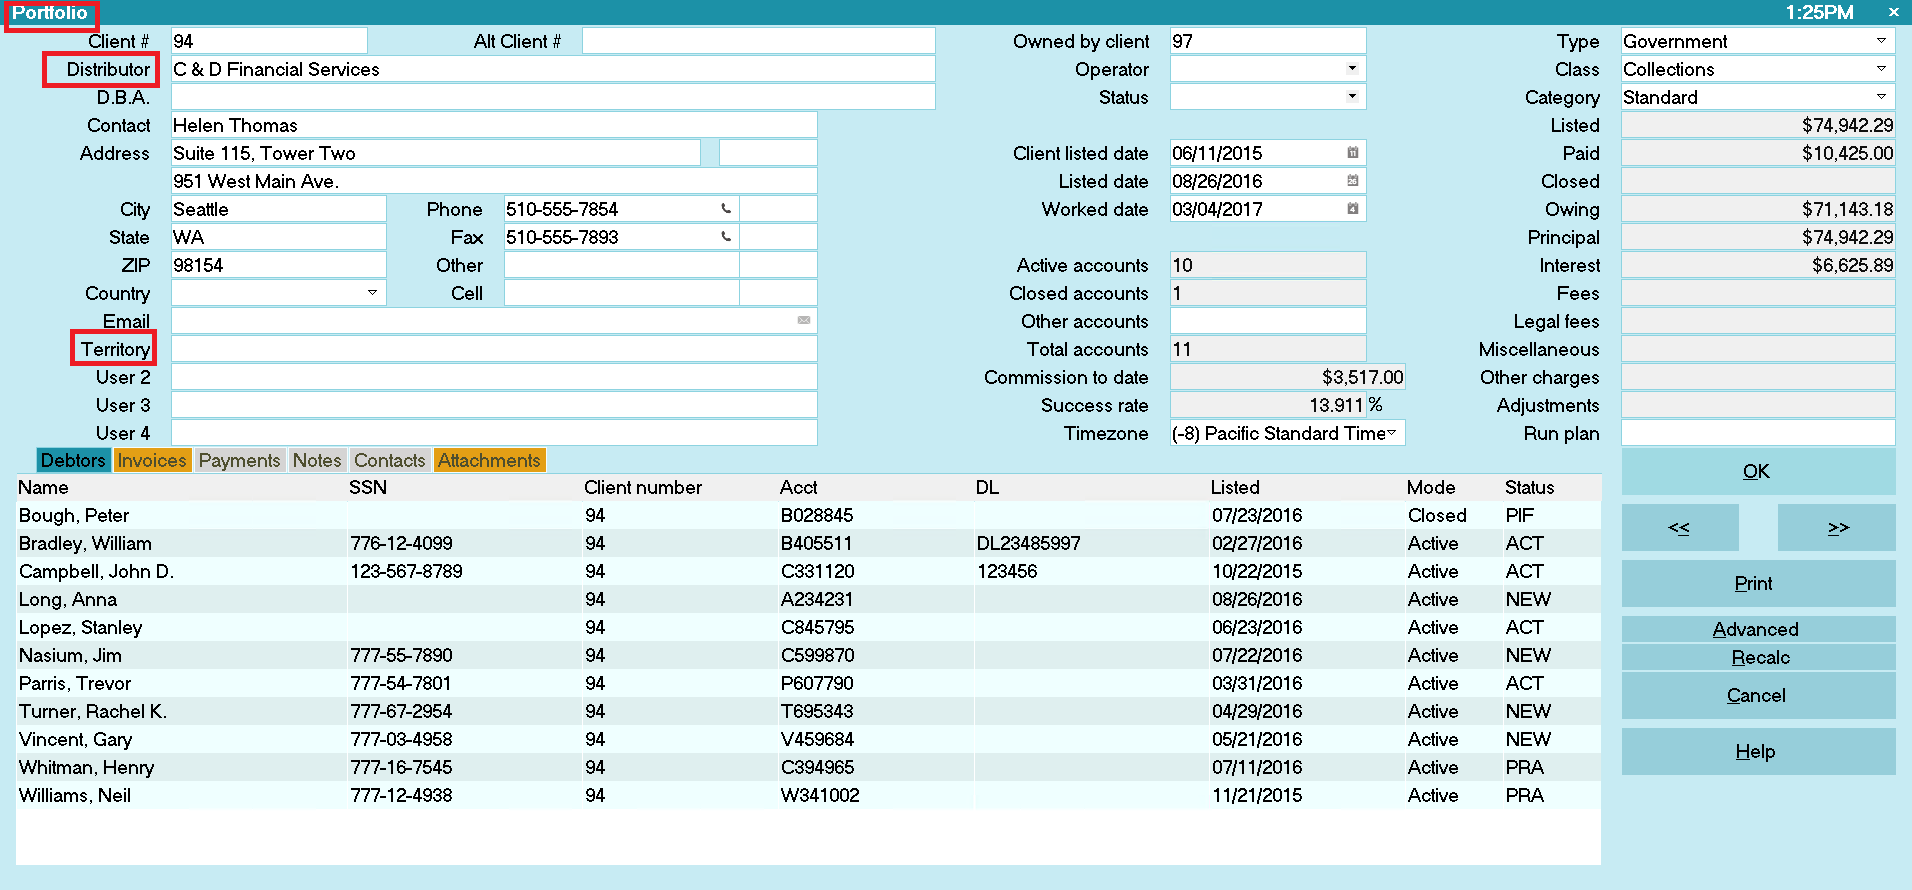
Client form with Aliased Fields
Once the language file is read, the changes are committed
to Collect! permanently in the Access Rights form for each
aliased form and field.
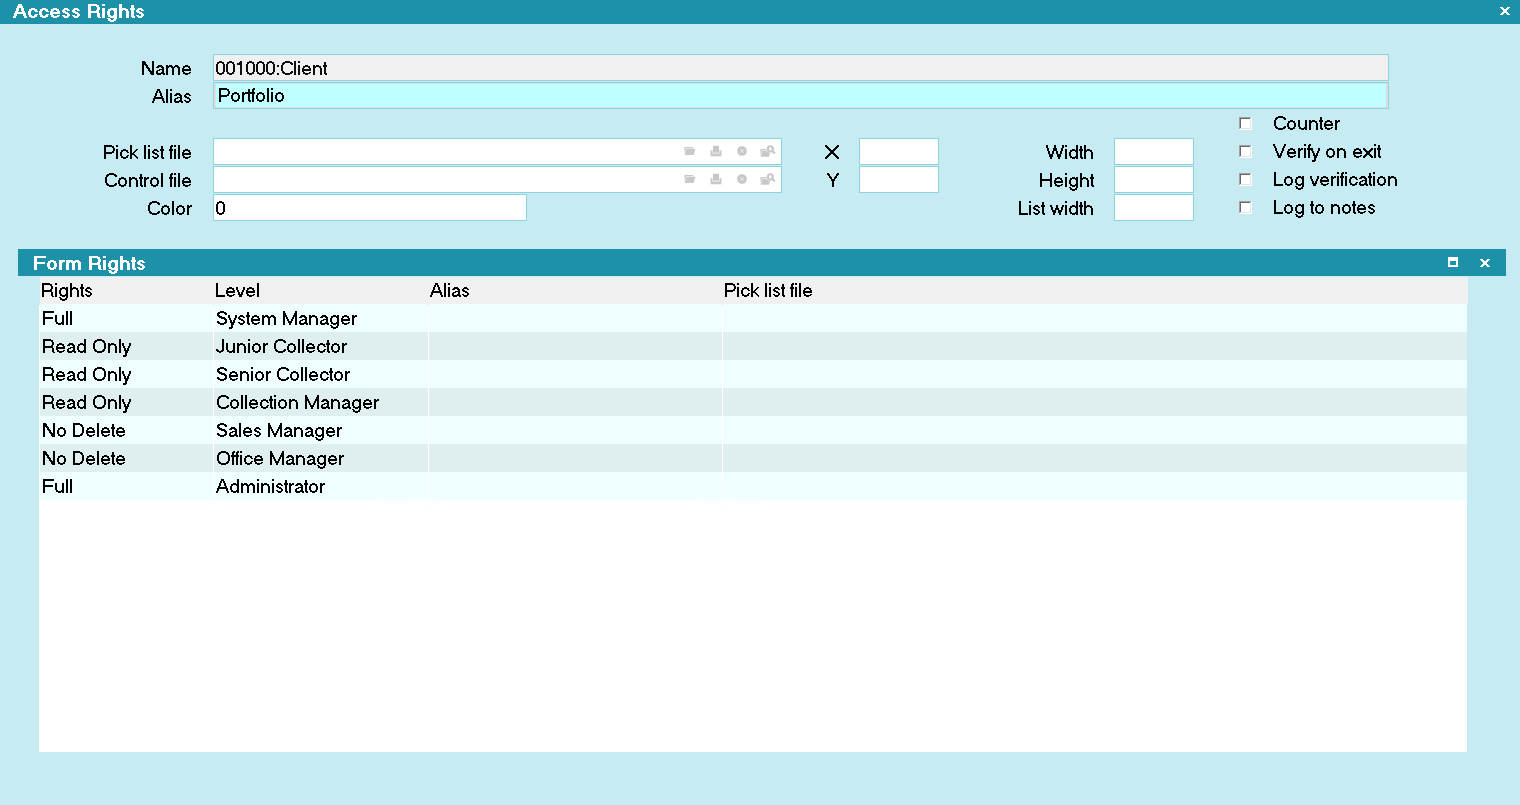
Access Rights for Client

Access Rights for Client Field
Multi-Language DDE
Collect!'s DDE capabilities work very well with multi-language
and multi-currency. You can insert any information from
Collect! into DDE reports.
Multilingual Collect! and Microsoft Word
Summary
Write Language File and Read Language File enable you
to customize the Collect! user interface for any language
or any type of business. This is a very flexible, extremely
easy way to apply sweeping changes to your Collect!
program. You can even load different language files for
different databases. Once the language file is read, the
changes are committed to Collect! permanently and the
file is not read again during your normal use of the Collect!
program.
| 
Was this page helpful? Do you have any comments on this document? Can we make it better? If so how may we improve this page.
Please click this link to send us your comments: helpinfo@collect.org