Web Host Client
Set up your operations the best way right from the start, and
you'll minimize your frustration and enjoy using Collect!. This is
especially true when you enter Clients and their Debtors into your
working database. The right way to do this is to start from the Client
form.
Make sure you set up your Company Details, Dunning letters,
Operators, Transaction Types and a Contact Plan, if applicable,
before you begin to enter Client and Debtor information. If these
areas are taken care of first, all their settings and information are
readily available to you when you enter your clients and debtor
accounts.
To add a new client, click the ADD A CLIENT button in the toolbar.
Fill in the applicable fields on the form.
Click each of the orange buttons on the left to fill in the following:
* General Information
* Advanced Settings
* Statement and Invoice Setup
* Commission Settings
* Tax Settings
* Credit Bureau Reporting Settings
A description of each of the sections and fields is available below.
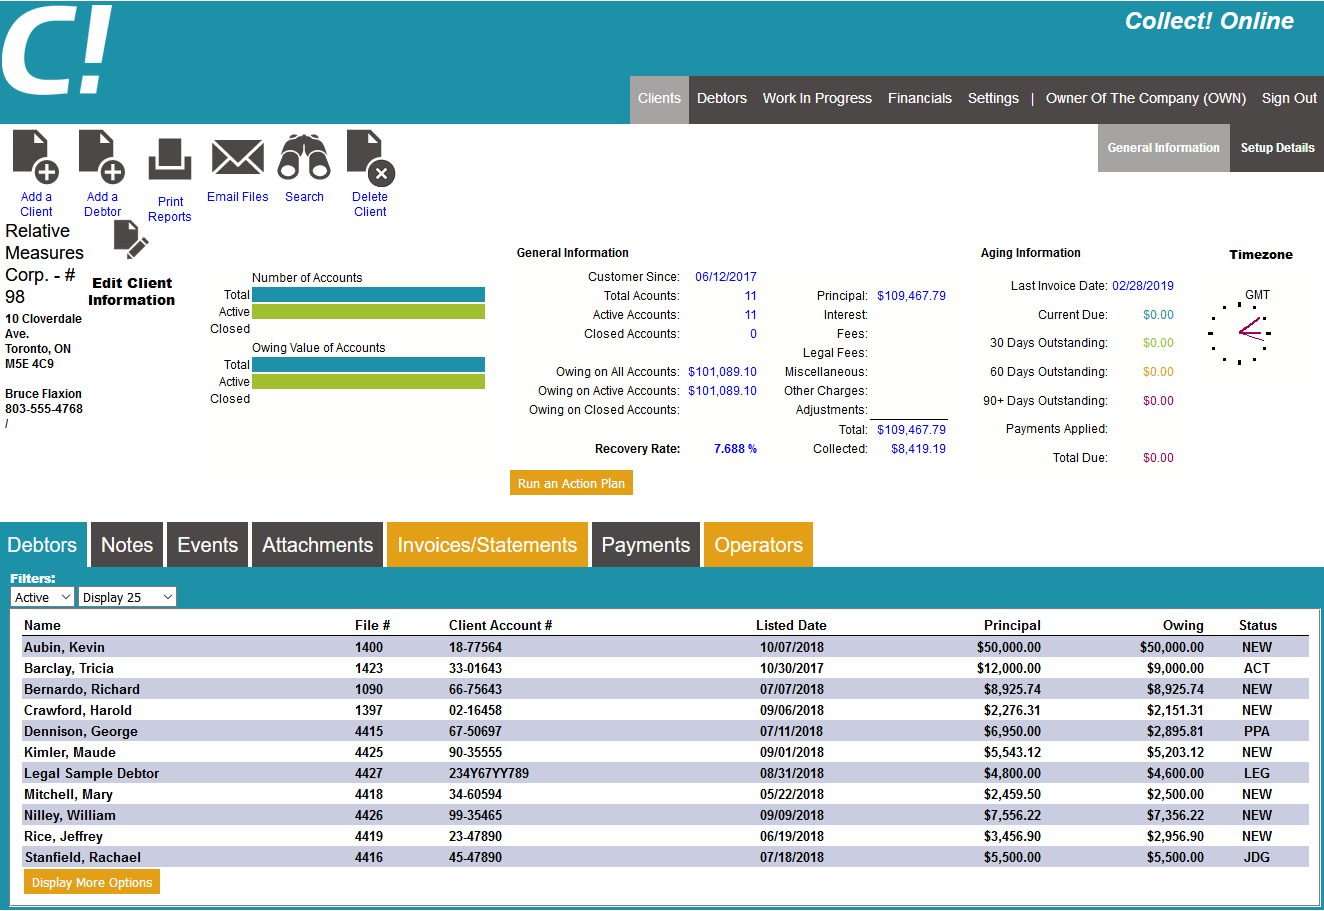
The Client form shows Client information and the accounts listed
by the Client.
Debtor
The Client Settings form contains many settings that
will determine how Debtors, Payments, Invoices and
Credit Bureau Reporting are handled for this Client.
After you have entered your basic personal information for
this Client, select the EDIT CLIENT INFORMATION button to open the
Client Settings form. It is very important to set up this
information correctly right from the start. The information you
set will be automatically entered into all related forms - Debtors,
Payments, Invoices and CBR. This will save a considerable
amount of time and reduce errors.
Most of the information below is available on the main Client view,
but for organizational purposes, we will go through the fields
based on where they appear in the 'Edit Client Information' view.
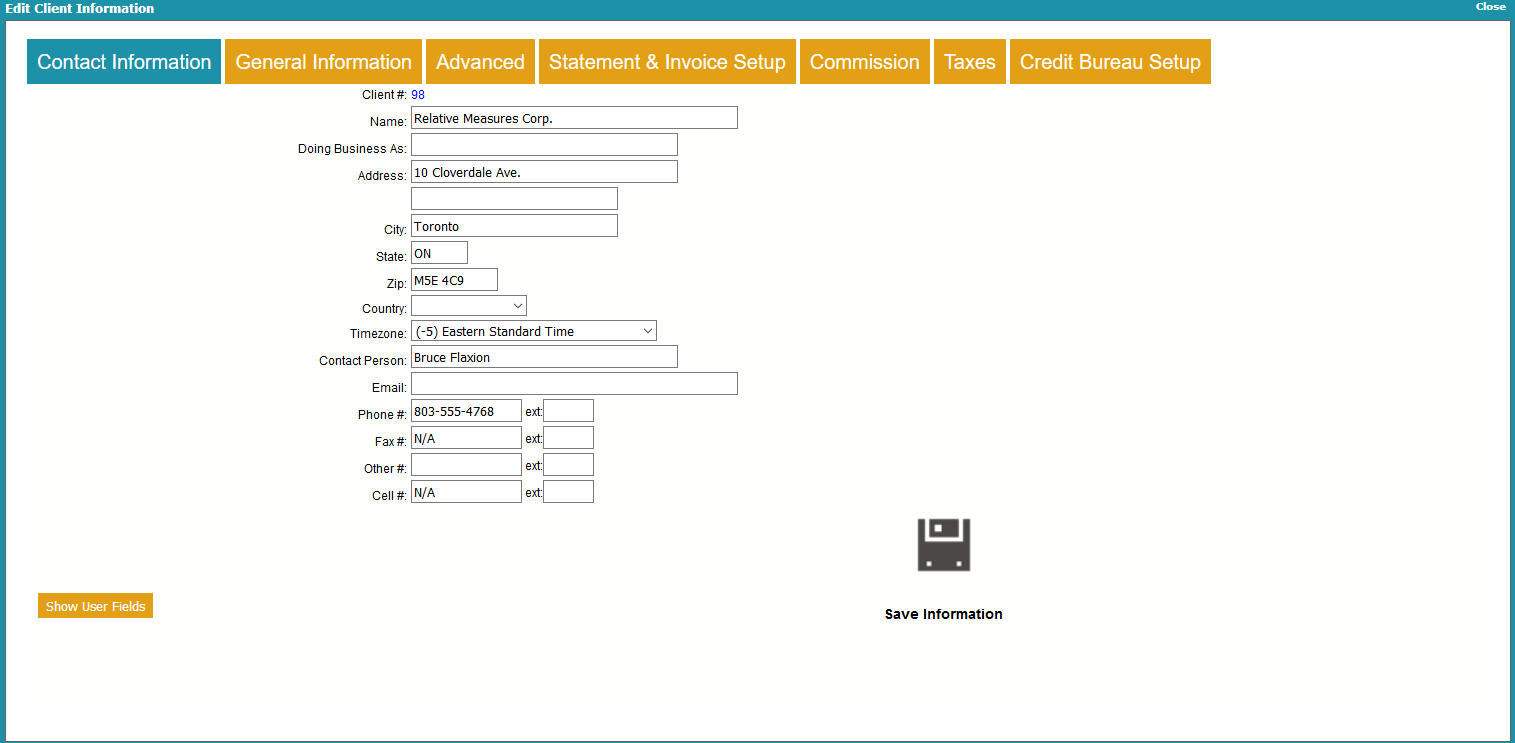
Client Contact Information
Client #
This is the Client ID number as assigned by Collect!.
This number may hold only digits and is used by
Collect! whenever the Client is referenced. If you have
another ID that you would like to use, please enter it in
the field labeled Alt Client #.
This field has additional functions when used with
Account Access Control and Operator Security.
This field is INDEXED.

Name
This is the actual name of the Client or company.
This field holds up to 62 alphanumeric characters.
This field is indexed.
Doing Business As
This is an alternate name that you may use in reports.
Perhaps the Client has requested that you refer to
them with a pseudonym. This field holds up to 62
alphanumeric characters.
Address
First line of the mailing address of the company. All
invoices will be sent to this address, by default. This
is first line to begin typing the address. This field holds
up to 78 alphanumeric characters.
Address 2
Second line of the mailing address of the company. All
invoices will be sent to this address, by default. This is
another line to type the address. This field holds up
to 126 alphanumeric characters.
City
Use this field to break out the City from the Client
address. This field holds up to 30 alphanumeric
characters.
State
Use this field to break out the State from the Client
address. This field holds up to 30 alphanumeric
characters.
ZIP
Use this field to break out the Postal Code from
the Client address. This field holds up to 22 alphanumeric
characters.
Country
Use this field to break out the Country form the Client
address. This field holds up to 30 alphanumeric
characters.
Time Zone
This field holds a POSITIVE or NEGATIVE integer
indicating the Timezone of this Client.
 Timezones are standard integer
values calculated from
GMT (Greenwich Mean Time).
Timezones are standard integer
values calculated from
GMT (Greenwich Mean Time).
Contact Person
The name of the contact person or Representative
for this Client. This field holds up to 62 alphanumeric
characters.
Email
This is the Client's email address. Select the Email icon
to the right of this field to open the Send Mail window
which allows you to create an email and send it to the
Client. This field holds up to 78 alphanumeric characters.
Phone
The phone number of the Client. Enter the phone number as
you would manually dial it. This field holds up to 22
alphanumeric characters.
Phone Extension
The phone extension. Enter the extension as you
would manually dial it. This field holds up to 6
alphanumeric characters.
Fax
The fax number of the Client. Enter the fax number as you
would dial it manually. This field holds up to 22 alphanumeric
characters.
Fax Extension
The fax extension. Enter the extension as you
would manually dial it. This field holds up to 6
alphanumeric characters.
Other
Another phone number for the Client. Enter the phone number
as you would manually dial it. This field holds up to 22
alphanumeric characters.
Other Extension
The other extension. Enter the extension as you
would manually dial it. This field holds up to 6
alphanumeric characters.
Cell
The cellular or other phone number of the Client. Enter the
number as you would dial it manually. This field holds up
to 22 alphanumeric characters.
Cell Extension
The cell extension. Enter the extension as you would
manually dial it. This field holds up to 6 alphanumeric
characters.
User 1
This field is for your own definition and use. This field holds
up to 62 alphanumeric characters. This field is indexed.
User 2
This field is for your own definition and use. This field holds
up to 62 alphanumeric characters.
FOR CBR: If you are reporting to Credit Bureaus
by client, Trans Union codes go here.
Please refer to How to Setup Credit Bureau Reporting
for details.
User 3
This field is for your own definition and use. This field holds
up to 62 alphanumeric characters.
FOR CBR: If you are reporting to Credit Bureaus
by client, Trans Union codes go here.
Please refer to How to Setup Credit Bureau Reporting
for details.
User 4
This field is for your own definition and use. This field holds
up to 62 alphanumeric characters.
FOR CBR: If you are reporting to Credit Bureaus
by client, Trans Union codes go here.
Please refer to How to Setup Credit Bureau Reporting
for details.
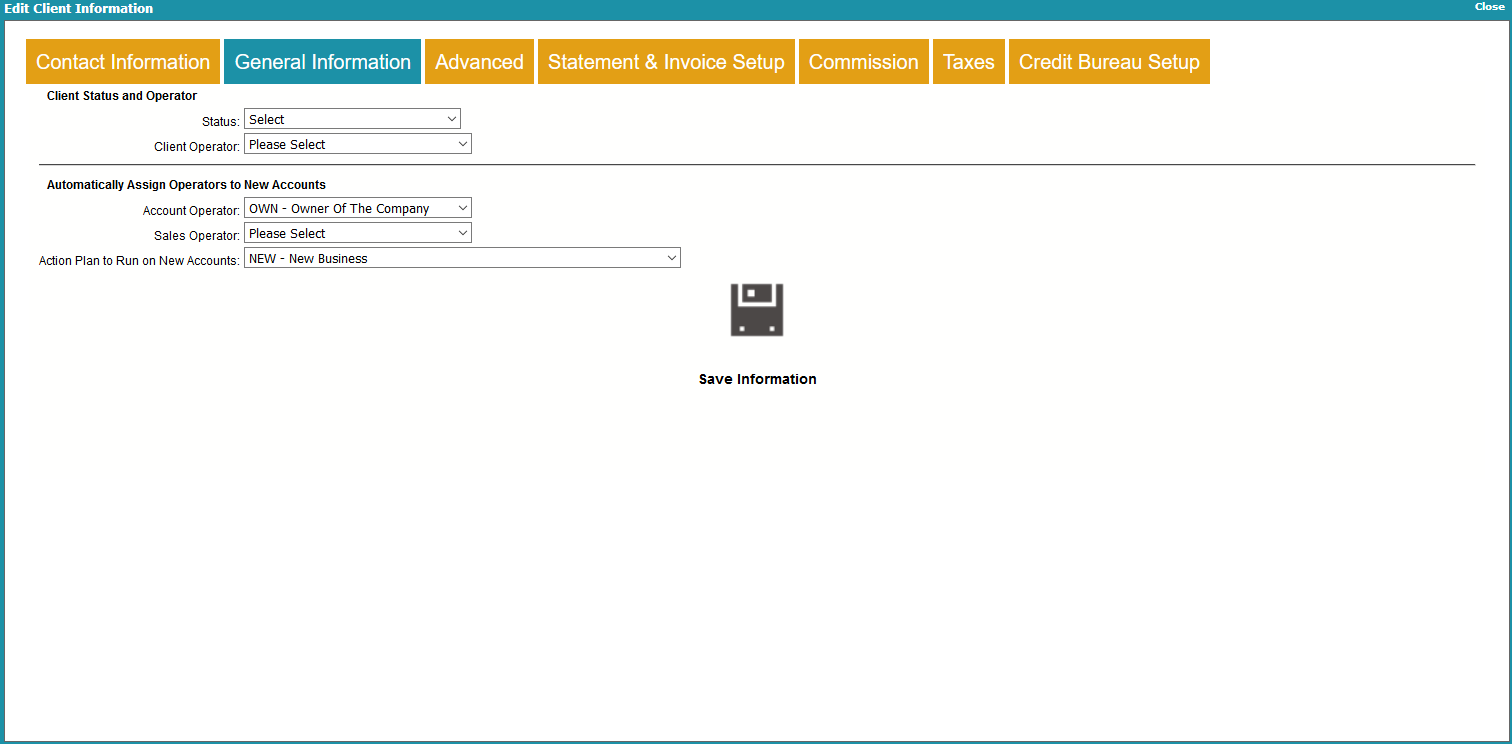
Client General Information
Status
Select a Status from the Debtor Status code pick list
to apply to this Client.
 This field uses the same pick list as the
Debtor does for Status Codes. If you
have codes that apply specifically to
your clients, simply add them to the list
of Debtor Status Codes.
This field uses the same pick list as the
Debtor does for Status Codes. If you
have codes that apply specifically to
your clients, simply add them to the list
of Debtor Status Codes.
Client Operator
Select an Operator from the Operator pick list to
assign to this Client.
This field uses the same pick list as the
Debtor does for Operators. If you have
Operators who only work Clients,
simply add them to the list of
Operators.
Account Operator
This Operator ID will be assigned to all new accounts
recorded for this client. It will be copied to the
Debtor's record automatically. The Operator ID is
very important for following up on a debtor's account,
scheduling contacts and reviewing account activity.
Sales Operator
This Sales ID will be assigned to all new accounts
recorded for this client. It will be copied to the
Debtor record automatically and then the information
can be tracked for salesperson status and for
commission reporting.
Action Plan To Run On New Accounts
Whenever a new account is entered, this plan will run
automatically. For instance, you could schedule a
phone call or a review for each new account.
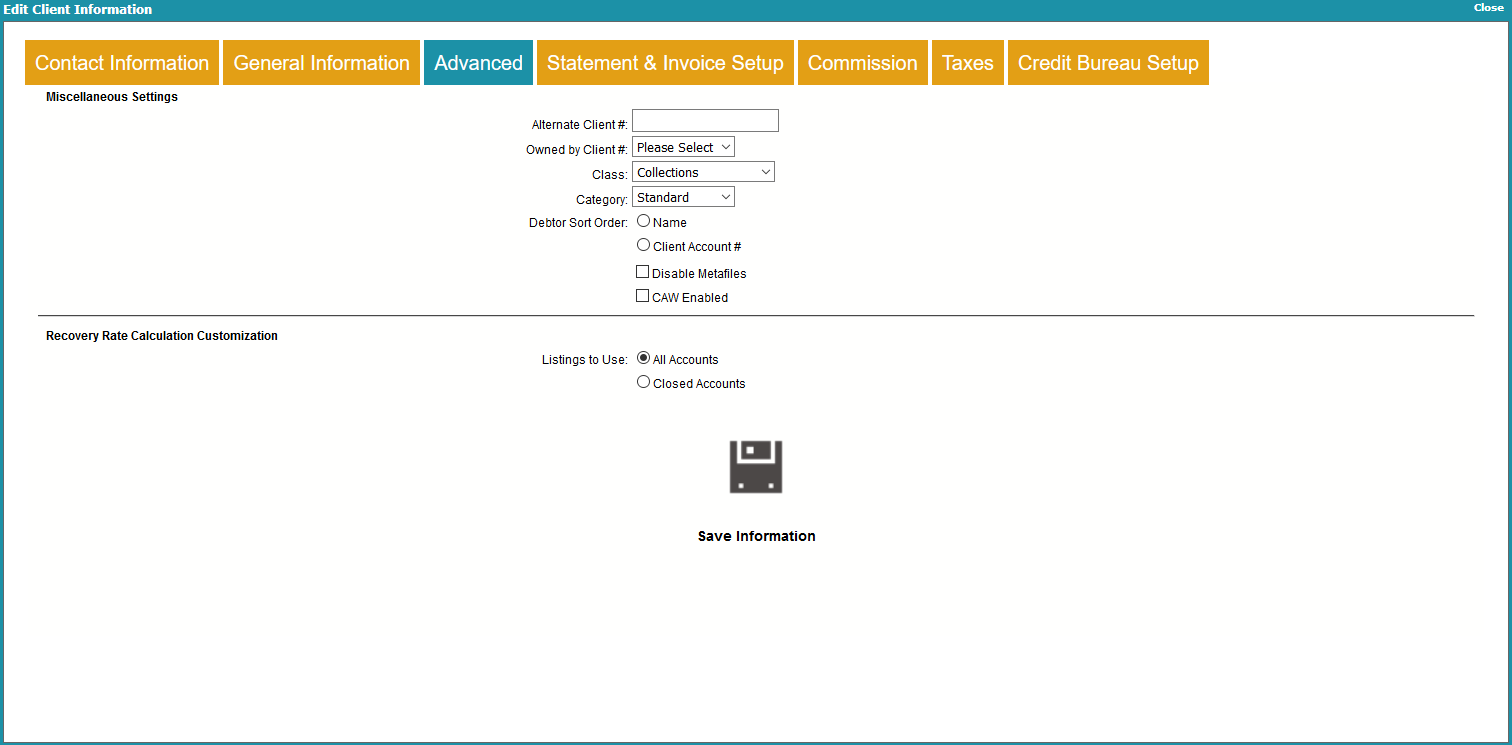
Client Advanced Information
Alternate Client #
This field is for your own use. You may enter
an alternate Client Number to reference on reports.
Perhaps your Client has given you an alphanumeric
code to use. This field holds up to 18 alphanumeric
characters. This field is indexed.
Owned By Client
This field is for your own use. You may enter the
Client Number for a "master" client. This enables you
to group client accounts for account security, for
auditing and for reporting.
The Search functionality for Parent Clients is also tied to a
hierarchical client ownership system. This enables you
to set a Client # in this field that will then be used
when applying Account Access Control.
Clients restricted to a particular Client # will
be able to freely search for records in your database.
However, they will only be able to find records within the
Client # or client ownership hierarchy to which they belong.
For instance, clients who own other clients will be able to
see all records in their hierarchical tree, but no others.
You should not set the "Owned By Client" to
the same Client # as the Client itself. This
might cause details to be hidden erroneously
for accounts that should be visible to the
Operator. For example, Client #94 should not
have "94" entered in its "Owned By Client" field.
Class
This field is for your own definition and use.
Category
A user defined category. This is used to indicate Client
records that represent third parties, such as other
agencies, attorneys or client prospects. You can add
additional types to this pick list.
If you are setting up Legal Offices or Parent Clients,
you should set the values in this field accordingly.
Debtor Sort Order
These switches display the order used to sort this
client's debtors. This is the order in which they will
be displayed when statements are generated.
If the Sort Order option is not set, then Collect! is
using the default Sort Order set by sorting all
debtors by Name or Account #.
Disable Metafiles
Switch this ON with a check mark if you do not want
to save METAFILES when letters are printed through
Collect!. Ordinarily, when printing from the Debtor or
Client, or in a scheduled letter batch, Collect! creates
and attaches a METAFILE to the Letter contact.
The "Disable metafiles" switch enables you to control
this at the Client level.
Metafiles are created when printing via the Collect!
desktop application, not the web application.
Caw Enabled
This switch enables you to flag accounts for use
with Client Access Web.
Success Calculation
Collect! provides two automatic processes for calculating
success rate for each given client. Either your success
can be based on only closed accounts, or on all the
accounts listed for the Client.
All Accounts
This calculation method is based on all accounts that
belong to this Client. The Success Rate is total
payments to date over total listed dollar value. This is
the default calculation method.
Closed Accounts
This calculation method evaluates only closed accounts.
It gives you a more accurate performance figure over
long periods of time, but ignores any active accounts.
So it is less current that the All Accounts calculation.
This Success Rate is calculated using total payments
made on closed accounts over total listed dollar value
for the closed accounts.
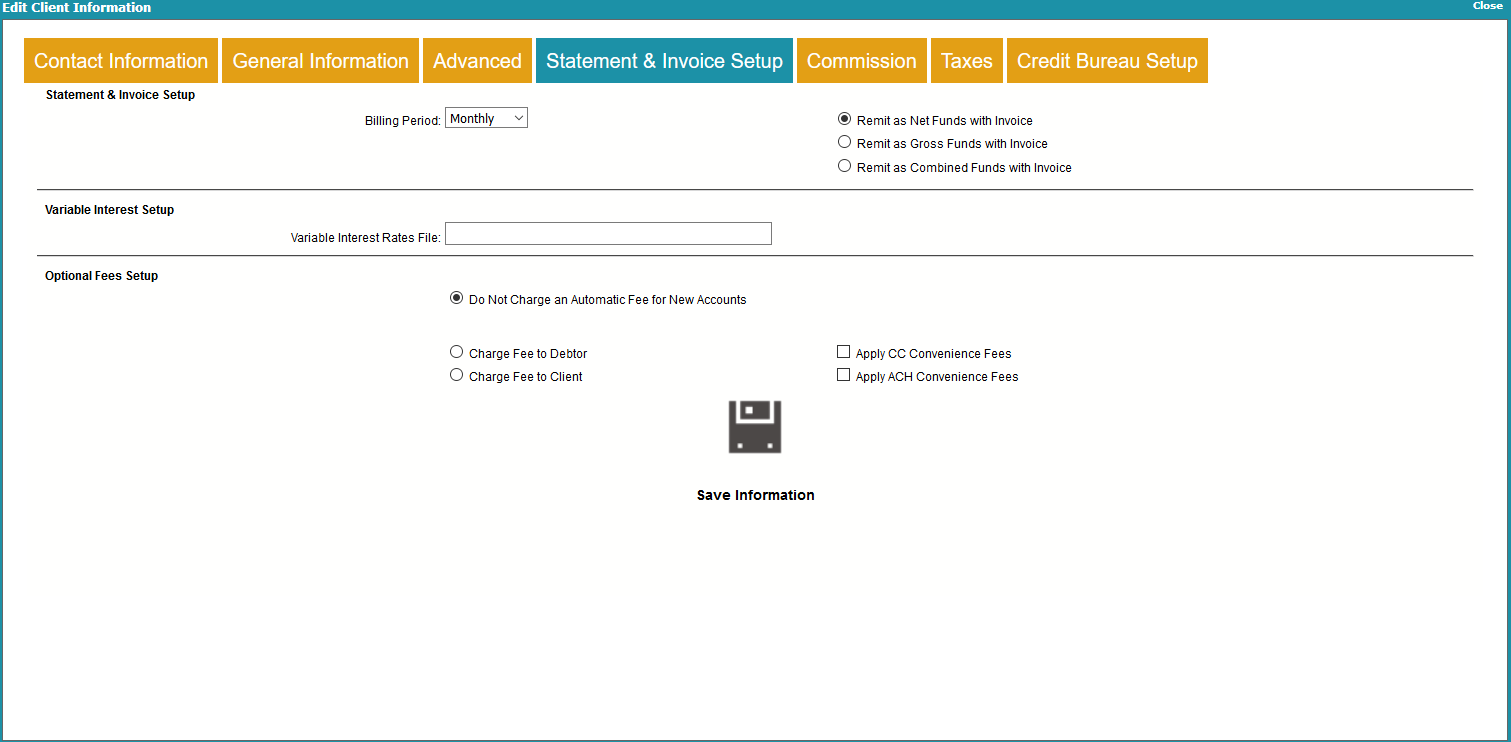
Client Statement Information
Billing Period
This is the interval for generating invoice/statements
for this client. For instance, if you bill your clients on
a monthly basis, MONTHLY is the Billing Period that
you would choose.
Collect! uses MONTHLY as the default, but please
make a definite choice here. In order to generate
statements, Collect! needs to know what billing
period you have agreed upon with your client.
For our Lite users, we setup the process to
generate statements monthly. If you are using
other billing periods, please let us know so
we can set your batch processes up accordingly.
Remit As Nets Funds With Invoice
If you retain commission and taxes yourself and only
return the remaining funds to the client, then select this
switch. At period end, Collect! will correctly
calculate the amount owed to the client, or what the
client owes your company based on the payments
received during the billing period.
Remit As Gross Funds With Invoice
All funds collected on behalf of a client are returned to the
client at the end of the billing period. The invoice sent to the
client at the same time lists all commission and taxes due
and payable by the client.
Combined Invoice
Switch this on to generate combined Net/Gross invoices
for this client. When you print your statements, Collect!
will use the Statement report to break out the agency
and client portions of the total remit and return.
For more Information on Remittance Types, please refer to the
Help Topic How To Understand Net Or Gross Or Combined Remittances
for more information.
Variable Interest Rates File
This field is only used when you are using the
Variable Interest extension module. Enter the
exact name of the file containing your interest
rates table.
Please refer to Help topic, How to Use Variable Interest
for details.
Do Not Charge An Automatic Fee For New Accounts
Turn this switch ON when you don't want to charge
a fixed fee to the client or the debtor.
Fee Amount
This is the amount of the fixed fee, and should be a
dollar amount. This is billed to either the client or the
debtor, depending on the Charge to Client or Debtor
options described above. If you turn the No Fixed Fees
switch ON, this value is ignored.
Charge Fee To Debtor
Turn this switch ON and enter the amount of the fixed fee.
When you add a new debtor to this client, the fixed fee
amount is copied to the Debtor record. When you edit the
debtor's Fee field, you can verify the amount and then
Collect! posts a fee transaction to the debtor's account,
the fee amount to the debtor.
Charge Fee To Client
Turn this switch ON and enter the amount of the fixed fee.
When you add a new debtor to this client, the fixed
fee amount is copied to the Debtor record. At period end,
when you generate statements for your client, this fee will
be included in the statement to your client.
Credit Card Convenience Fees
Switch this ON with a check mark if this Client permits
you to charge a convenience fee when using Collect!'s
Billing Tree module for credit card payments.
To implement credit card convenience fees
you must set up your credit card convenience
fee Transaction Types. Please refer to
Help topic, Credit Card Setup for details.
ACH Convenience Fees
Switch this ON with a check mark if this Client permits
you to charge a convenience fee when using Collect!'s
Billing Tree module for ACH payments.
To implement ACH convenience fees you
must set up your ACH convenience fee
Transaction Types. Please refer to Help
topic, ACH Payments Setup for details.
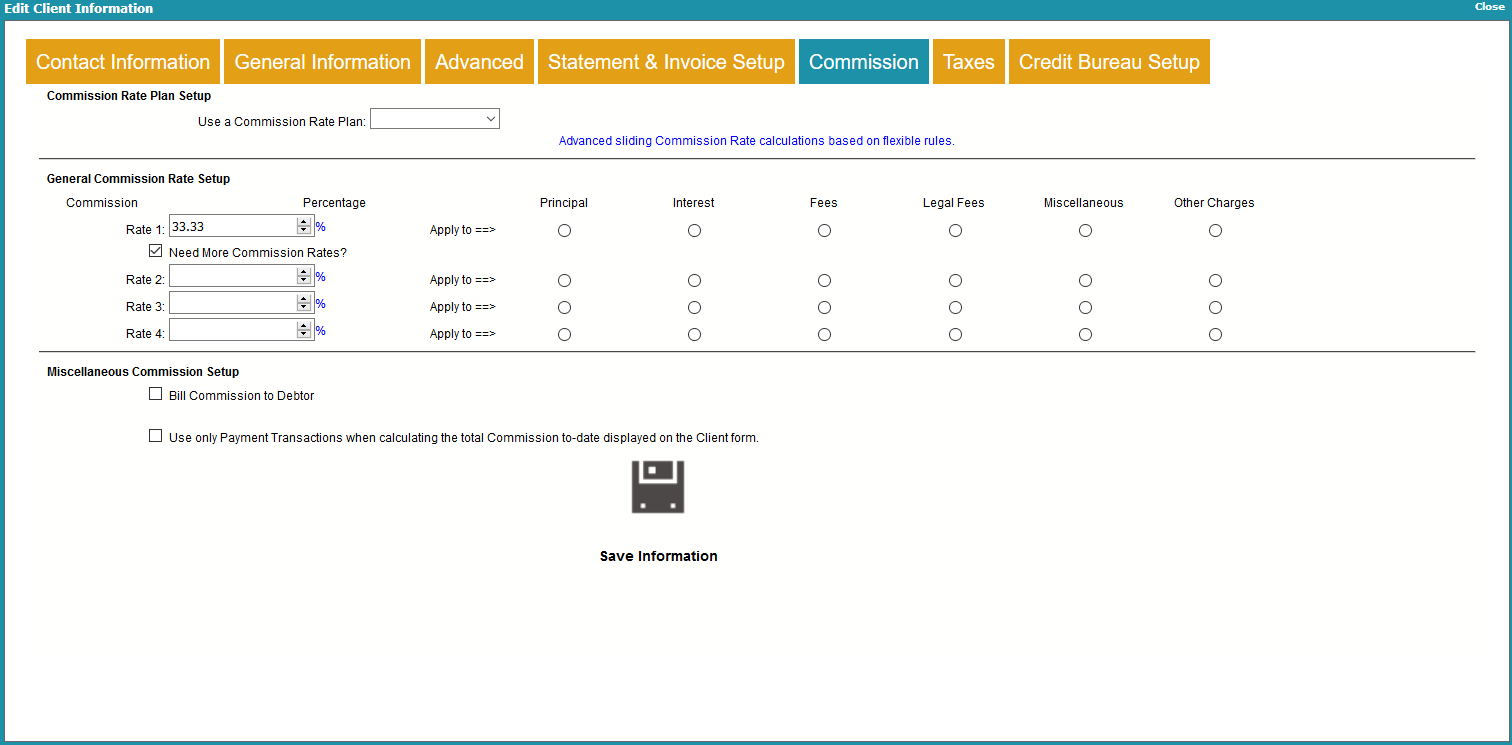
Client Commission Information
The Commission Rates form stores the commission rates
you charge your clients for payments received from debtors.
Whenever you post a payment transaction, these settings
are used to calculate commission charges.
Up to four commission rates may be set on the account.
Breakdown settings enable you to apply separate
commission rates to various types of transactions.
Please see the
Commission and Breakdown example here for details.
Use A Commission Rate Plan
The commission that is charged on the debtor's payments will
be calculated based on the rates in the plan that you choose.
When a payment transaction is posted, the dollar
amount of the applicable commission is calculated using the
rate chosen in this field. The actual commission amount is
entered automatically into the transaction's Commission field.
Do not enter both a fixed rate and a rate plan.
Use one or the other only.
Rate 1
Enter a percentage here. This is a fixed amount. It is
the portion of the debtor's payment that your agency
charges as a fee for services. When a payment transaction
is posted, the dollar amount of the a
applicable commission is calculated using the percentage
in this field. This amount is entered automatically into
the transaction's Commission field.
Enter a fixed commission amount here OR select a
sliding scale rate plan in the Commission Rate Plan
field.
Do not enter both a fixed rate and a rate
plan. Use one or the other only.
Select the type of payment this rate is applied to by
putting a check mark in the appropriate column next
to this field.
Rate 2
You can enter a percentage here if you need to charge
a different commission rate for the breakdown type that
is check marked for Rate 2.
Rate 3
You can enter a percentage here if you need to charge
a different commission rate for the breakdown type that
is check marked for Rate 3.
Rate 4
You can enter a percentage here if you need to charge
a different commission rate for the breakdown type that
is check marked for Rate 4.
Principal
Select a Rate or Rates that you wish you apply to any
portion of the Transaction that goes to Principal.
Interest
Select a Rate or Rates that you wish you apply to any
portion of the Transaction that goes to Interest.
Fees
Select a Rate or Rates that you wish you apply to any
portion of the Transaction that goes to Fees.
Legal Fees
Select a Rate or Rates that you wish you apply to any
portion of the Transaction that goes to Legal.
Miscellaneous
Select a Rate or Rates that you wish you apply to any
portion of the Transaction that goes to Misc.
Other Charges
Select a Rate or Rates that you wish you apply to any
portion of the Transaction that goes to Other.
Bill Commission To Debtor
When this switch is set, the Commission amount is added
to the debtor's Owing.
Normally debtors cannot be charged the
collection expenses. You can only check
the box labeled 'Bill Commission to Debtor'
if you have the legal right in your
jurisdiction to charge the debtor for
incurred collection expenses.
Collect! calculates the commission amount and creates
a fee transaction with Transaction Type 399 debiting the
commission amount from the debtor's account. Collect!
uses the information from your Transaction Type 399
settings to determine how to calculate the fees. If this
transaction type is not in the system, you are prompted
to create it in your transaction types.
Please be aware that adding commission to owing alters
the calculation of commission on each payment that is
posted on the account.
When the Add Commission to Owing switch is ON, the
calculation is
commission = payment X (rate/100) / (1.0 + (rate/100))
When the commission is not added to the owing,
the default calculation is
commission = payment X rate/100
Basically, this is the logic:
If a Debtor owes you $100 and your commission rate is
30%, then the total owed is $130. But the commission
they owe you is still $30. So it is no longer 30% of the
total. It is not 30% of $130. It is actually 23.08% of $130.
To find this figure you divide the Commission Owed by
the Total Owed with the Commission added to
it. - $30/$130.
Do not set this switch unless you have a
signed agreement from the debtor on file, or
you are sure the laws in your region permit
you to charge the debtor collection fees.
Use Only Payment Transactions For Commission To Date
Switch this ON with a check mark to tell Collect! to use
only Payment type transactions when calculating the
total Commission to Date displayed on the Client form.
When this switch is OFF, Collect! will total commissions
from any transaction that has a commission amount entered.

Client Tax Information
The Tax form stores your tax rates. Tax is calculated on the
commission you receive from your clients when you post
debtor payments. Whenever you post a payment transaction
with a commission amount, the settings in the Tax form
will be used to calculate any tax charges.
Up to four tax rates may be set on the account.
Breakdown settings enable you to apply separate
tax rates to various types of transactions.
Please see the
Tax and Breakdown example here for details.
Is Client Tax Exempt
This switch turns OFF the calculation of tax on all
transactions for this Debtor. If a Tax Rate has been
set previously, it will not display when a transaction
is posted.
When this switch is ON, tax will not be calculated
even if the "Don't Calculate Tax" switch is not ON
and there is a Tax percentage entered in the Tax
details for the account. Tax will not be calculated if
a transaction is posted with a Tax Rate in the
Transaction Type settings. Whenever a transaction
is posted, tax will not be calculated and the
transaction's Tax field should remain blank.
Rate 1
If you charge tax on commissions that you earn,
enter a percentage tax rate here. (e.g. Enter 7.0
for 7%) This is the tax charged on any commissions
that you receive for debtor payments. This rate is
automatically written into the Tax Rate field for any
transaction posted for this debtor when there is a
commission amount. Tax is calculated on the
commission amount only and is displayed in the
Tax field of the transaction.
This field must contain a value if you are calculating
tax on commissions for this debtor.
When a new debtor is entered, this field is filled
automatically from the Client Settings Tax Rate field.
You can change the rate for this particular debtor to
override the rate used generally for the client.
Select the type of transaction to apply this tax to
by placing a check mark in the appropriate box in
the columns next to this field.
Rate 2
You can enter a percentage here if you need to charge
a different tax rate for the breakdown type that is
check marked for Tax 2.
Rate 3
You can enter a percentage here if you need to charge
a different tax rate for the breakdown type that is
check marked for Tax 3.
Rate 4
You can enter a percentage here if you need to charge
a different tax rate for the breakdown type that is
check marked for Tax 4.
Principal
Select a Rate or Rates that you wish you apply to any
portion of the Transaction that goes to Principal.
Interest
Select a Rate or Rates that you wish you apply to any
portion of the Transaction that goes to Interest.
Fees
Select a Rate or Rates that you wish you apply to any
portion of the Transaction that goes to Fees.
Legal Fees
Select a Rate or Rates that you wish you apply to any
portion of the Transaction that goes to Legal.
Miscellaneous
Select a Rate or Rates that you wish you apply to any
portion of the Transaction that goes to Misc.
Other Charges
Select a Rate or Rates that you wish you apply to any
portion of the Transaction that goes to Other.
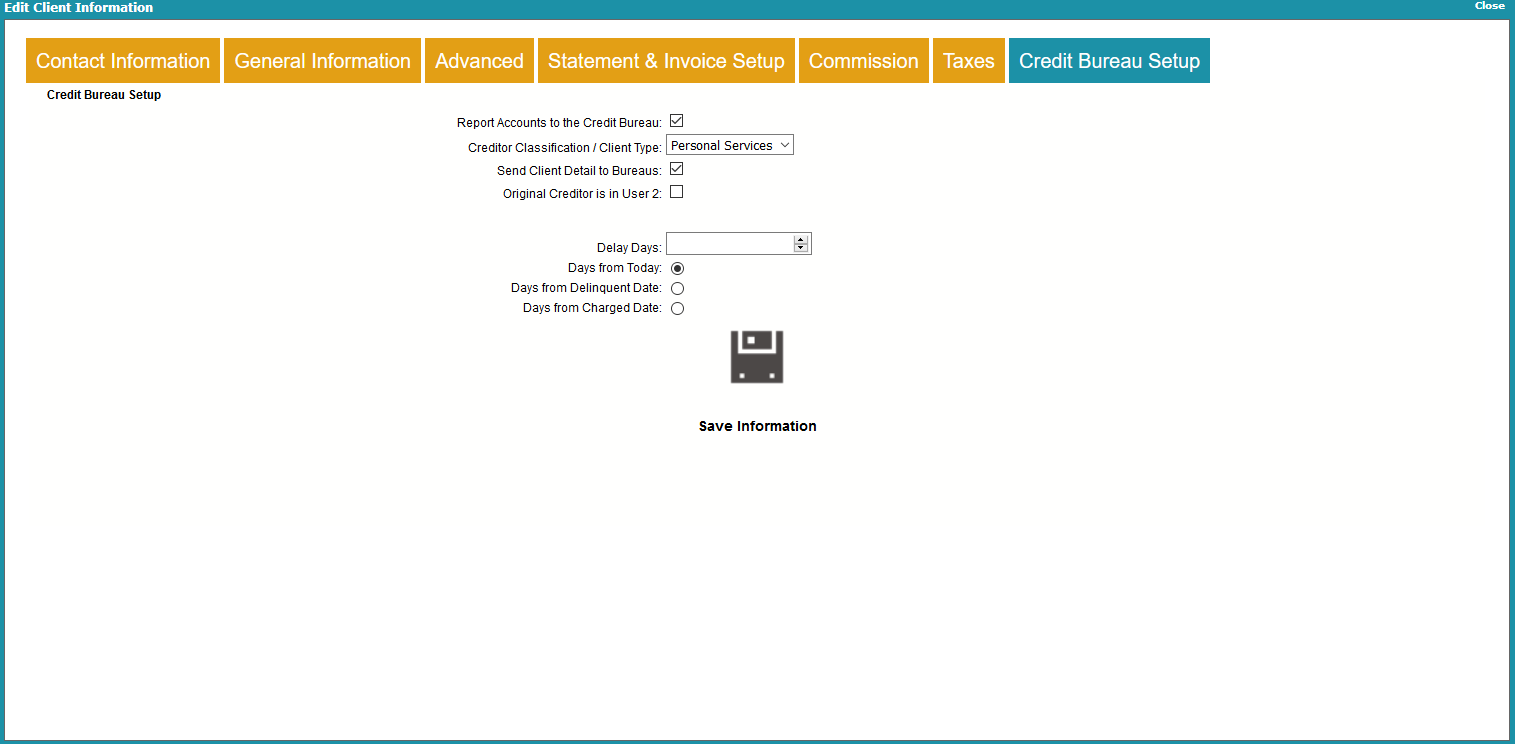
Debtor Miscellaneous Information
Report Accounts To Bureaus
Switch this ON when you wish to set up credit reporting for
a client.
Please be aware that this switch does not
automatically begin reporting debtors. You
must still switch ON credit bureau reporting
for each debtor that you want to report. Please
refer to How To Setup Credit Bureau Reporting
for details.
You must also switch ON 'Send client detail to bureaus'
if you are reporting as a Collection Agency so that
Collect! can include the details when you run your report.
Creditor Classification Code / Client Type
This field contains a pick list of choices that can be used
to classify your clients by Type.
FOR CBR: If you are using METRO 2 format, it is
required that you enter a valid "creditor
classification" in this field. The list of
choices given is a standard CBR list of
creditor classifications.
If you are not reporting to credit bureaus, this field is for your
own definition and use.
Click the arrow to see the default pick list
attached to this field.
FOR CBR: If the choice you need is not included in
the list, you can add it to the pick list.
Please check with your credit bureau to
ensure that it is a valid creditor classification
and let us know too, so we can add it to the
default list.
Send Client Detail To Bureaus
The FDCPA requires that the client details, K1 segment,
be sent with each debtor. FTC (Federal Trade Commission)
and ACB (Associated Credit Bureaus) policy stipulate that
the original creditor be identified.
When you switch ON 'Report accounts to bureaus', Collect!
will send the Client's Name in the K1 segment of data reported
to the credit bureaus. If you are reporting as a credit grantor
then this switch may be switched OFF.
If the credit grantor switch is OFF, the sending of K1
segments is UNCONDITIONAL regardless of the
setting in this field.
Original Creditor Is In User 2
This switch may be used by portfolio purchasers who want to
use the Client record for tracking the portfolio, yet also want to
send the original creditor information to credit bureaus. Switch
this ON on a client by client basis and then place the original
creditor information into the User 2 field on the Debtor form.
When you check this box, a text field will be made visible. This
field is linked to the User 2 field. Anything entered here will
be written to the User 2 field.
Delay Days
When you first report credit on an account, you can
schedule for the report to be sent later, rather than
immediately. The date can be changed manually.
This is configured on the Credit Bureau Setup screen
by selecting the Delay Report option.
This field allows you to overwrite the global Delay Days
value to report sooner or later than your global setting.
To have this client reporting based on the global settings,
leave the box empty.
Days From Today
This field is used with the DELAY DAYS field to delay reporting
to the bureau. This field is the default selection. If this option
is selected, the reporting delay will be based on the date that you
prepared the Debtor to be reported to the bureau.
Days From Delinquent Date
This field is used with the DELAY DAYS field to delay reporting
to the bureau. If this option is selected, the reporting delay
will be based on the Debtor's Delnqnt date.
Days From Charged Date
This field is used with the DELAY DAYS field to delay reporting
to the bureau. If this option is selected, the reporting delay
will be based on the Debtor's Charged date.
Customer Since
When you enter a new Client in your system, Collect! fills
this field with the current date. You can modify this field
manually if desired, or use it to store the date you
entered the Client.
Total Accounts And Owing
The total number/value of debtors attached to this client.
Active Accounts And Owing
The number/value of debtors attached to this client
whose Mode is ACTIVE, SUSPEND, OR PRECOLLECT.
Closed Accounts And Owing
The number/value of debtors attached to this client
whose Mode is CLOSED.
Commission To Date
This field shows the total commission calculated on all
accounts for this client.
If you want Collect! to calculate this total
from Payment type transactions only, then
switch ON 'Only payments for comm to date'
in the Client Settings form.
Success Rate
This is a percentage ratio of Paid to Listed accounts
and may be calculated using ALL accounts or only
CLOSED accounts, as set in Client Settings.
The success rate is calculated as
All Paid X 100 / ((All Listed + All Fees) - Adjustments)
Where All Paid is the client's Paid field, All Listed is the
client's Listed Field, All Fees is the sum of all the Fees
fields of the client's debtors, and Adjustments is the
sum of all the Adj fields of the client's debtors.
Principal
The total dollar value of Principal for all
accounts listed by this Client.
Interest
The total dollar value of Interest for all
accounts listed by this Client.
Fees
The total dollar value of Fees for all
accounts listed by this Client.
Legal Fees
The total dollar value of Legal Fees for all
accounts listed by this Client.
Miscellaneous
The total dollar value of Misc Fees for all
accounts listed by this Client.
Other Charges
The total dollar value of Other Charges for all
accounts listed by this Client.
Adjustments
The total amount of adjustments to debtors belonging
to this Client.
Total
This is the total of the above.
Collected
The sum of the Paid fields of all of the client's debtors.
Run An Action Plan
Enter a Contact Plan to run on this account.
Client Details
This area of the Client form contains tabs to sub-lists of
related Client information. The areas that may be
accessed are as follows.
* Debtors
* Notes
* Events
* Attachments
* Invoices/Statements
* Payments
* Sub-Clients
* Operators
Each of these sub-forms allow you to view records
related to this client and add new ones. If the tab is
displayed as ORANGE that means there are records in
that area.
Debtors
Select this tab to display the list of all debtors listed by
this Client. All Debtors with ACTIVE or CLOSED mode
can be displayed.
Notes
Select this tab to display this Client's notes or
add a new line.
To edit a note line, click on the note line.
To add a new note line, click ADD A NOTE.
The Add a Note text box is the text associated with the note line.
The priority will set a sort order for the note. Notes are sorted in
descending order on priority, date, then time.

Add a Note Line
Events
Select this tab to display this Client's events or add
a new one.
To edit an event, click on the event.
To add a new event, click ADD AN EVENT.
Select the type of event that you want to create:
* Review - general review event
* Phone - indicates a phone action
* Other - miscellaneous event type
* Promise - indicates that money is expected to be received
* Letter - schedule a letter
* Action Plan - schedule an action plan
If promised is selected, the Amount field will be visible to enter the
expected amount of the payment.
Fill in the repeat field if you want the event to repeat. This is
generally used for promises, letters, or action plans.
Fill in a description for the Event. If Phone, Letter, or Action Plan
is selected, this field will be replaced with a drop down list for
the applicable event type.
Fill in the Due Date for the event.
If the time is filled in, Collect! will popup a notice in the
Work in Progress at the time the event is due to be worked.
Fill in the priority of the event.
Assign the event to an operator.
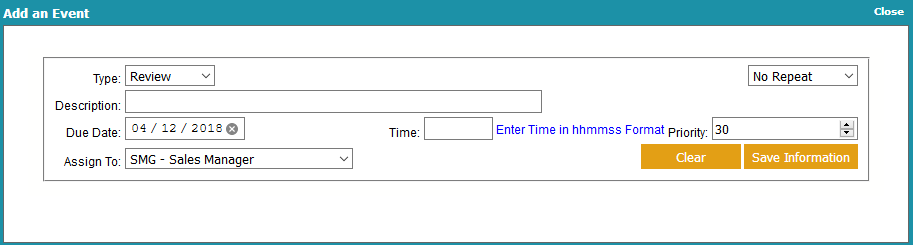
Add an Event
Attachments
Select this tab to display this Client's attachments or add
a new one.
To edit an attachment, click on the attachment.
To add a new attachment, click ADD AN ATTACHMENT.
Fill in a description for the attachment.
Select the class of contact that you want to create.
Once the attachment is saved, there will be more options
available associated with the type.
Fill in a Date for the attachment. This is optional.
Browse to a file to be associated with the attachment.
This needs to be done here as once the attachment record
is created, a file cannot be associated with it later.
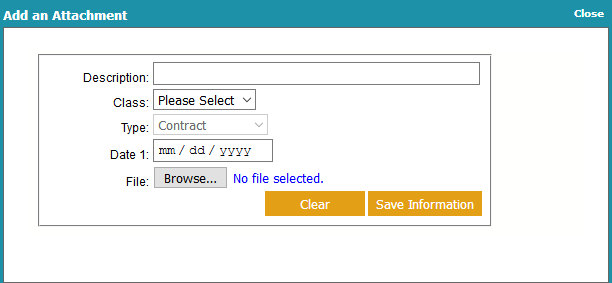
Add an Attachment
Invoices/Statements
Select this tab to display the list of Invoice/Statements
generated for this Client.
Click on VIEW CURRENT TRANSACTIONS to display a list
of transactions that will appear on the next statement.
Click on a statement to open it up in a new tab for printing.
Payments
Select this tab to display the list of Client Payments
attached to this Client.
To edit a payment, click on the payment.
To add a new payment, click ADD A PAYMENT.
Fill in the date of the payment.
You cannot enter a date for a period where a statement
has already been generated.
Fill in a description for the payment.
Fill in the amount of the payment.
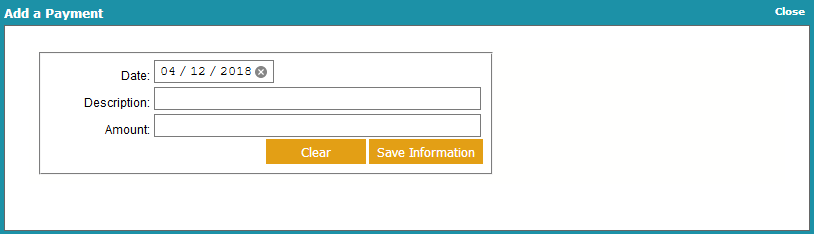
Add an Attachment
Sub-Clients
This tab is only visible when viewing a Parent Client.
Select this tab to display the list of Sub-Clients
attached to this Client.
To view a sub-client's details, click on the sub-client.
Operators
Select this tab to display the list of Operators
attached to this Client. These are operators that
are or have been allowed to sign in via the web
portal.
To view an operator's details, click on the operator.
| 
Was this page helpful? Do you have any comments on this document? Can we make it better? If so how may we improve this page.
Please click this link to send us your comments: helpinfo@collect.org