How To Use ODBC Sync
Collect!'s ODBC Sync extension module empowers you to interface with any third party ODBC compliant application. Commit
on-the-spot Updates, Inserts and Deletes to your other application from within Collect!. All the functions of Collect!'s
contact plan management system may be used to trigger events. You can synchronize with one or several third party applications.
Collect!'s ODBC Sync requires Open Database Connectivity capability with Version 3.x ODBC drivers.
Some examples of using this feature are updates to a predictive dialer campaign, inserts and deletes from an SQL database
table, updates to your ODBC compliant accounting system software.
Requirements
ODBC Sync can interface with any third party application that supports Open Database Connectivity with Version 3.x compliant
ODBC drivers.
*** ODBC Sync is a licensed add-on component. ***

ODBC Sync Setup
 To use ODBC Sync, you must be familiar with creating and configuring a data source for your application's ODBC
driver. Collect! relies on your successful installation of the third party's ODBC driver by your technician.
This is out of our realm.
To use ODBC Sync, you must be familiar with creating and configuring a data source for your application's ODBC
driver. Collect! relies on your successful installation of the third party's ODBC driver by your technician.
This is out of our realm.
Once you have successfully created your Data Source for your third party application, you can proceed to configure Collect!
to talk to this database. This process involves configuring two files, a CSV and an INI.
Odbcsync CSV File
The CSV file coordinated with the ODBC Sync feature must map each Collect! field to the corresponding field in your third party
database table. The first field must be an identifier that is unique. In Collect!, this is typically the
Debtor File Number or the Debtor Acct Number. This field must be mapped to the unique identifier or primary key in your third
party application table.
The CSV file has three columns:
- Third party application field name
- Collect! field code
- Third party application field data type
 A sample odbcsync.csv is included in the Demo installation. You can find it in the Collect\bin\odbcsync folder.
View sample ODBC CSV file
Please note that this file must have column headers.
You must have three fields for each line:
| ODBC Field Name |
Collect! Field Code |
ODBC Data Type |
ODBC Field Name
To specify a field from your third party application, use the exact name assigned to the field in that application.
This column is CASE SENSITIVE so please be exact!
Collect! Field Code
To specify a field from Collect!, use the printable information code for the field.
If needed, while setting your configurations, you can make modifications to the CSV file without having to restart
Collect!. ODBC Sync will evaluate the modified time of the odbcsync.csv whenever you execute an ODBC event in
Collect!. It is not cached, so it is always current.
ODBC Data Type
The field data type must be the data type of each field in your third party application. Currently, the only data types
supported are CHAR, TYPE_DATE, DECIMAL, and NUMERIC.
These are the ODBC standard names for these data types. Collect! uses them to correctly format the SQL queries sent
via ODBC Sync to your third party application. If your application uses different names, you must still refer to
the field in the CSV using the ODBC standard names. For instance, a STRING field in your application should be
mapped to CHAR in the data type column of your ODBC CSV file.
Odbcsync Ini File
The INI file coordinated with the ODBC Sync feature contains configuration settings for your ODBC Data Source. The ID and
Password for signing into the third party application are stored here. Also, the name of the database table to be updated is
stored in this file.
A sample odbcsync.ini is included in the Demo installation. You can find it in the Collect\bin\odbcsync folder.
View sample ODBC INI file
Please note that this file must have exact information taken from your third party application ODBC driver
installation.
If you have an invalid table name in your INI file and you run a contact plan, the contact plan will fail, generating
the default contact plan error message for failure.
Odbcsync Folder
The CSV and INI files for ODBC Sync go together. They must have the same name. In our samples, we used "odbcsync" but you can
use a different name, as long as both files have the same file name with CSV and INI extensions. The files must reside in the
Collect\bin\odbcsync folder. You cannot change the name of this odbcsync folder.
You can have one or several "pairs" of odbcsync files depending on the number of third party applications you will be
writing to through ODBC Sync. Each pair of files must reference the correct data source and the correct data source
table as per the installation your technician performed for your ODBC drivers. Each pair of files must reside in the
Collect\bin\odbcsync folder.
ODBC Sync Contact Management
Three events may be triggered through ODBC Sync. These are: Updates, Inserts and Deletes. Each of these event types is
triggered through Collect!'s native contact management system. A contact type has been created especially for the ODBC Sync
feature. It is the ODBC contact. Every aspect of the contact plan management system may be utilized to manage accounts for ODBC
Sync.
The Update, Insert and Delete events would be triggered from running one or several contact plans. You can set up the events
using any Schedule If criteria you need, just as you would for any other contact plans. The name of the CSV/INI configuration
file "pair" is entered in the ODBC contact's Attachment field with NO file extension.
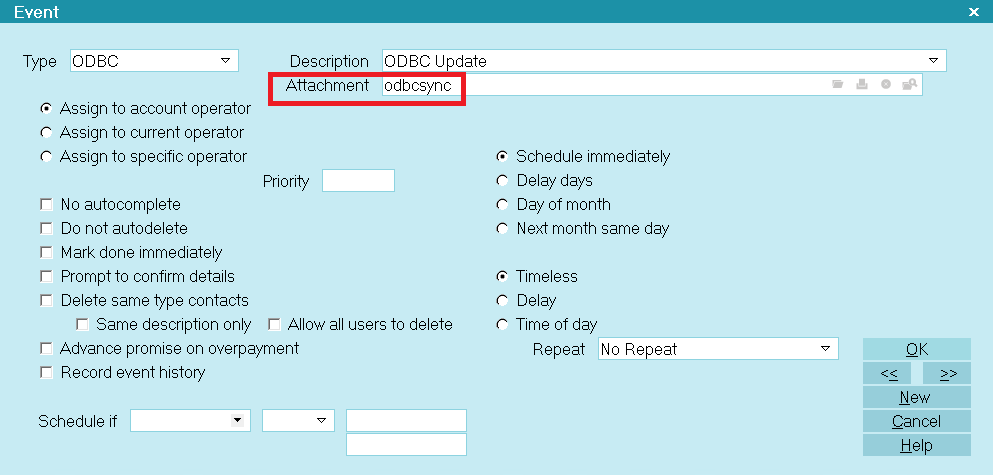
ODBC Event Type with ODBC Attachment
You can trigger events in a different third party application or table by entering a different name for a different pair of
configuration files.
You can create schedule ODBC events through a contact plan, using the normal steps for scheduling contacts and running
contact plans.
Each ODBC event must be scheduled to execute "immediately."
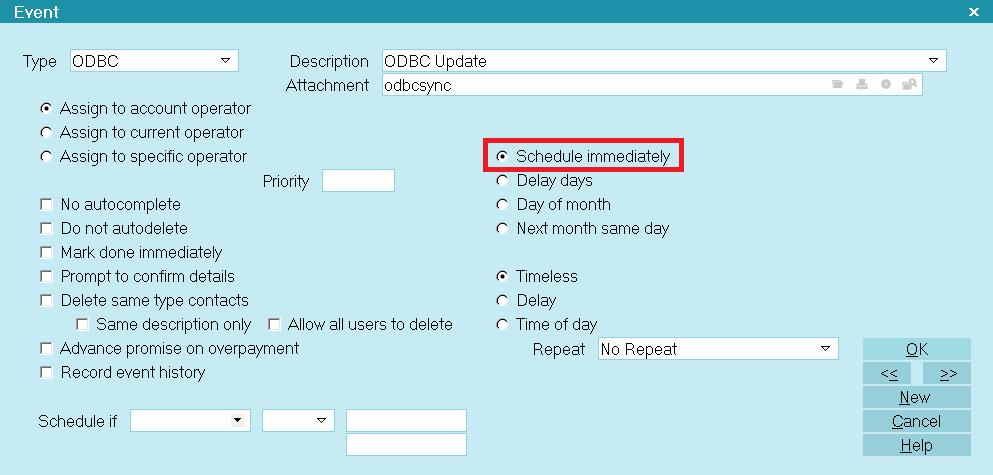
Schedule Immediately
As soon as the plan is run, the Update, Delete or Insert event occurs on-the-spot. You can see your changes in your third party
application immediately.
Executing an ODBC event using a contact plan enables you to engage the Schedule If conditioning functionality.
Set Plans To Run On Changes
You can trigger ODBC events when the Operator or Phones are changed on an account. Select the contact plans you want to run
when the Operator or Phones change. These options are available in the Screen and Messages form, accessed through
System -> Preferences -> Options, Sounds and Colors.
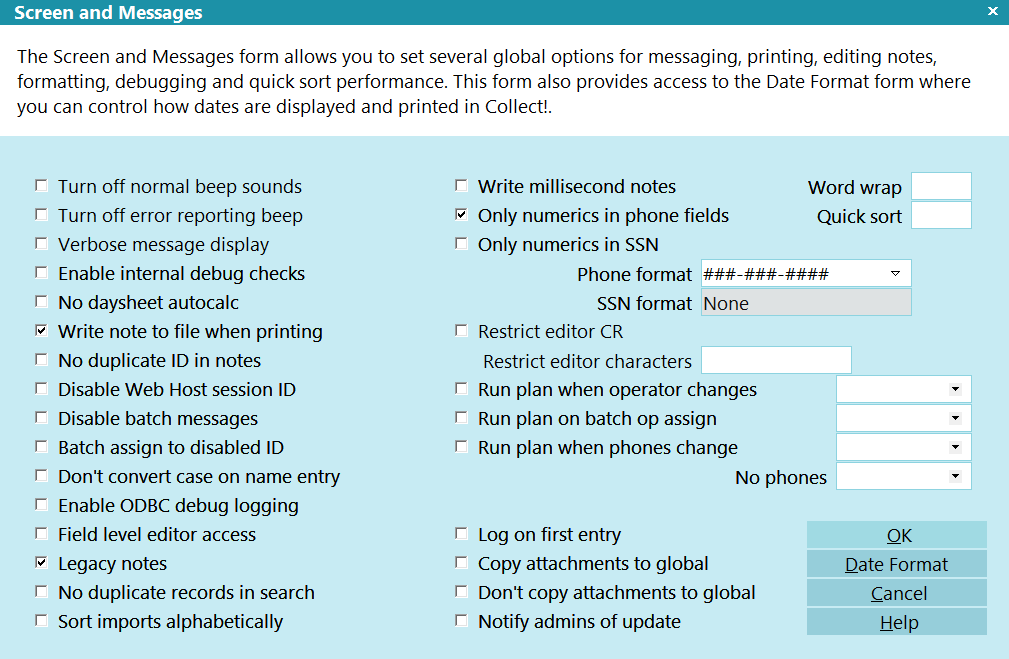
Run Plans on Changes
Updating Via ODBC Sync
When you schedule an ODBC event in a contact plan and you set it to occur immediately, Collect! submits the change on-the-spot
to your third party application.
Updates and Deletes must be able to find the exact record in your third party database table that matches the account
in Collect!. To do this, ODBC Sync keys off the information in the first row of data in the CSV config table, much
the same as a primary key. So this must be the unique identifier for the record. In Collect!, this is typically the
Debtor File Number or the Debtor Acct Number. You must be careful to configure this correctly when creating
your odbcsync CSV.
Troubleshooting ODBC Sync
Several tools have been included for monitoring and troubleshooting ODBC Sync operations.
When ODBC Sync fails to commit a change when a plan is executed, Collect! displays the same error message it uses whenever a
contact plan fails to run.
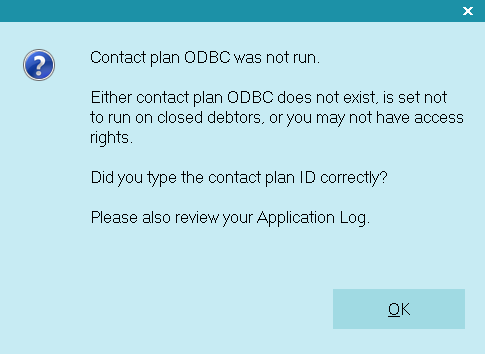
ODBC Contact Plan Did Not Execute
To view details, you can examine the Application Log for entries referring to your ODBC Sync calls. You can also switch ON a
debugging utility in Screen and Messages to log more in-depth details.
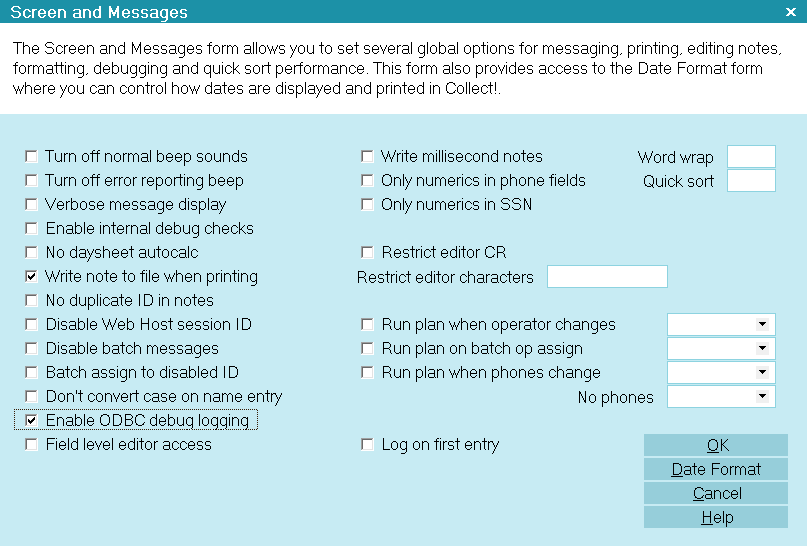
ODBC Debug Logging Enabled
When this switch is ON, Collect! will generate an odbcsync.log in your Collect\bin folder. This log gives
very specific information regarding Collect!'s attempts to connect to the data source you specified and to commit the changes
you requested. It also includes the exact SQL command with details for each account.
This file will grow very large very fast! So it is recommended that you only enable the switch for short periods while
debugging a particular issue or when requested to do so by Collect! Member Services.
Summary
Collect!'s ODBC Sync extension module expands the functionality of Collect! to write to any third party application with Open
Database Connectivity and Version 3.x compliant ODBC drivers. You can commit on-the-spot Updates, Inserts and Deletes to your
other application from within Collect!. All the functions of Collect!'s contact plan management system may be used to trigger
events. You can synchronize with one or several third party applications.
ODBC Sync can interface with any third party application that supports Open Database Connectivity with Version 3.x compliant
ODBC drivers.
| 
Was this page helpful? Do you have any comments on this document? Can we make it better? If so how may we improve this page.
Please click this link to send us your comments: helpinfo@collect.org