How To Prompt To Verify A Field On Exiting A Form
This document explains how to prompt your operators to confirm important information before they can exit a form.
One or several fields on a form may be set up for confirmation.
Some information on a form may be particularly important to your operation, for instance, the Status of the account or pertinent
account information stored in the Summary line. Collect! offers a flexible way to prompt your operators to confirm the value in
a field. Their confirmation can be logged into notes automatically. If there are any questions later, it is easy to go back into
the notes and see exactly what was verified and confirmed.
Control which operators need to be prompted, so that your supervisors can quickly browse accounts unimpeded,
whereas your operators and junior personnel can be required to confirm the data.
The steps to set up prompting to verify a field are:
- Switch on Enable Verification in the Operator form. Make sure the operator's User Level is
NOT User Level 99.
- Switch on Verify On Exit in the Access Rights form for the field you want verified.
- Switch on Log Verification in the Access Rights form if you want to log to the debtor's
Notes.
- Test your settings
.
 When you set up field verification, Collect! automatically enters an Alias for the
field in the Access Rights form. This is necessary for the Login procedure to read the switches you have set.
When you set up field verification, Collect! automatically enters an Alias for the
field in the Access Rights form. This is necessary for the Login procedure to read the switches you have set.
Prompt To Verify does not work for users signed in at User Level 99. Collect! bypasses
prompting at this administrative level. Please use a different user level.
The rest of this topic steps you through setting up prompting to verify a field on exiting a form.
Sign In As User Level 99
Whenever you change access rights settings, it is good practice to sign into Collect!
as an operator with User Level 99. So please do that before you get started.

Switch On Enable Verification
To enable the verification on a field, visit the Operator form for each operator that you want to set up.
1. Select System from the top menu bar and then select Rights from the drop-down choices to display the sub-menu.
Select Operators to view the list of Operators.
2. Open the Operator form for each operator for whom you want to enable logging to Notes.
3. On the Operator form, put a check mark in the box next to the field labeled Enable verification.
4. Make sure the operator's User Level is NOT 99.
5. Press F8 to save the settings and close the Operator form.
6. Repeat this for each operator that you want to set up. Then, close the Operator list when you are finished
setting up all the operators.
The next two switches, Verify On Exit and Log Verification, are set in the
Access Rights form. Set these two switches in the Access Rights form for each field that you want verified.
Switch On Verify On Exit
Open the form that contains a field that you want verified.
1. Tab into the field that you want verified so that it is highlighted in blue.
2. Right select the field and choose Properties in the popup menu for the field. This will display the
Access Rights form for the field.
3. Check the field labeled Name on the Access Rights form to make sure you are verifying the correct field.
4. Put a check mark in the box next to the field labeled Verify on exit. This will make Collect! prompt the
user on exiting the form.
Collect! can also write a line to the debtor's Notes when a field has been verified. This switch is explained next.
Switch On Log Verification
Set this if you want Collect! to write to the debtor's Notes when the user verifies the data in the field. This enables you to
examine the notes to see exactly what was verified and confirmed. Collect! writes into the Notes file of the last debtor
read from the database.
1. While you are still looking at the Access Rights form for the field you are verifying, put a check mark
in the box next to the field labeled Log verification.
2. Press F8 to save your settings and close the Access Rights form.
The Log Verification switch should only be used on fields in records related to debtors such as
Transactions, Contacts, Attachments and Cosigners. Please do not switch this ON for a Client record, or
a Client Payment record, or other record types not directly related to the debtor.
Rebuild Access Rights
Whenever you make changes to Access Rights settings, it is good practice to rebuild the list. Select System from
the top menu bar and then select Rights, Access Rights. Select the REBUILD button to rebuild the list.
Test Your Settings
Once you have completed setting up field verification, please sign in as each operator that you set up and test the settings.
You must sign out of Collect! completely, returning to the Desktop, whenever you change to a different User Level,
or some of the rights from the previous level that you were signed in as may still be in effect.
When you go to any record where verification is now required and try to exit the form, you will receive the
verification confirmation prompt.
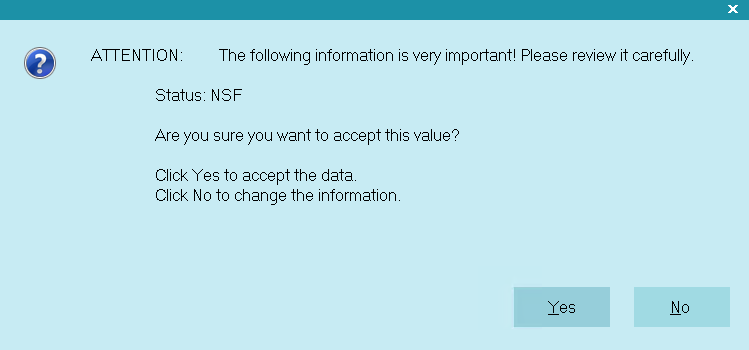
Verification Confirmation Prompt
The default response is NO. If you press ENTER, Collect! will go back to the field requiring confirmation.
If you select the YES button or press the 'Y' key, then Collect! checks to see if the Log Verification
switch is set. If so, the confirmation needs to be logged, so a line is written to the notes.
For example,
10/25/2009 11:05:32 NEW OWN: Confirmed Status: NEW
Summary
This document has explained how to have your operators verify important information on a form and log the confirmation to notes.
The Enable verification switch is set for each Operator that you want prompted. This works for any
User Level other than 99.
The Verify On Exit and Log Verification switches are set in the Access
Rights form for each field where you want data confirmed.
Log Verification should only be set for fields related to the Debtor, such as Transactions, Attachments, Contacts and Cosigners.
It is recommended that you test each operator that you have set up for prompting to verify a field.
| 
Was this page helpful? Do you have any comments on this document? Can we make it better? If so how may we improve this page.
Please click this link to send us your comments: helpinfo@collect.org